
Onboarding
In short
The very first time you start TensorPM, you do not get an empty screen. You get a short
conversation. The app calls it Onboarding and gives it the subtitle Your first project. It asks
about your project, about your name, and about how active the project agent should be. At the end
you have a first usable project and you know where to continue.
The project agent is the AI inside TensorPM that reads your project, evaluates it, and makes suggestions. Onboarding is your first contact with it. It does not produce a finished project plan. It creates a foundation that you then check and correct.
Onboarding needs no account. The welcome screen says so explicitly:
Local-first. No account required. For preparing your project, TensorPM uses a dedicated onboarding
service that you do not have to sign in to.
Installation, system requirements, and download options are not covered here. They live in Getting Started.
When onboarding appears
Onboarding appears exactly once: on the first start of a fresh installation, as long as your settings do not yet record that you have seen it. As soon as you finish or skip it, that record is written and the app opens straight on the start screen from then on.
That also means there is no menu entry to run onboarding again. What you can restart is the guided tour. The section "Restarting onboarding" further down explains how.
While onboarding runs, the left navigation bar is greyed out. That is deliberate: finish the conversation first, or skip it on purpose.
The flow at a glance
Onboarding runs in this order:
- Welcome screen with the
Startbutton - The project question:
What are you working on? - The name question:
What should I call you? - The activity question:
How active should I be? - The project-ready message with the buttons
Open projectandLogin - Optional: connect AI via
Login,Local, orBusiness API key - The offer of a short tour:
Show tourorLater
The order matters: the project question comes before the name question. As soon as your project description is complete enough, TensorPM starts preparing the project in the background and asks the two short questions about your name and activity level while that runs. Both happen in parallel so you are not staring at a progress bar.
Step 1: The welcome screen
The first screen shows the TensorPM logo, the heading Welcome to TensorPM, and the line
Understand. Steer. Execute. Below that sits the Start button, and below that the footnote
Local-first. No account required.
This screen has three more controls:
- A small toggle at the top showing the active language code, for example
EN. It is labelledSwitch languageand flips the whole interface between English and German. If the language is wrong, change it here before you continue. - An eye icon labelled
Hide background videoorShow background video. It turns off the looping background video. On slower machines, onboarding feels calmer without it. Skip onboardingat the bottom left. That takes you straight to the start screen.
Clicking Start fades out the welcome screen and opens the conversation.
Step 2: What are you working on?
Before the first question appears, TensorPM briefly checks the connection. You see
Checking your connection…. If the connection is fine, the project agent introduces itself and
asks: What are you working on? The input field shows the hint
Start with whatever you already know.
Write as if you were briefing a new colleague on the project. Include:
- the outcome you want
- key dates and the budget
- what belongs to the project and what explicitly does not
- where things stand today
- major risks or open decisions
The project agent asks follow-up questions when something is missing, so the conversation may take several rounds. Only once it has enough material does it move on.
At the bottom left this step shows Later. That skips project creation without leaving onboarding
altogether. TensorPM then replies with
No problem. We can set up a project later. Want a short tour?
Attaching documents and images
To the left of the input field sits a paperclip icon. Use it to attach documents you already have,
for example a specification, a set of minutes, or a photo of a schedule. TensorPM reads the files
and shows Reading... while it does. The number next to the paperclip tells you how many
attachments are currently selected.
There is an upper limit on how much text the documents may contribute. If you exceed it, the message cannot be sent. Remove individual files or shorten them. You remove a single file with the cross on its entry.
You can also send documents with no text at all. TensorPM then composes the message
Prepare a project from these documents: with the file names itself.
A strong and a weak example
Strong example:
We are rolling out a new maintenance system across three plants by March. The budget of 250,000 euros covers configuration, data migration, training, and rollout. New mobile devices are out of scope. The plant managers have to sign off the migration plan. The biggest risks are data quality and limited training time.
Weak example:
Roll out maintenance software.
The difference is not length, it is the number of checkable facts. Deadline, budget, scope boundary, approver, and risk: those are the five things the agent can build a solid foundation from.
Step 3: What should I call you?
Once your project description is sufficient, preparation starts in the background and TensorPM asks:
While I prepare your project: What should I call you? The input field shows Your name.
The name is stored locally and is only used to address you. It is not a login and not an account.
You can skip this step. The bottom left shows Continue without name for exactly that. TensorPM
replies No problem. and moves straight to the next question.
If you are already signed in with a TensorPM account that carries a display name, this question is skipped entirely. TensorPM takes the name from the account and goes directly to the activity question.
Step 4: How active should I be?
Next comes the only question that permanently changes how TensorPM behaves:
I can review your project status regularly. That means evaluating progress and risks. How active should I be?
You see a scale with three stops. The left end is labelled On request, the right end
Status review + prioritization. The middle stop carries the badge Recommended and is
preselected. Below the scale it says You can change this later. You confirm with Let's go.
Tapping a stop shows its description above the scale, so you can see what you are agreeing to before you confirm.
On request
Description in the app: I review your project only when you ask.
The agent never acts on its own. Every analysis, evaluation, and prioritization starts only when you trigger it. This is the most frugal level: the only AI cost is the cost you cause yourself.
Daily project status review
Description in the app: I evaluate status, progress, and risks once a day.
This level switches on the setting Daily Project Status Review. TensorPM then evaluates status,
progress, and risk factors of the active project once a day, as soon as AI access is available. This
is the recommended level.
Cost consequence: one run per day and per active project. If you work through the TensorPM AI access, every run consumes AI Credits. AI Credits are the usage allowance of your plan. How much your plan includes is described in Account & AI Modes.
Status review plus automatic prioritization
Description in the app: I evaluate status, progress, and risks daily and automatically prioritize new or edited action items.
This level additionally switches on the setting Automatic AI Prioritization. From then on
TensorPM calculates the AI priority of an action item automatically whenever you create or edit one.
Cost consequence: on top of the daily run, one AI call per new or edited action item. In a project that gets maintained a lot, this is by far the heaviest level. Choose it deliberately.
What this costs
All three levels are plain settings. You can change them any time under Settings -> General ->
AI. The two switches there are named exactly as described above: Daily Project Status Review and
Automatic AI Prioritization.
If you work with your own AI access, meaning a local model or your own provider key, these runs do not go through TensorPM and consume no credits. They cost compute time on your machine or money at your provider instead.
Step 5: Your project is ready
While preparation runs, you see Preparing your project... together with a short summary of what
TensorPM understood. Do not close the app during this time.
At the bottom left it says Later. That cancels preparation and takes you straight to the tour
question.
Once both the project is ready and the name and activity questions are answered, the agent reports:
I've prepared your project. Let's walk through it step by step. Before that, you can sign in for TensorPM AI or connect Local AI.
Two buttons sit below:
Open projectopens the created project and ends onboarding.Loginopens AI setup. On a Business plan the same button readsConfigure AI.
The helper line below reads TensorPM account or local model., or on Business plans
Account, Business API key, or local model.
If you are already signed in at this point, TensorPM skips this screen and opens the project directly. The screen only pitches signing in and connecting AI, and both would already be done for you.
Step 6: Connecting AI
You reach AI setup from two places: the Login or Configure AI button at the bottom right of the
conversation, and the button of the same name on the screen from step 5. Up to three cards sit at
the top of the setup area. Go back returns you to wherever you left the conversation.
Login
Card Login. This is the default path. You create a free TensorPM account or sign in with an
existing one. The heading reads Create your free account, or Welcome back for an existing
account.
After that TensorPM runs on TensorPM AI and usage is billed in credits. During sign-in you see
Signing in... and Preparing access..., and finally Your TensorPM account is ready.
Local
Card Local, heading Use local model. This connects an AI model that runs on your own machine or
inside your network, for example through Ollama or LM Studio.
Enter the address of your endpoint under Local API URL. An endpoint is the internet address your
local model can be reached at. There is an optional API key (optional) field for protected
endpoints. The note beside it states that the key is stored securely and sent only to that endpoint,
over HTTPS or a local connection.
Test connection checks the address. If it works, TensorPM reports Connection works. and lists
what it found under Available model. If nothing is detected, type the name yourself under
Model name, for example gpt-oss.
On this path no project data leaves your machine and no credits are consumed.
Business API key
Card Business API key, heading Use Business API key. This card appears only if your plan allows
your own provider keys. That is the case on the Business plan only.
You paste your key, TensorPM detects the provider automatically and reports Detected provider:
with the name. If detection fails, pick the provider from the list offered. The key is stored
locally.
If the key is rejected, TensorPM says so explicitly and suggests choosing a different provider or a different key.
Step 7: Want a short tour?
Finally the agent asks Want a short tour? There are two buttons:
Show tourstarts the guided tour. It walks you through the most important places in the interface with small hint windows: workspace selection, connectors, creating a project, the AI panel, incoming signals, AI activity, and bug reporting. Every window hasNext, the last one hasDone, and you canSkipat any point.Laterends onboarding without the tour.
The same question appears if you skipped or cancelled project creation. The wording is then
No problem. We can set up a project later. Want a short tour?
Restarting onboarding
Onboarding itself cannot be reopened. It is tied to the first launch of an installation.
What you can restart is the guided tour. You find it under Settings -> General -> System.
There you see the row Guided Tour with the button Start tutorial. Clicking it closes settings
and first opens a small window headed How TensorPM works best with a short list of the first
steps. From there you start the actual tour with Show me, or close it with Got it.
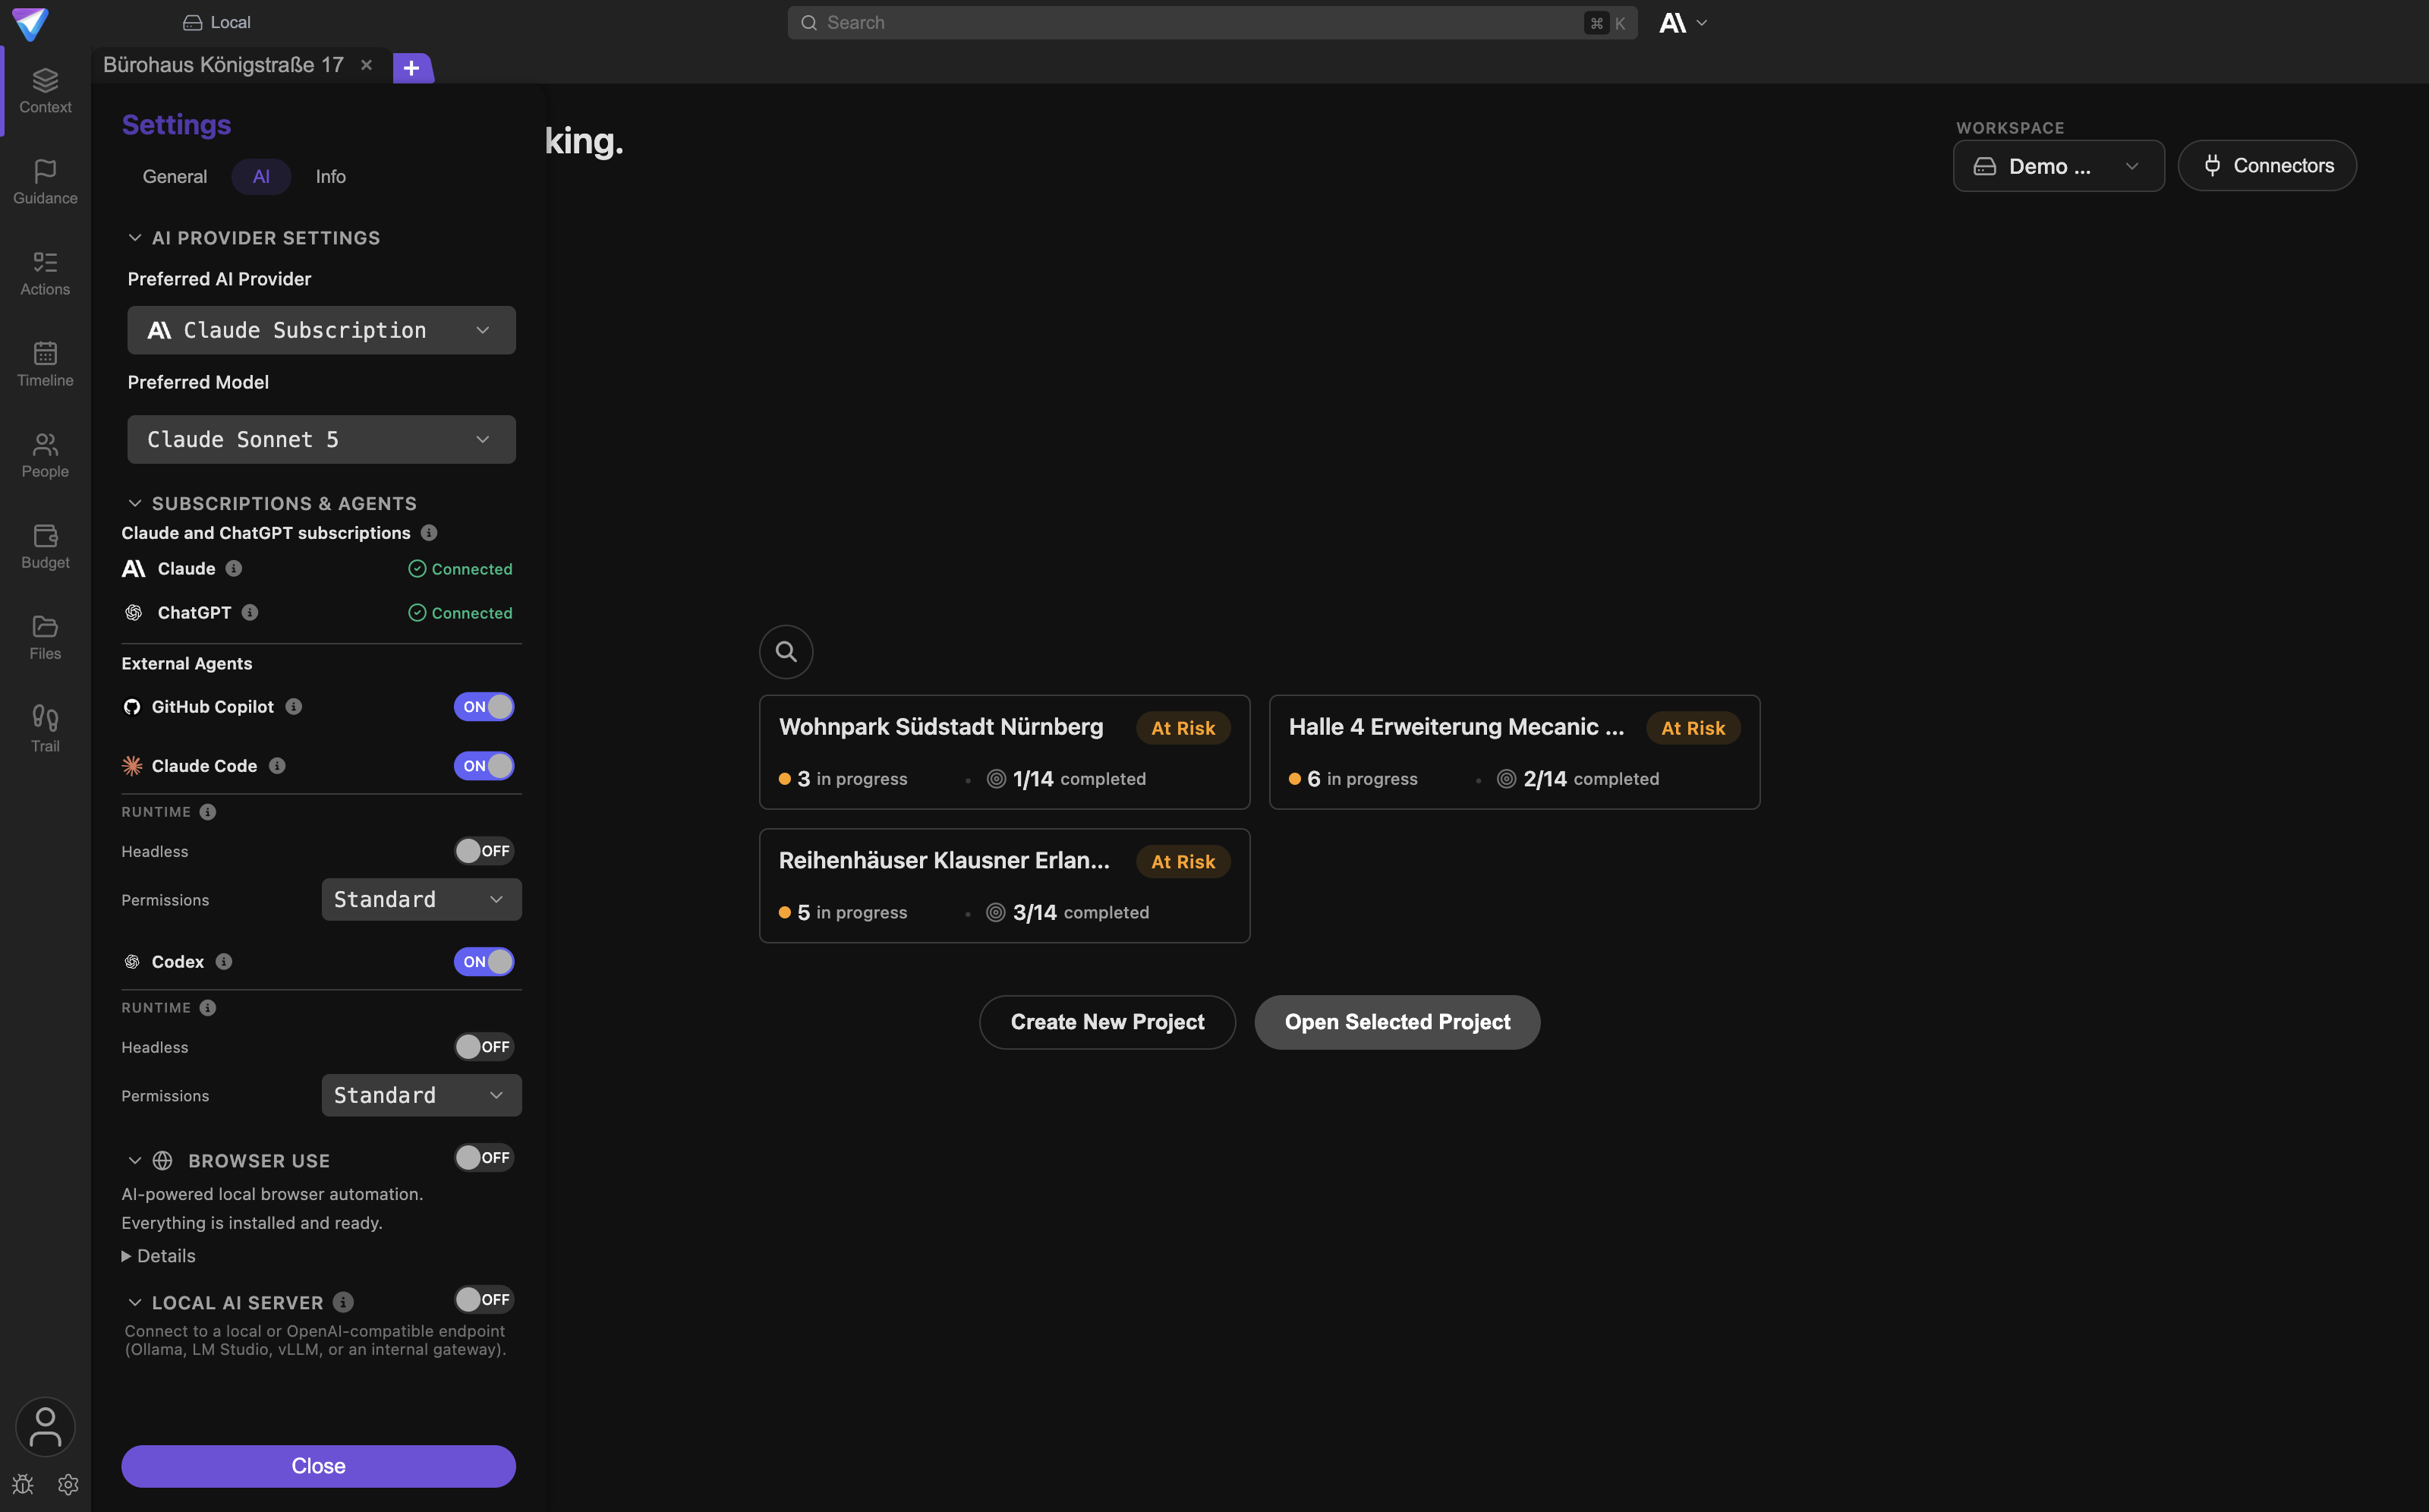
The guided tour can be repeated any time. Onboarding cannot.
If you want to see the whole first-contact flow again, you need a fresh installation with an empty data set. That is a special case and is described in Uninstall. Never delete data on a system you already work in productively.
What you can skip
Almost everything can be skipped. The link at the bottom left changes its label depending on where you are:
| Label | Where it appears | Consequence |
|---|---|---|
Skip onboarding |
Welcome screen and at the end | Onboarding ends immediately. You land on the start screen and no project is created. |
Later |
During the project question and during preparation | Project creation is skipped or cancelled. The tour question follows. |
Continue without name |
At the name question | No name is stored. The agent addresses you neutrally. |
The activity level cannot be skipped, but the recommended middle level is preselected. One click on
Let's go is enough.
If you skip onboarding entirely, you land on the start screen. From there you create a project with the guided Project Creation Wizard.
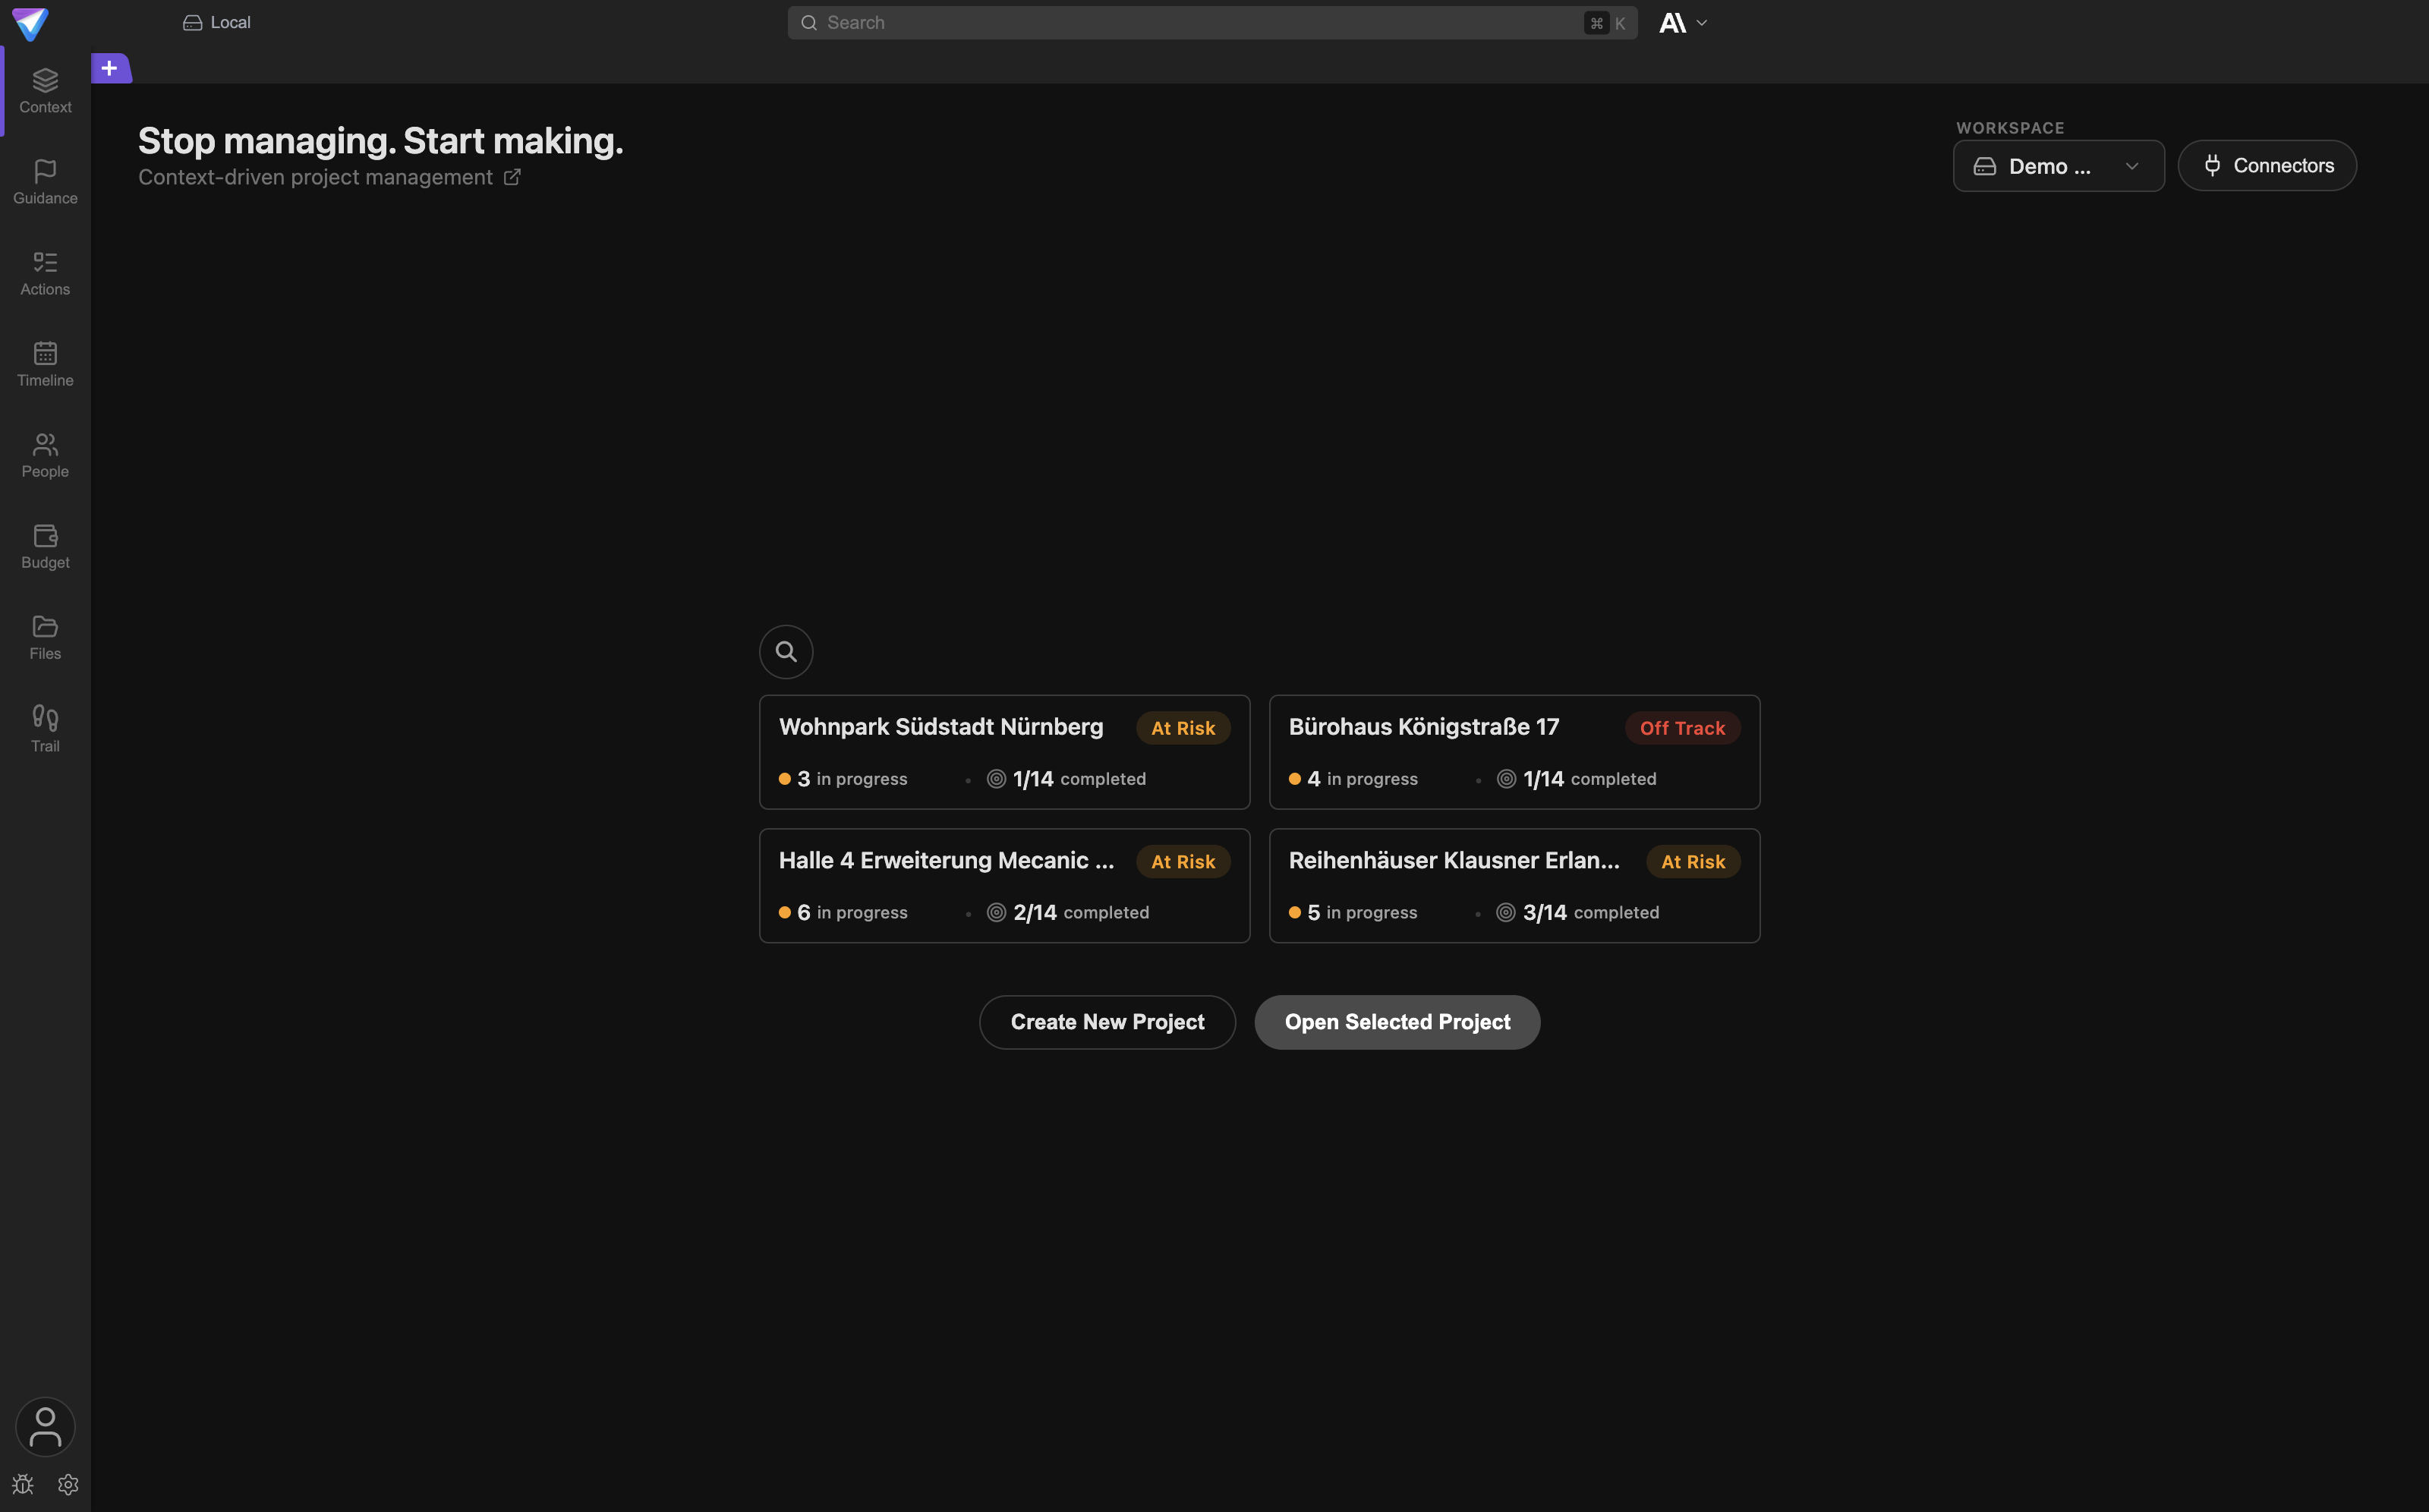
This is where you end up when you skip or finish onboarding.
When no AI is set up
You can complete onboarding without an account and without your own AI access. Project preparation runs through the TensorPM onboarding service. Afterwards, though, the app has no permanent AI access until you set one up.
Without AI access, the following still works:
- every project view:
Context,Action Items,Timeline,People,Budget,Files,Trail - editing, extending, and correcting every field by hand
- creating and changing action items, dates, dependencies, and budget figures
- the
TrailwithChangesandDecisions - database backups under
Settings->General->Database Backup
Without AI access, the following does not work:
- chatting with the project agent
- the four analyses behind
Review project:Context Analysis,Strategy,Coverage Analysis, andExecution - distillation of incoming signals, meaning proposed context changes derived from emails and documents
- the
Daily Project Status ReviewandAutomatic AI Prioritizationyou chose in step 4: they only take effect once AI access is available - creating further projects from a written description
You can catch up any time. Open Settings -> AI. There you connect a TensorPM account, a Claude
or ChatGPT subscription, a local model, or, on the Business plan, your own provider key.
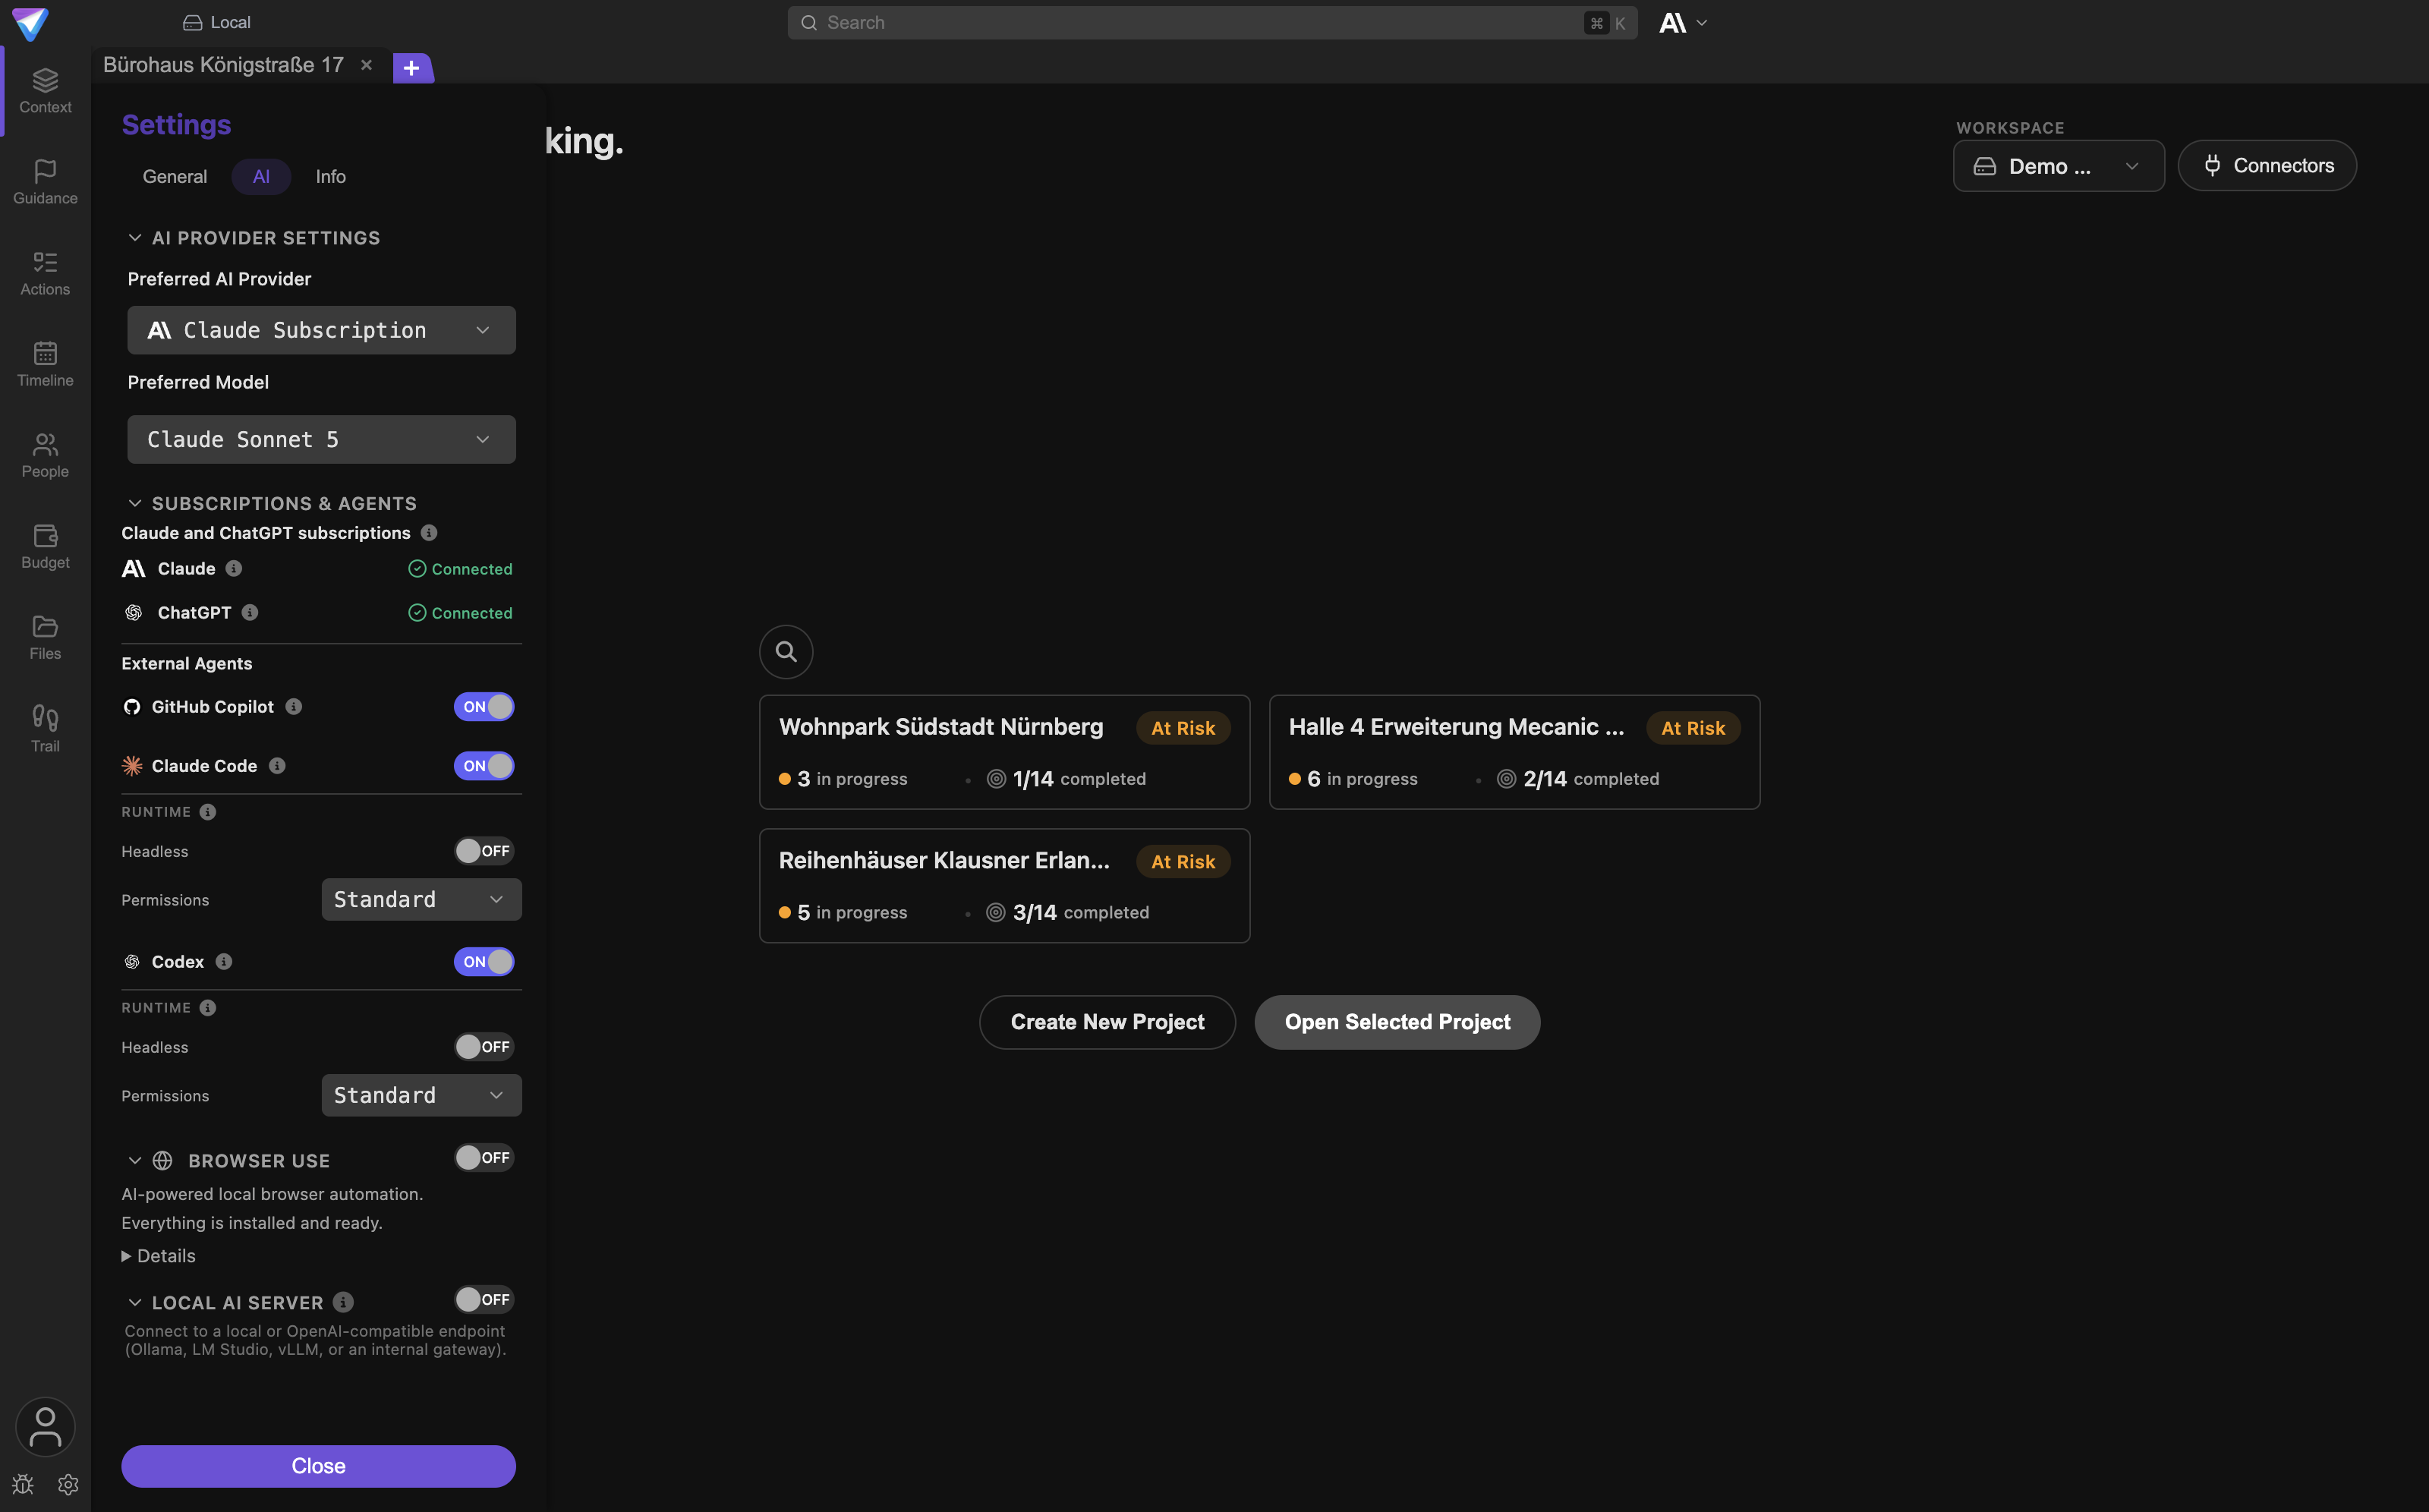
Whatever you skipped during onboarding, you set up here.
When you are offline
Before the first question, TensorPM checks whether the onboarding service is reachable. If it is not, this message appears instead of the project question:
It looks like you're currently offline, with no internet connection. I can't reach the TensorPM AI right now. Want to start with an empty project wizard instead?
Three buttons come with it:
Start empty wizardends onboarding and takes you to the start screen, where you create a project by hand.Configure local AIopens AI setup directly on theLocalcard, because signing in cannot work without an internet connection anyway.Try againre-checks the connection.
What happens in the background
Once your description is sufficient, TensorPM sends it to the onboarding service and gets a structured project back. Depending on what you wrote and which AI is available, that can include:
- project name, description, and goal
- scope and exclusions
- success criteria
- timeframe and budget
- requirements, milestones, dependencies, and risks
- first categories or action items
The answers about your name and activity level are stored locally in your settings, not in the project. They therefore apply to the whole app, not just to this one project.
Onboarding writes nothing into a cloud workspace. A workspace is the container your projects live in. On first launch that is a local workspace on your device. Cloud sync is set up later, see Sync & Cloud.
What to check after opening
The agent may structure what you told it. You stay responsible for whether the project facts are correct. So walk through this once after opening the project:
- Read the goal and scope on the
Profiletab. - Remove invented or unsupported details.
- Mark unknown facts as unknown instead of guessing them.
- Check dates, currency, and budget.
- Rewrite success criteria that are vague.
- Review generated action items before assigning them to anyone.
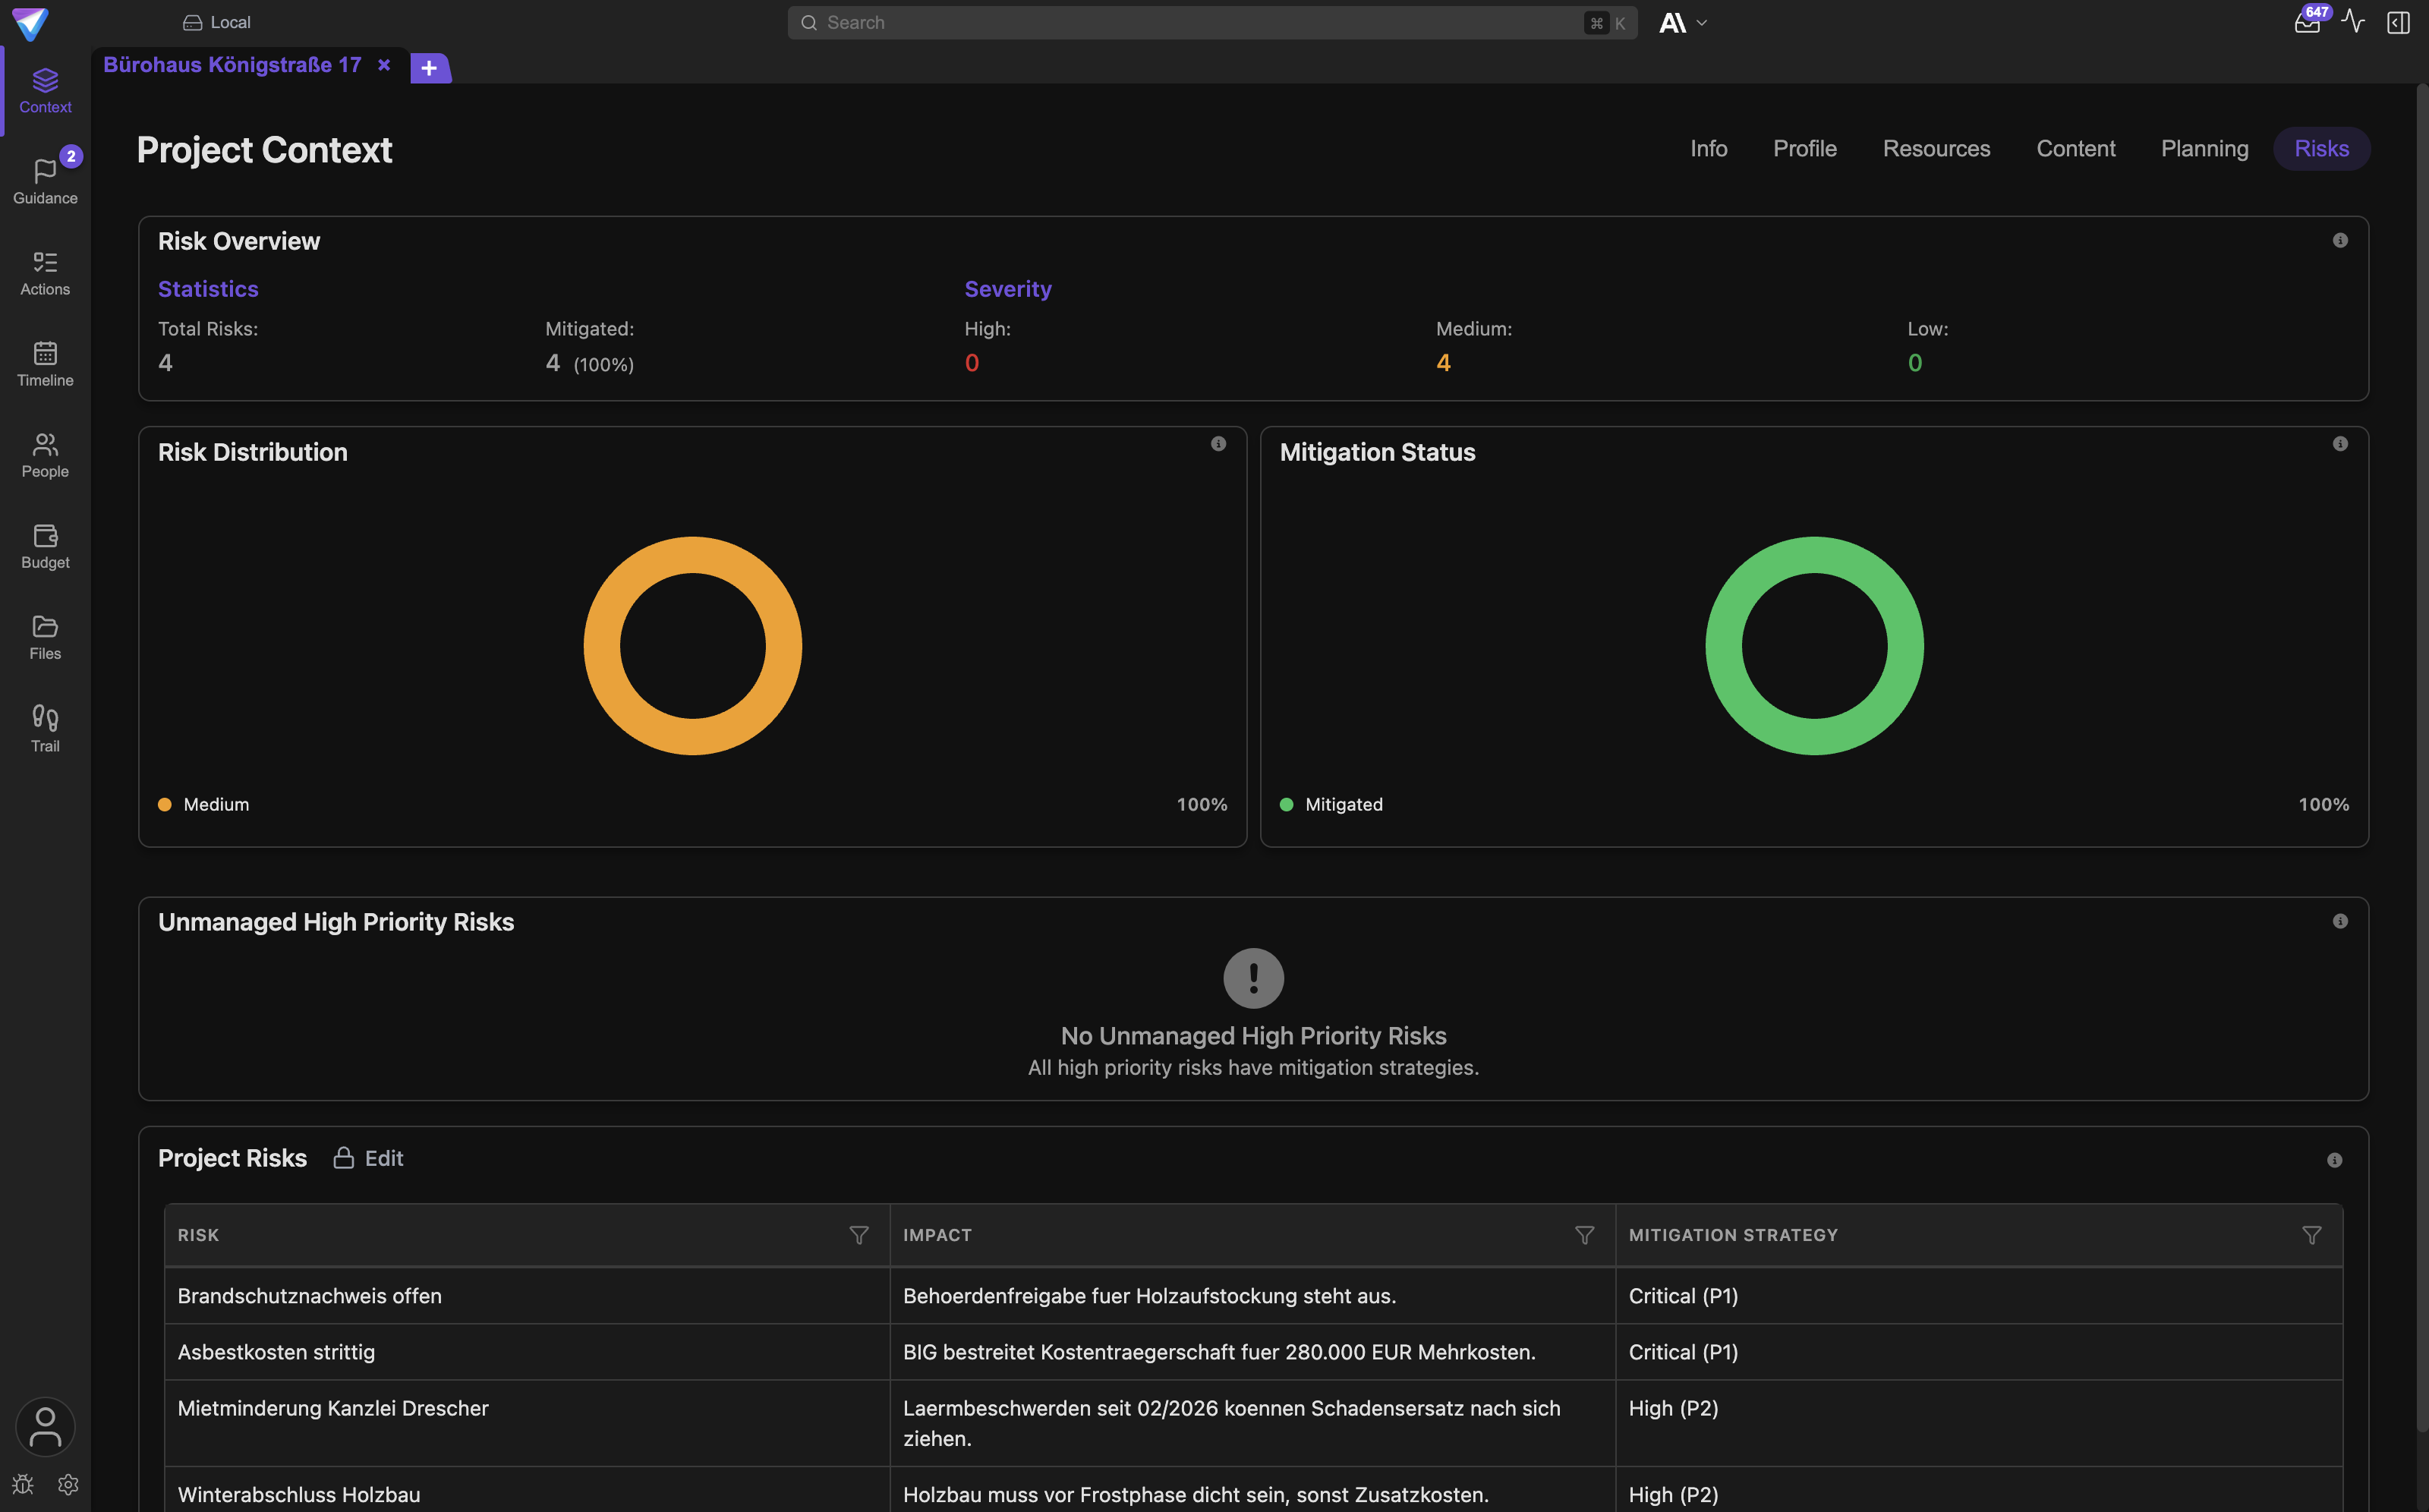
Review first, then work with the suggestions. A wrong foundation produces wrong recommendations.
If something is missing, you do not have to repeat onboarding. Open the matching tab under Context
and add the information by hand. The project agent can ask about it or propose a correction.
Protecting real project information
- Only use documents and images that may be processed over the AI path you chose.
- Remove personal or confidential details that are not needed to understand the project.
- Review generated project facts before you share a cloud workspace.
- Never write passwords, credentials, or keys into the project description.
If you do not want anything to leave your machine at all, set up the Local card in step 6.
Processing then stays on your device.
Common questions
Do I need an account to complete onboarding? No. Project preparation runs without signing in. You need an account only for permanent AI access through TensorPM and for cloud sync.
Does onboarding consume my credits?
Preparing the first project runs through a dedicated onboarding service and not against your plan
allowance. Everything you do afterwards in chat or through Review project is billed normally as soon as
you work through TensorPM.
Can I change the language later?
Yes. The toggle on the welcome screen is only a shortcut. The permanent setting lives under
Settings -> General -> System.
I picked the wrong activity level. Now what?
No problem, and the app says so itself: You can change this later. The two switches
Daily Project Status Review and Automatic AI Prioritization live under Settings -> General
-> AI.
Why does the name question come after the project question? Because preparing the project takes time. TensorPM asks the short questions during exactly that window so you are not waiting.
Is my name sent anywhere? It is stored locally. If you are signed in with a TensorPM account, it is additionally set as your account display name.
Can I leave onboarding halfway and resume later? No. As soon as you finish or skip it, it is done. Everything it offers is reachable afterwards from the start screen and from settings.
What is the difference between onboarding and the guided tour? Onboarding is a conversation that produces a project. The tour is a series of hint windows that show you the interface. Only the tour can be repeated.
If something goes wrong
Symptom: the offline message appears instead of the first question.
Cause: the onboarding service is unreachable, or the device has no internet connection.
Fix: check the connection and click Try again. If you are working offline on purpose, take
Configure local AI or Start empty wizard.
Symptom: Project creation failed. Try again?
Cause: preparation failed, usually a timeout with very large attachments.
Fix: try again. If that does not help, remove the largest documents and describe the project more
briefly. You can add the documents to the project later.
Symptom: the message cannot be sent, the send arrow stays grey.
Cause: either the field is empty and no attachments are selected, or the attachments exceed the text
limit, or a file is still being read.
Fix: wait until Reading... disappears, and remove files if needed.
Symptom: Could not read one document.
Cause: the format is unsupported or the file is damaged.
Fix: remove the file and summarize its content briefly in the text instead.
Symptom: Message failed. Try again.
Cause: the connection dropped during the conversation.
Fix: send the message again. The conversation is preserved.
Symptom: Could not save. Try again. at the activity question.
Cause: the setting could not be written.
Fix: click Let's go again. If it persists, set the level later under Settings -> General ->
AI.
Symptom: the local endpoint does not respond.
Cause: the local model is not running, or the address is wrong.
Fix: check that your local program is started and test the address again with Test connection. If
no model is detected, type the name under Model name by hand.
Symptom: the Business API key is rejected.
Cause: the wrong provider was detected, or the key is invalid.
Fix: pick the provider from the list or use a different key. Your own provider keys exist only on
the Business plan.
Symptom: there is no project after onboarding.
Cause: project creation was skipped with Later or cancelled.
Fix: create a project from the start screen with the
Project Creation Wizard.
More cases are covered in Troubleshooting.
Next steps
- Understand the working model: How TensorPM works
- Check and correct the foundation: Project Structure
- Get to know the main views: Navigation & Views
- Set up AI and understand the plans: Account & AI Modes
- Create further projects systematically: Project Creation Wizard
- Look up terms: Glossary