
Personen & Budget
Kurz gesagt
Zwei Ansichten beantworten zwei Fragen, die in jedem Projekt täglich gestellt werden: Wer ist
beteiligt, und wie viel Geld ist noch da. In Personen pflegst du alle Beteiligten mit Rolle,
Organisation, Kontaktdaten und Einfluss. In Budget legst du fest, wie viel das Projekt kosten
darf, gliederst diesen Betrag in Töpfe und vergleichst geplante mit tatsächlichen Beträgen.
Beide Ansichten sind Teil des Projektkontexts. Der Projektagent liest sie mit. Wer eine Aufgabe übernimmt, welcher Topf schon überzogen ist, wer bei einer Entscheidung mitreden muss: All das kann die KI nur berücksichtigen, wenn es in diesen beiden Ansichten steht.
Wann du das brauchst
- Du willst wissen, wen du bei einer Terminverschiebung informieren musst.
- Eine Rechnung kommt herein und du willst sehen, ob der zugehörige Topf noch Luft hat.
- Der Auftraggeber fragt nach dem Stand der Kosten und du willst nicht erst drei Tabellen öffnen.
- Ein Nachtrag steht im Raum und du willst vor der Zusage sehen, was das mit dem Gesamtbudget macht.
- Du bereitest eine Jour-fixe-Runde vor und brauchst eine Liste der Beteiligten mit Rollen.
- Der Projektagent soll Entwürfe an die richtigen Leute adressieren.
Die Ansicht Personen
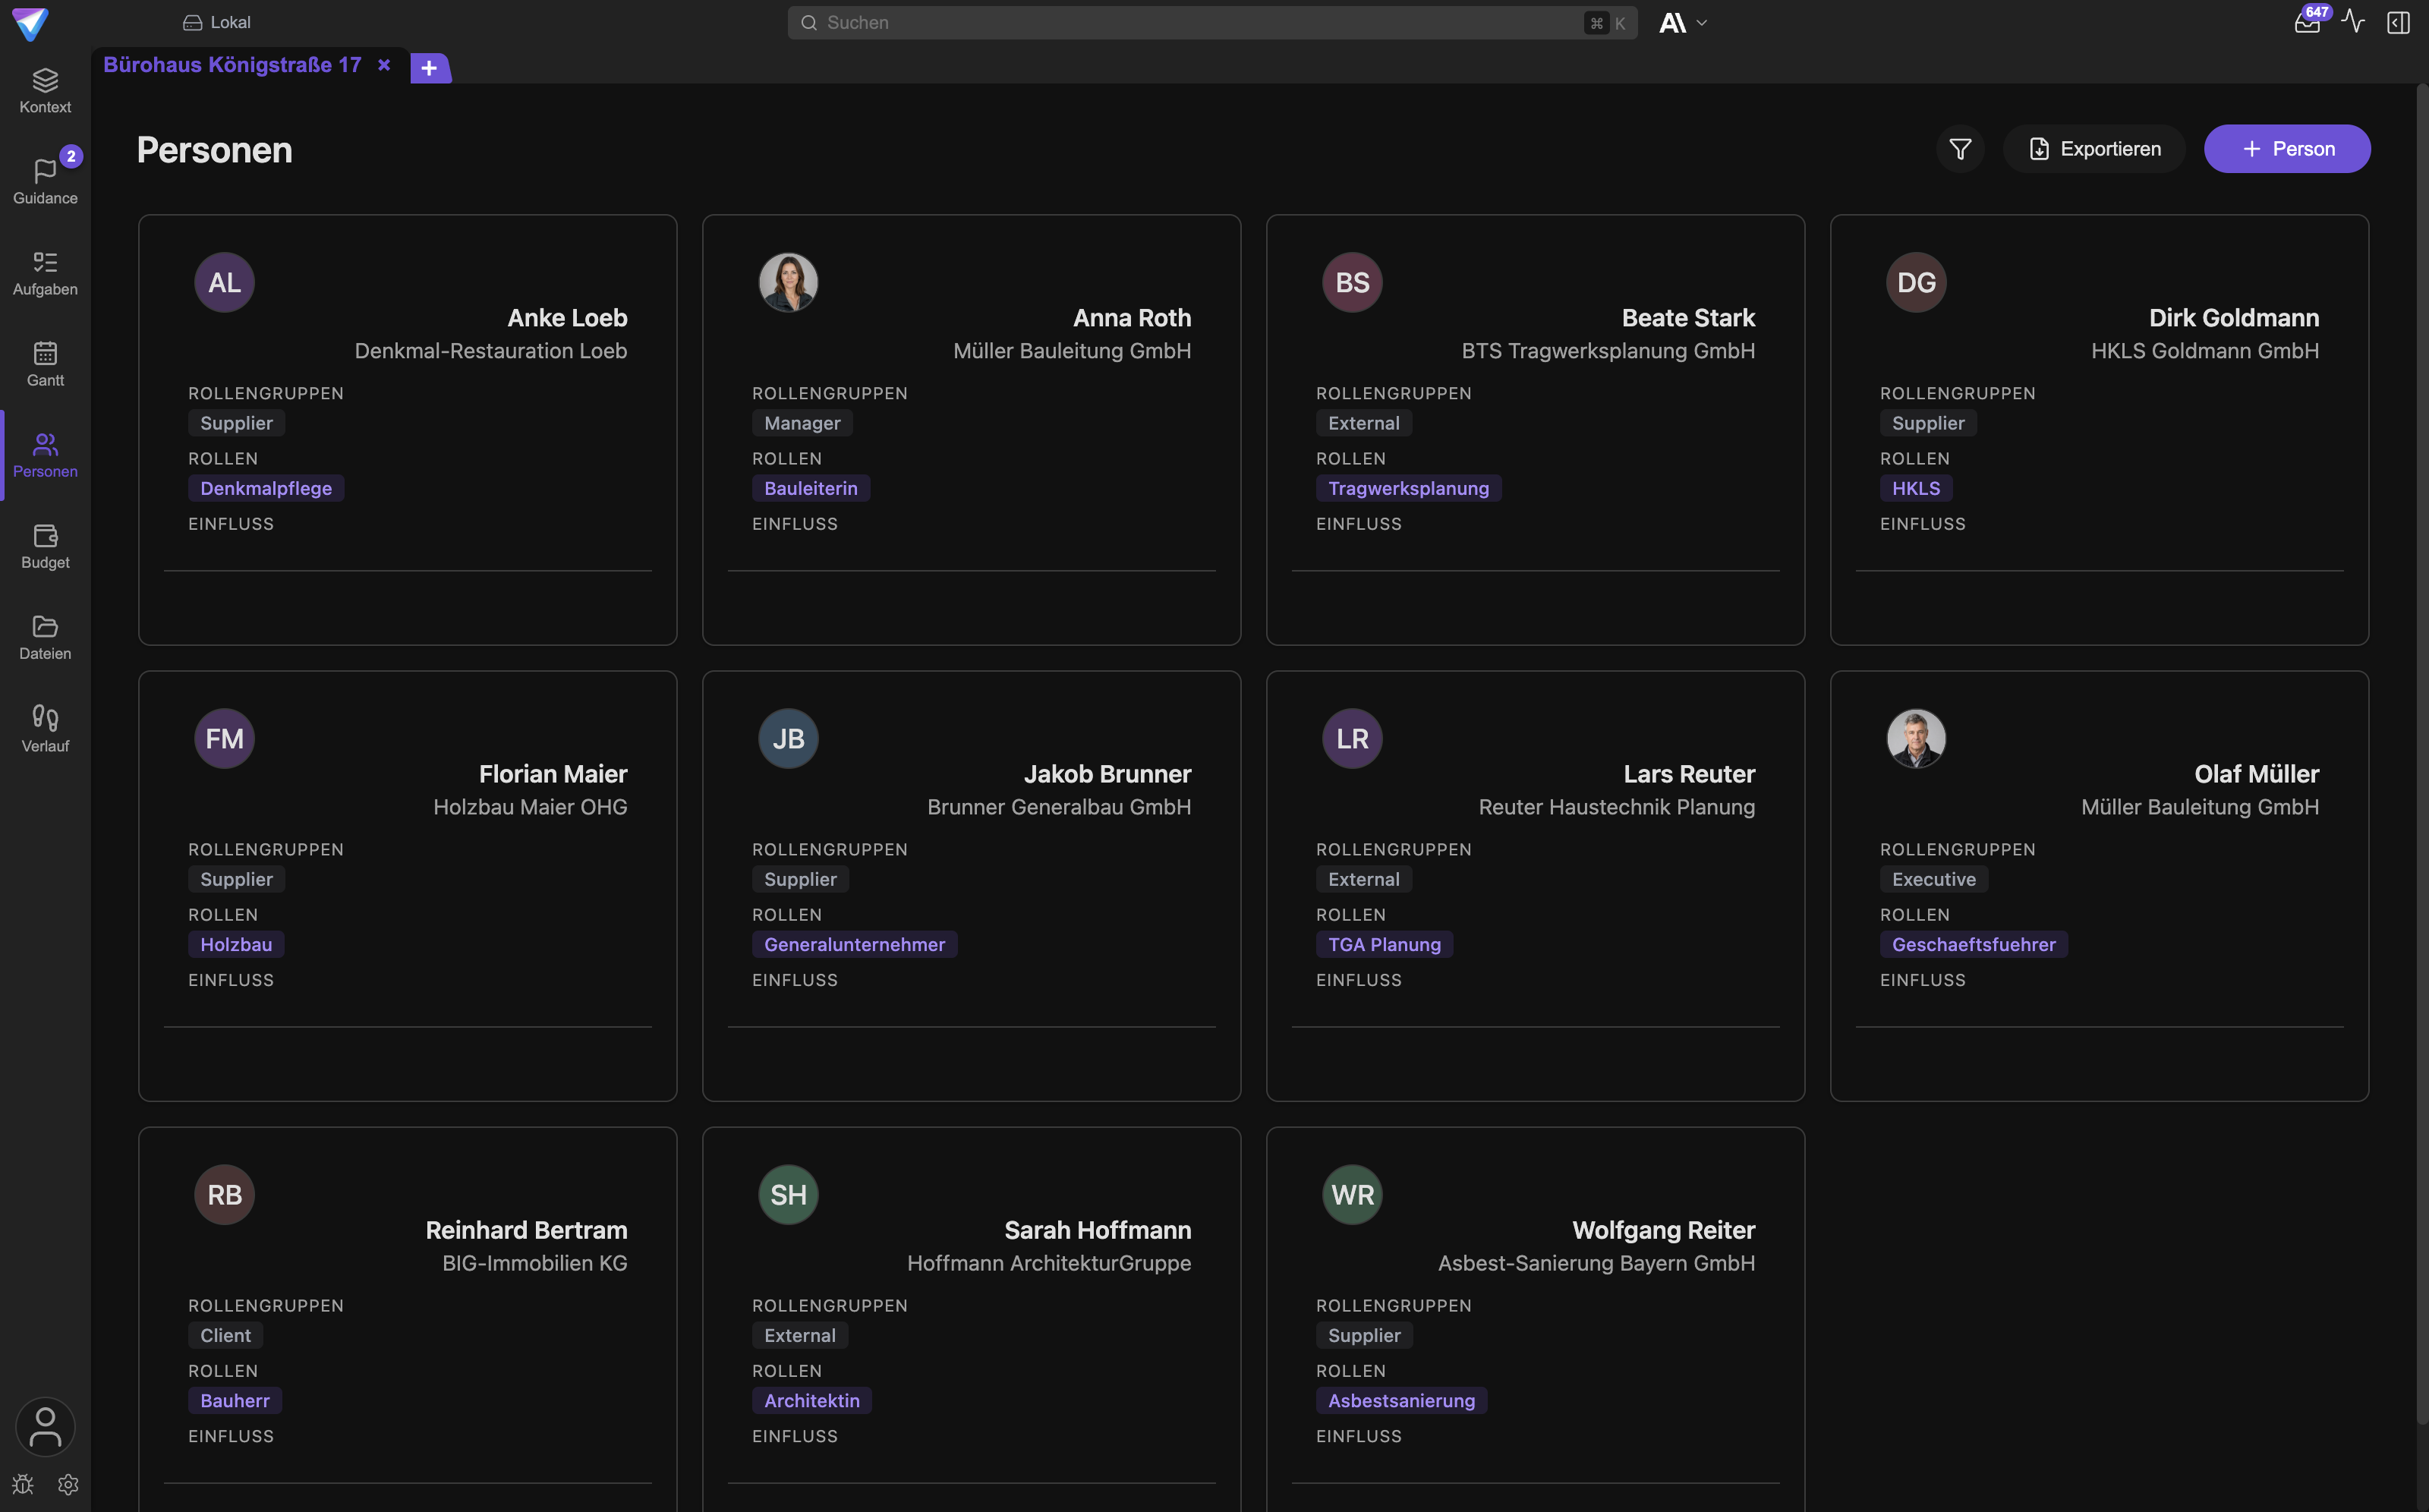
Du öffnest sie über den Tab Personen in der linken Leiste. Die Ansicht zeigt Karten, eine je
Person. Oben findest du die Suche, den Button Filter & Sortierung, den Button Exportieren und
den Button Person zum Anlegen.
Was TensorPM zu einer Person speichert
Das Formular ist in zwei Blöcke geteilt. Unter Basisinformationen stehen:
Name *undOrganisation *. Beide sind Pflicht. Die Organisation ist wichtiger, als sie aussieht: Sie trennt das eigene Haus vom Planungsbüro, vom Bauherrn und von den Nachunternehmern.E-Mail. Ohne E-Mail-Adresse kann TensorPM weder eine Nachricht adressieren noch die Person mit einem TensorPM-Konto verknüpfen.Telefon. Als Platzhalter steht+49 123 456789. Die Nummer schaltet die Telefon- und Messenger-Einträge im Kontextmenü frei.Profilbild.
Unter Rollen und Einfluss stehen:
Rollengruppen *. Eine feste Auswahl, damit sich filtern lässt.Eigene Rollen. Freier Text, ein Eintrag je Zeile, mit Enter bestätigt. Hier gehören projektspezifische Bezeichnungen hinein, zum Beispiel "Bauleiter Rohbau" oder "SiGeKo".Einflussebene *. Hoch, Mittel oder Niedrig.Labels. Freie Schlagworte, ebenfalls mit Enter bestätigt. Labels sind das flexibelste Feld und gleichzeitig das nützlichste, weil du danach filtern kannst.
Jede Person trägt zusätzlich zwei Angaben, die TensorPM selbst führt: wann sie zuletzt geändert wurde und von wem. Beides erscheint auch im CSV-Export.
Rollengruppen, eigene Rollen und Einfluss
Die Auswahl unter Rollengruppen * ist bewusst kurz gehalten: Führungskraft, Manager,
Teammitglied, Extern, Lieferant, Kunde, Sponsor, Klient, Sonstige. Eine Person kann
mehreren Gruppen angehören.
Die Rollengruppe ist die grobe Schublade, die eigene Rolle die genaue Bezeichnung. Ein
Fachplaner Elektro bekommt also die Rollengruppe Extern und die eigene Rolle "Fachplaner
Elektro". So kannst du später alle Externen auf einmal filtern und trotzdem die genaue Funktion
lesen.
Einflussebene * beschreibt nicht die Hierarchie, sondern die Wirkung auf das Projekt. Der
Sachbearbeiter im Bauamt, der eine Genehmigung unterschreibt, hat hohen Einfluss, auch wenn er in
keiner Organigramm-Kästchenreihe über dir steht. Der Projektagent nutzt diese Einstufung, wenn er
vorschlägt, wen du bei einer Änderung einbeziehen solltest.
Profilbild
Über Profilbild lädst du ein Bild hoch und schneidest es zu. Der Button Avatar entfernen setzt
es zurück. Bilder von externen Personen liegen als Datei neben der Projektdatenbank auf deinem
Gerät. Ist die Person mit einem TensorPM-Konto verknüpft, wird das Bild zusätzlich beim Konto
hinterlegt, damit es auf deinen anderen Geräten ebenfalls erscheint.
Ohne Bild zeigt die Karte die Initialen. Das ist kein Mangel, sondern für die meisten Projekte völlig ausreichend.
Verantwortung: Aufgaben und Arbeitspakete
Personen ist ein Verzeichnis, keine Zuweisung. Wer was tut, entscheidest du an drei anderen
Stellen:
- In
Aufgabenüber die SpalteZugewiesen an. Eine Aufgabe kann mehrere Zuweisungen haben, Personen und lokale Coding-Agents gemischt. - Im Arbeitspaket über das Feld
Verantwortlich (intern). Das ist die Person in deiner Organisation, die für das Paket geradesteht. - Im Arbeitspaket über das Feld
Ausführende Firma. Auch hier wählst du einen Eintrag ausPersonenaus, üblicherweise den Ansprechpartner des ausführenden Unternehmens.
Alle drei Auswahllisten speisen sich aus derselben Personenliste. Wer dort fehlt, taucht in keiner Auswahl auf. Das ist der häufigste Grund, warum eine Zuweisung "nicht geht".
Kommunikations-Tools im Kontextmenü
Ein Rechtsklick auf eine Personenkarte öffnet ein Menü mit Bearbeiten, E-Mail senden,
In Workspace einladen und Löschen. Zusätzlich kannst du vier Messenger freischalten unter
Einstellungen -> Allgemein -> Kommunikations-Tools:
| Schalter | Neuer Menüeintrag | Voraussetzung an der Person |
|---|---|---|
Microsoft Teams |
Teams-Chat und Teams-Anruf |
E-Mail-Adresse |
Slack |
Slack-DM |
E-Mail-Adresse |
WhatsApp |
WhatsApp |
Telefonnummer |
Signal |
Signal |
Telefonnummer |
Ist eine Telefonnummer hinterlegt, erscheint außerdem Telefonanruf. Die Einträge öffnen den
jeweiligen Dienst außerhalb von TensorPM. TensorPM meldet sich nicht bei Teams oder Slack an und
liest dort nichts mit.
TensorPM-Nutzer erkennen und einladen
Gehört die E-Mail-Adresse einer Person zu einem TensorPM-Konto, zeigt die Karte ein Abzeichen.
Bei bereits verknüpften Konten steht dort TensorPM-Nutzer, dazu je nach Konto der Tarif
(Trial, Pro, Business oder Sitz) und die Workspace-Rolle. Ist die Person registriert, aber
noch nicht in deinem Workspace, weist ein Abzeichen darauf hin, dass du sie einladen kannst. Der
Menüeintrag In Workspace einladen verschickt die Einladung an die hinterlegte Adresse.
Das funktioniert nur in einem Cloud-Workspace. Mehr dazu unter Workspaces und Cloud-Sync.
Suchen, filtern, sortieren, exportieren
Die Suche oben filtert die Karten sofort. Filter & Sortierung öffnet ein Panel mit:
Sortieren nach:Name,Organisation,Rolle,EinflussRolle: Mehrfachauswahl über die RollengruppenEinflussebene:Hoch,Mittel,NiedrigLabels: Mehrfachauswahl über alle im Projekt vergebenen LabelsAlle zurücksetzen
Exportieren erzeugt eine CSV-Datei mit den Spalten Name, Organisation, E-Mail, Telefon,
Rollengruppen, Eigene Rollen, Einfluss, Labels, Zuletzt geändert und Geändert von. Exportiert wird
genau das, was gerade sichtbar ist. Filterst du also erst auf Extern, bekommst du eine
Nachunternehmerliste und nicht das ganze Verzeichnis.
Wie Personen aus eingehenden Signalen entstehen
Du musst nicht alle Beteiligten von Hand eintippen. Personen entstehen auf vier Wegen:
- Beim Projektstart aus Dokumenten. Legst du ein Projekt aus vorhandenen Unterlagen an, liest
TensorPM Namen, Organisationen, Rollen und Adressen aus Vertrag, Protokoll oder Verteilerliste
und schlägt daraus Personen vor. Fehlt eine Rollengruppe, setzt TensorPM
Teammitglied, fehlt der Einfluss, setzt esMittel. Beides kannst du danach korrigieren. - Aus eingehenden Signalen über den Distiller. Trifft eine E-Mail von einem bisher unbekannten
Absender ein, kann der Distiller eine neue Person als Vorschlagskarte anbieten. Die Karte trägt
den Namen als Überschrift und Angaben wie Organisation oder Rolle als kleine Chips darunter. Du
entscheidest mit
AnnehmenoderÜberspringen. Nichts wird ohne dein Zutun gespeichert. - Im Chat. Du kannst dem Projektagenten sagen, er soll eine Person anlegen oder ändern.
- Von Hand über den Button
Person.
Weil Weg zwei über den Distiller läuft, gelten dort dieselben Regeln wie für jede andere Kontextänderung. Die Details stehen unter Konnektoren & Freigaben.
Warum sich die Pflege lohnt, auch wenn niemand sonst die App benutzt
Das ist die häufigste Rückfrage: Warum soll ich Personen pflegen, wenn ich als Einzige mit TensorPM arbeite? Vier Gründe:
- Der Projektagent adressiert richtig. Ein E-Mail-Entwurf braucht eine Adresse und eine Anrede.
Beides kommt aus
Personen. - Eingehende Post wird zugeordnet. Kennt TensorPM den Absender, kann es dessen Nachricht mit Rolle und Organisation einordnen, statt sie als anonymen Text zu behandeln.
- Analyse und Guidance werden konkret. "Kläre die Freigabe" ist eine schwache Empfehlung. "Kläre die Freigabe mit dem Bauamt, Ansprechpartner ist eingetragen" ist eine brauchbare.
- Es ist deine Übergabe. Fällst du aus oder wechselt die Projektleitung, ist die gepflegte Personenliste mit Rollen und Einfluss das Erste, was jemand braucht. Sie lässt sich als CSV exportieren und weitergeben.
Der Aufwand ist überschaubar. Für ein mittleres Bauprojekt reichen zum Start Bauherr, Projektsteuerung, Architekt, die drei bis vier wichtigsten Fachplaner und je ein Ansprechpartner je Gewerk. Alles Weitere wächst über eingehende Signale von selbst nach.
Was die Personen-Ansicht nicht kann
TensorPM führt keine Verfügbarkeits- oder Kapazitätsplanung je Person. Es gibt kein Feld für Wochenstunden, keinen Urlaubskalender und keine Auslastungskurve. Wer wann wie viel Zeit hat, ist in TensorPM keine Eigenschaft der Person.
Kapazität planst du stattdessen auf der Arbeitsseite: Jede Aufgabe hat Planaufwand und
Ist-Aufwand in Stunden, jedes Arbeitspaket rollt daraus Aufwand (Plan) und Aufwand (Ist)
zusammen. Über die Zuweisung siehst du, wie viele Stunden auf einer Person liegen. Grobe
Verfügbarkeiten, etwa "nur dienstags und donnerstags auf der Baustelle", gehören als Label an die
Person oder in den Projektkontext unter Kontext -> Ressourcen.
Die Ansicht Budget
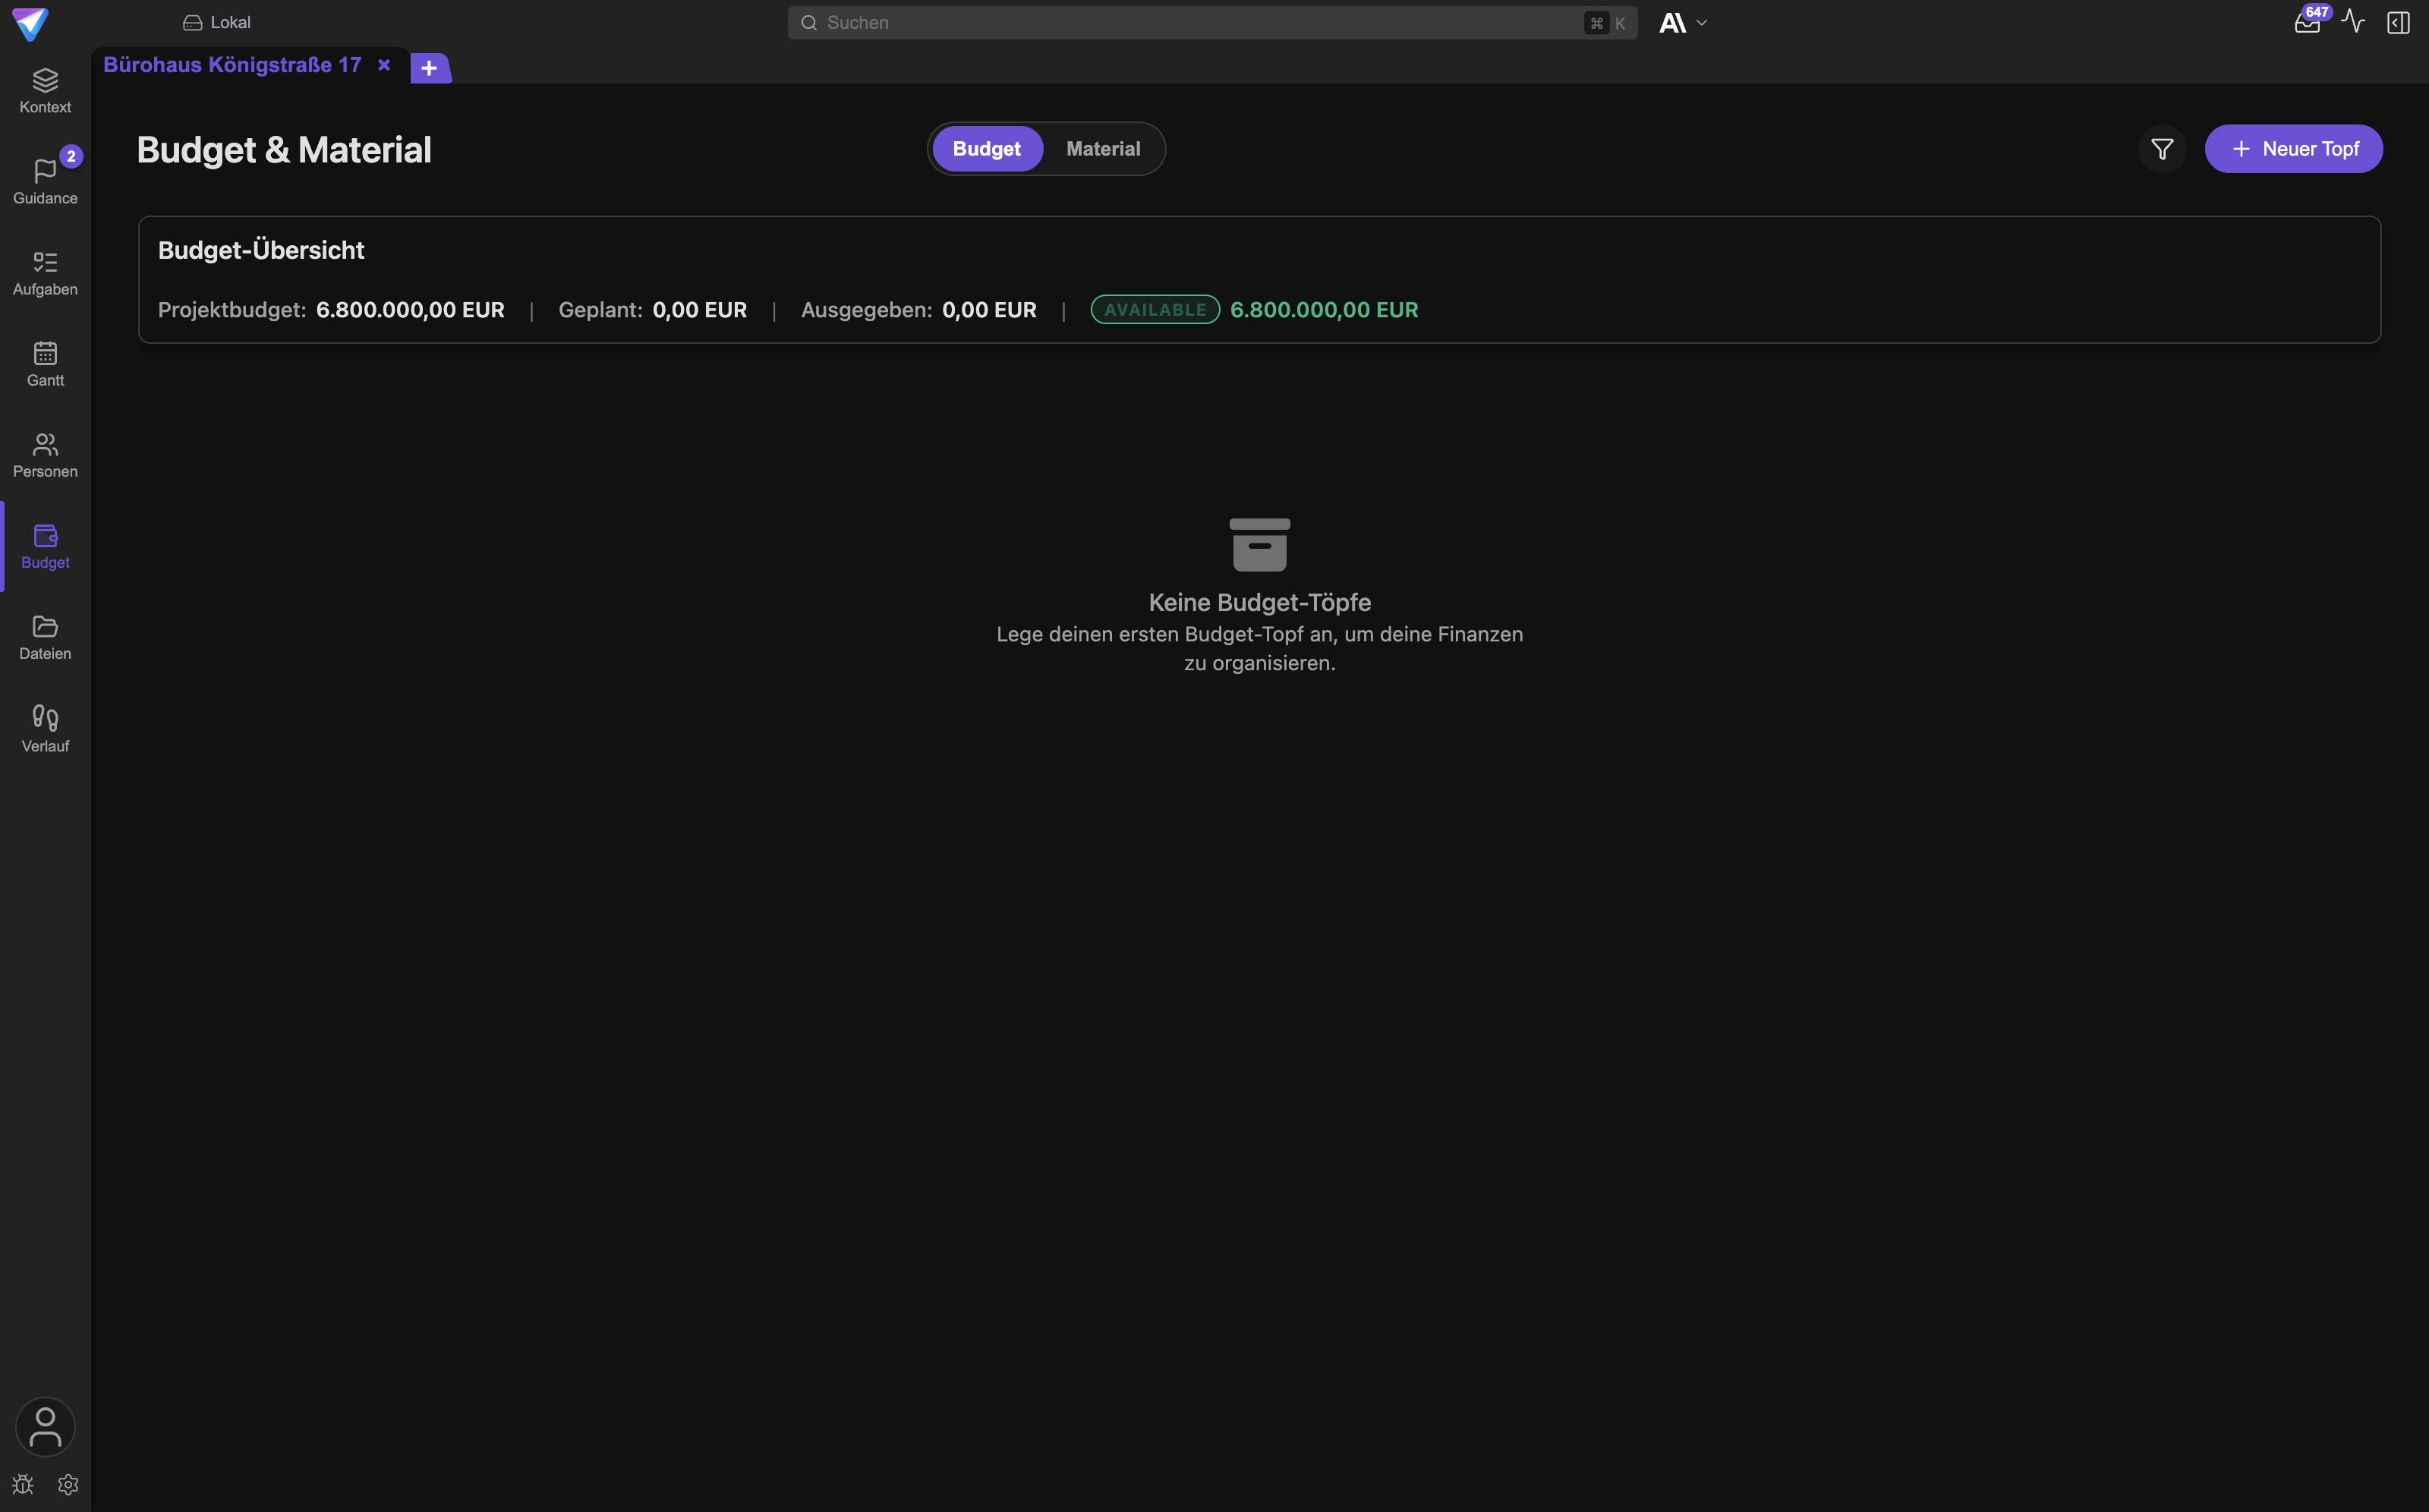
Du öffnest sie über den Tab Budget in der linken Leiste. Der Ansichtstitel lautet
Budget & Material, denn die Ansicht hat zwei Tabs: Budget und Material. Dieser Artikel
beschreibt nur Budget. Alles zu Material, zu Lieferanten und zum Beschaffungsstatus steht unter
Material & Beschaffung.
Das Projektbudget festlegen
Das Projektbudget ist eine einzelne Zahl am Projekt, nicht am Topf. Du setzt oder änderst sie unter
Kontext -> Ressourcen im Budgetfeld. Beim Anlegen eines Projekts fragt der Assistent ebenfalls
danach.
Ist kein Projektbudget gesetzt, zeigt die Budget-Übersicht nur Projektbudget: und daneben
Nicht gesetzt. Töpfe und Ausgaben funktionieren trotzdem, aber du bekommst keine Aussage darüber,
ob du im Rahmen liegst. Setze die Zahl früh, auch wenn sie noch grob ist.
Budget-Töpfe anlegen
Ein Budget-Topf ist eine Kostengruppe. Der Button Neuer Topf öffnet das Formular mit
Topf-Name und Beschreibung, gespeichert wird mit Speichern.
Sinnvolle Töpfe im Bau sind Gewerke oder Kostengruppen: Rohbau, Ausbau,
Technische Gebäudeausrüstung, Baunebenkosten, Unvorhergesehenes. In einem IT-Projekt eher
Externe Dienstleistungen, Lizenzen, Hardware, Reserve.
Halte die Zahl klein. Fünf bis zehn Töpfe kann man im Kopf behalten, vierzig nicht. Für feinere Gliederung nutzt du die Aufgaben und Ausgaben innerhalb eines Topfes.
Jede Topf-Karte hat oben rechts Topf bearbeiten und Topf löschen. Ein Löschen musst du mit
Löschen bestätigen bestätigen.
Aufgaben einem Topf zuweisen
Eine Aufgabe kann Kosten tragen. In Aufgaben gibt es dafür die Spalten Planbudget und
Ist-Budget. Damit diese Beträge in einem Topf auftauchen, weist du die Aufgabe dem Topf zu.
- Klicke auf der Topf-Karte auf
Zuweisen. - Es öffnet sich
Aufgaben zu "<Topf-Name>" zuweisenmit zwei Spalten: linksVerfügbar (<Anzahl>), rechtsZuzuweisen (<Anzahl>). - Suche über das Feld oben, klicke Aufgaben links an, um sie nach rechts zu übernehmen.
- Bestätige mit
Auswahl zuweisen (<Anzahl>).
Im Bereich Aufgaben der Topf-Karte steht danach je Aufgabe eine Zeile mit Plan: und Ist:.
Über Aufgabe aus diesem Topf entfernen löst du die Zuordnung wieder, ohne die Aufgabe zu löschen.
Einfache Ausgaben erfassen
Nicht jede Ausgabe hat eine Aufgabe. Eine Kranmiete, eine Gebühr, eine Materialrechnung: Dafür gibt
es Direkte Ausgaben. Der Button Hinzufügen auf der Topf-Karte öffnet Neue Ausgabe mit:
Ausgaben-Name, Platzhalterz. B. BüromaterialBeschreibung, optionalDatumGeplant:undIst:als zwei getrennte BeträgeAngehängte Dateien
Gespeichert wird mit Ausgabe speichern. Bestehende Ausgaben änderst du über Ausgabe bearbeiten
und entfernst sie über Ausgabe löschen.
Der Trick liegt in den zwei Beträgen. Eine Ausgabe, die du erwartest, aber noch nicht bezahlt hast,
trägst du mit Geplant: ein und lässt Ist: auf null. Kommt die Rechnung, trägst du den
tatsächlichen Betrag unter Ist: nach. So siehst du jederzeit den Unterschied zwischen dem, was du
erwartest, und dem, was schon geflossen ist.
Belege an eine Ausgabe hängen
Jede Ausgabe kann Dateien tragen. Im Bereich Angehängte Dateien hast du zwei Wege:
Hochladennimmt eine Datei von deiner Festplatte in den Projektordner auf.Vorhandene Dateien suchendurchsucht die Dateien, die schon im Projekt liegen, zum Beispiel eine per E-Mail eingegangene Rechnung.
Der zweite Weg ist der wichtigere. Kommt eine Rechnung als E-Mail-Anhang herein und landet über
einen Konnektor im Projekt, musst du sie nicht erneut hochladen: Du suchst sie und hängst sie an
die Ausgabe. Der Eintrag zeigt danach, wie viele Dateien angehängt sind. Mit Datei entfernen
löst du eine Verknüpfung wieder.
Damit ist der Beleg dort, wo die Zahl steht. Das ist keine Buchhaltung, aber es beantwortet die Frage "Woher kommt dieser Betrag?" ohne Suche im Postfach.
Geplant gegen Ist
Der Vergleich zieht sich durch alle Ebenen und funktioniert überall gleich.
| Ebene | Plan | Ist |
|---|---|---|
| Aufgabe | Planbudget |
Ist-Budget |
| Direkte Ausgabe | Geplant: |
Ist: |
| Topf | Summe aller Plan-Beträge im Topf | Summe aller Ist-Beträge im Topf |
| Projekt | Summe aller Töpfe unter Geplant: |
Summe aller Töpfe unter Ausgegeben: |
Wichtig: Die Topf-Summe ist immer eine Rechnung, nie ein Eingabefeld. Du kannst einem Topf keinen Deckel geben. Was ein Topf kosten soll, ergibt sich aus den geplanten Beträgen der Aufgaben und Ausgaben darin. Wer eine Reserve abbilden will, legt dafür einen eigenen Topf mit einer geplanten Ausgabe an.
Parallel dazu gibt es dieselbe Logik für Zeit: Planaufwand und Ist-Aufwand in Stunden je
Aufgabe. Diese Werte laufen nicht in die Budget-Ansicht, sondern in die Spalten Aufwand (Plan)
und Aufwand (Ist) der Arbeitspakete.
Die Budget-Übersicht lesen
Ganz oben steht die Karte Budget-Übersicht mit vier Feldern:
Projektbudget:die Zahl ausKontext->RessourcenGeplant:die Summe aller geplanten Beträge über alle Töpfe. Sie färbt sich, sobald sie das Projektbudget übersteigt.Ausgegeben:die Summe aller Ist-Beträge über alle Töpfe. Sie färbt sich rot, sobald sie das Projektbudget übersteigt.- Ein Abzeichen mit der Restaussage.
Das Abzeichen kennt drei Zustände, und zwar in dieser Rangfolge:
OVERSPENT, wenn schon mehr ausgegeben als budgetiert wurde. Daneben steht die Überschreitung.OVERPLANNED, wenn zwar noch nicht zu viel ausgegeben, aber schon zu viel verplant wurde.AVAILABLE, wenn noch Planungsspielraum übrig ist. Daneben steht der Rest.
Wichtig: Diese drei Abzeichen erscheinen auch in der deutschen Oberfläche auf Englisch. Das ist ein bekannter Rest im Programm und kein Fehler deiner Einstellungen.
OVERPLANNED ist das eigentlich nützliche Signal. Es erscheint, bevor Geld geflossen ist, also zu
einem Zeitpunkt, an dem du noch handeln kannst.
Der Ring auf jeder Topf-Karte
Jede Topf-Karte zeigt einen Ring. Er vergleicht innerhalb des Topfes das Ist mit dem Plan und
kennt drei Segmente: Genutzt, Verfügbar und, wenn das Ist den Plan übersteigt, Überzogen.
Unter dem Ring steht Verfügbar: oder Überschritten: mit dem Betrag.
Über Übersicht und Details schaltest du zwischen der kleinen und einer ausführlicheren
Darstellung um. Die ausführliche zeigt zusätzlich, wie viele Ausgaben in die Zahl eingehen.
Filter und Sortierung
Der Button Filter & Sortierung öffnet das Panel Budget filtern & sortieren. Du kannst filtern
nach:
Nach Topf-Namen filtern: Namen eintippen und mit Enter als Chip übernehmenAusgaben-NameZeitraummitStartdatumundEnddatum, bezogen auf das Datum der AusgabeGeplanter Budget-BereichundTatsächlicher Budget-Bereich, jeweils mitMinundMaxHat AufgabenundHat Ausgaben, jeweilsJa,NeinoderBeliebig
Sortieren kannst du nach Topf-Name, Geplante Summe, Tatsächliche Summe, Anzahl,
Ausgaben-Name, Ausgaben-Datum, Geplantes Budget und Tatsächliches Budget.
Alle zurücksetzen räumt alles wieder auf.
Filter und Sortierung werden je Projekt gespeichert. Wenn eine Ansicht beim nächsten Öffnen leer wirkt, ist fast immer noch ein Filter aktiv.
Der Budgetverlauf über die Zeit
Die Budget-Ansicht zeigt einen Stand, keinen Verlauf. Den Verlauf findest du unter Kontext ->
Info in der Karte Projekt-Insights, dort im Reiter Budget. Das Diagramm zeigt:
Ist pro Tagals BalkenIst gesamtals aufsteigende LinieProjektbudgetals waagerechte Bezugslinie
Über 30 Tage, 90 Tage und Gesamt wählst du den Zeitraum. Der spannende Moment ist der, in dem
die Linie Ist gesamt sich der Linie Projektbudget nähert, während im Terminplan noch Monate
offen sind.
Die Werte stammen aus einer täglichen Fortschreibung. Ein Projekt, das erst seit zwei Tagen in
TensorPM liegt, hat entsprechend wenig zu zeigen. Ohne Aufgaben mit Budgetangaben erscheint der
Hinweis Keine Budgetdaten.
Währung und Wechselkurse
TensorPM unterscheidet zwei Währungen.
Die Anzeige-Währung legt fest, in welcher Währung Beträge auf dem Bildschirm erscheinen. Sie
gilt je Projekt und steht unter Einstellungen -> Allgemein -> Währung -> Anzeige-Währung.
Zur Auswahl stehen EUR, USD, GBP, JPY, CHF, CAD und AUD. Der Schalter
Währungssymbole anzeigen wechselt zwischen dem Kürzel und dem Symbol.
Die Speicher-Währung ist die Währung, in der TensorPM intern rechnet und speichert. Sie gilt für
die ganze Anwendung, kennt nur EUR und USD und liegt hinter dem Button
Erweiterte Währungs-Einstellungen.
Wichtig: Ein Wechsel der
Speicher-Währungrechnet alle vorhandenen Daten um. Die App warnt mit dem Hinweis, dass das alle bestehenden Daten konvertiert. Lege vorher ein Backup an unterEinstellungen->Allgemein->Datenbank-Backup->Backup erstellen.
Der Schalter Wechselkurse automatisch aktualisieren ist standardmäßig aus. Schaltest du ihn ein,
holt TensorPM bei Bedarf tägliche Referenzkurse von Zentralbanken über den kostenlosen Dienst
Frankfurter. Es wird kein Konto und kein Schlüssel gebraucht, übertragen werden nur die
Währungskürzel, und die Kurse liegen danach 24 Stunden lokal zwischengespeichert. Der Button
Wechselkurse aktualisieren erzwingt einen Abruf, ist aber nur aktiv, wenn der Schalter an ist.
Ohne Kursabruf rechnet TensorPM mit fest hinterlegten Umrechnungsfaktoren weiter. Beträge sind dann weiterhin sichtbar, nur nicht tagesaktuell umgerechnet. Für Rechnungen und Abrechnungen gilt ohnehin der Kurs deiner Buchhaltung, nicht der in TensorPM.
Ein Rechenbeispiel aus einem Bauprojekt
Ausgangslage
Bürohaus mit vier Geschossen, Sanierung im Bestand. Unter Kontext -> Ressourcen ist das
Projektbudget auf 2.400.000 EUR gesetzt. Anzeige-Währung und Speicher-Währung sind beide EUR.
Die vier Töpfe
| Topf | Geplant | Ist |
|---|---|---|
Rohbau |
1.200.000 | 1.004.300 |
Ausbau |
700.000 | 210.000 |
Technische Gebäudeausrüstung |
350.000 | 96.000 |
Baunebenkosten |
90.000 | 141.500 |
| Summe | 2.340.000 | 1.451.800 |
Schon hier siehst du etwas: Baunebenkosten sind mit 141.500 EUR bereits über den geplanten
90.000 EUR. Auf der Karte dieses Topfes steht deshalb Überschritten: 51.500 EUR, und der Ring
zeigt ein rotes Segment Überzogen.
Der Topf Rohbau im Detail
Der Topf enthält drei Aufgaben und zwei direkte Ausgaben.
| Eintrag | Art | Plan | Ist |
|---|---|---|---|
| Bodenplatte betonieren | Aufgabe | 180.000 | 186.500 |
| Kellerwände erstellen | Aufgabe | 240.000 | 240.000 |
| Decken EG bis 3. OG | Aufgabe | 620.000 | 415.000 |
| Baustelleneinrichtung | Ausgabe | 138.000 | 138.000 |
| Kranmiete Mai bis Juli | Ausgabe | 22.000 | 24.800 |
| Summe Topf | 1.200.000 | 1.004.300 |
Die Zeile "Decken EG bis 3. OG" ist noch nicht fertig: 620.000 EUR geplant, 415.000 EUR
tatsächlich abgerechnet. Die Karte zeigt für den ganzen Topf Verfügbar: 195.700 EUR. Das ist
kein Gewinn, sondern schlicht der Teil, der noch nicht abgerechnet ist.
Die Kranmiete liegt mit 24.800 EUR über den geplanten 22.000 EUR, weil eine Woche länger gemietet
wurde. An der Ausgabe hängt die Rechnung des Kranvermieters, die über den E-Mail-Konnektor ins
Projekt kam und über Vorhandene Dateien suchen angehängt wurde.
Was die Budget-Übersicht daraus macht
Projektbudget:2.400.000 EURGeplant:2.340.000 EUR, die Summe der vier TöpfeAusgegeben:1.451.800 EUR- Abzeichen:
AVAILABLEmit 60.000 EUR
Die 60.000 EUR sind die Differenz zwischen Projektbudget und Summe der geplanten Beträge. Es ist also nicht das, was noch auf dem Konto liegt, sondern das, was du noch verplanen darfst, ohne den Rahmen zu sprengen.
Ein Nachtrag kommt herein
Der Rohbauer meldet einen Nachtrag: Der Baugrund unter der Bodenplatte muss auf 400 Quadratmetern
ausgetauscht werden, Forderung 85.000 EUR. Du legst im Topf Rohbau eine direkte Ausgabe an:
Ausgaben-Name: Nachtrag N-014 BodenaustauschDatum: Datum des NachtragsschreibensGeplant:85.000,Ist:0Angehängte Dateien: das Nachtragsschreiben als PDF
Sofort ändert sich die Rechnung:
| Wert | Vorher | Nachher |
|---|---|---|
Topf Rohbau, geplant |
1.200.000 | 1.285.000 |
Geplant: gesamt |
2.340.000 | 2.425.000 |
| Abzeichen | AVAILABLE 60.000 |
OVERPLANNED +25.000 |
Das Abzeichen springt auf OVERPLANNED, obwohl noch kein Euro geflossen ist. Genau das ist der
Zweck: Du siehst die Überschreitung vor der Zusage, nicht nach der Rechnung.
Zwei Wochen später wird der Nachtrag auf 71.000 EUR verhandelt und beauftragt. Du änderst
Geplant: auf 71.000. Damit steht die Gesamtplanung bei 2.411.000 EUR, immer noch 11.000 EUR über
dem Rahmen. Kommt später die Rechnung, trägst du sie unter Ist: ein, und der Topf Rohbau
steigt beim Ist auf 1.075.300 EUR.
Was du an diesem Beispiel siehst
- Jede Zahl in der Übersicht ist eine Summe von Zeilen, die du einzeln nachvollziehen kannst.
- Kein Topf hat einen eigenen Deckel. Der Deckel ist das Projektbudget.
- Ein einzelner überschrittener Topf macht das Projekt nicht automatisch defizitär, solange andere Töpfe Luft haben. Umgekehrt kann das Projekt gefährdet sein, obwohl jeder Topf für sich passt.
- Plan-Beträge sind das Frühwarnsystem, Ist-Beträge die Dokumentation.
Was TensorPM nicht ist
TensorPM ist keine Buchhaltung. Es gibt keine Konten, keine Buchungssätze, keine Umsatzsteuer, keinen Kontenrahmen, keinen Jahresabschluss und keine GoBD-konforme Belegablage. Die Ausgaben in einem Topf sind Projektsteuerungsgrößen, keine Buchungen.
TensorPM ersetzt auch nicht die Kostenrechnung im ERP. Kostenstellen, Kostenträger, Auftragsabrechnung, Zahlungsläufe, Mahnwesen, Anlagenbuchhaltung und Rückstellungen bleiben dort, wo sie hingehören. Was in TensorPM steht, ist die Sicht des Projekts auf seine Kosten, in der Genauigkeit, die für Steuerung reicht.
Praktisch heißt das:
- Die Wahrheit über bezahlte Beträge steht in der Buchhaltung. Weicht TensorPM davon ab, hat die Buchhaltung recht.
- Trage in TensorPM Nettobeträge ein, es sei denn, ihr habt euch im Projekt bewusst anders geeinigt. TensorPM rechnet keine Steuer heraus.
- Erwarte keinen automatischen Abgleich mit dem ERP. Wenn eine Verbindung zu einem Vorsystem besteht, läuft sie über die üblichen Wege, siehe Konnektoren & Freigaben und Agent-Integrationen.
- Nutze die Genauigkeit, die zur Entscheidung passt. Ob eine Position 24.800 oder 24.812,47 EUR kostet, ändert an keiner Projektentscheidung etwas.
Das ist keine Einschränkung, sondern eine Arbeitsteilung. Die Buchhaltung sagt dir, was war. TensorPM sagt dir, was daraus für den Rest des Projekts folgt.
Schritt für Schritt: die erste Einrichtung
- Öffne
Kontext->Ressourcenund trage das Projektbudget ein. Eine grobe Zahl reicht. - Öffne
Personenund lege die fünf bis zehn wichtigsten Beteiligten an. Achte auf E-Mail und Organisation. Du erkennst den Erfolg daran, dass für jede Person eine Karte erscheint. - Öffne
Einstellungen->Allgemein->Kommunikations-Toolsund schalte die Messenger frei, die ihr wirklich nutzt. Prüfe danach mit einem Rechtsklick auf eine Personenkarte, ob die Einträge erscheinen. - Öffne
Budgetund lege überNeuer Topfdeine Kostengruppen an. Fünf bis zehn genügen. - Weise über
Zuweisendie Aufgaben zu, die Kosten tragen. - Erfasse über
Hinzufügendie Ausgaben, die keine Aufgabe haben, und hänge die Belege an. - Prüfe die Karte
Budget-Übersicht. Steht dort ein Abzeichen und eine plausible Summe, ist die Einrichtung fertig.
Danach reicht eine kurze Runde pro Woche: neue Rechnungen als Ist nachtragen, neue Forderungen als Plan anlegen, das Abzeichen prüfen.
Was im Hintergrund passiert
Alle Beträge werden in der Speicher-Währung abgelegt und erst beim Anzeigen in die Anzeige-Währung umgerechnet. Deshalb ändert ein Wechsel der Anzeige-Währung nichts an den Daten, ein Wechsel der Speicher-Währung dagegen alles.
Topf-Summen sind nirgends gespeichert. TensorPM rechnet sie bei jedem Öffnen neu aus den zugewiesenen Aufgaben und den Ausgaben im Topf. Deshalb ist eine Summe nie veraltet, und deshalb gibt es auch kein Feld, in das du eine Summe direkt eintragen könntest.
Plan- und Ist-Beträge einer Aufgabe liegen getrennt von der Aufgabe selbst. Löschst du eine Aufgabe, verschwinden ihre Beträge mit. Entfernst du sie nur aus einem Topf, bleiben Aufgabe und Beträge erhalten und zählen nur in diesem Topf nicht mehr mit.
Personen und Budgetdaten gehören zum Projekt und werden in einem Cloud-Workspace mitsynchronisiert und dabei Ende-zu-Ende verschlüsselt. Profilbilder externer Personen liegen als Datei auf dem Gerät. Mehr dazu unter Verschlüsselung.
Häufige Fragen
Kann ich einem Topf ein eigenes Limit geben? Nein. Ein Topf hat keinen eigenen Deckel. Sein Plan ist die Summe der geplanten Beträge darin. Wenn du ein Limit abbilden willst, lege eine geplante Ausgabe in dieser Höhe an und buche die tatsächlichen Kosten dagegen.
Warum steht in der Übersicht OVERSPENT statt eines deutschen Worts?
Diese drei Abzeichen sind im Programm fest auf Englisch hinterlegt. Sie bedeuten: mehr ausgegeben
als budgetiert, mehr verplant als budgetiert, noch Spielraum vorhanden.
Kann eine Aufgabe in zwei Töpfen liegen? Ordne jede Aufgabe genau einem Topf zu. Doppelte Zuordnung würde denselben Betrag zweimal in die Gesamtsumme rechnen.
Ich sehe keine Gruppe Währung in den Einstellungen.
Diese Gruppe erscheint nur, wenn ein Projekt geöffnet ist, weil die Anzeige-Währung je Projekt gilt.
Kann der Projektagent Töpfe und Ausgaben selbst anlegen?
Ja, er kann Töpfe anlegen, umbenennen, löschen und Ausgaben erfassen. Was er tut, siehst du danach
unter Verlauf -> Änderungen.
Werden Ausgaben automatisch aus Rechnungen erzeugt? Nein. Eingehende Rechnungen landen als Signal und als Datei im Projekt, und der Distiller kann daraus eine Änderung vorschlagen. Der Betrag wird aber nicht ungefragt gebucht.
Was ist der Unterschied zwischen Budget und Material?
Budget verwaltet Geld in Töpfen. Material verwaltet Positionen mit Lieferant und
Beschaffungsstatus. Siehe Material & Beschaffung.
Kann ich Personen aus einer Datei importieren? Es gibt einen Export, aber keinen CSV-Import. Der schnellste Weg zu vielen Personen führt über die Projektanlage aus Dokumenten oder über den Chat.
Was passiert mit einer Person, die das Projekt verlässt? Lösche sie nicht, wenn sie noch in Zuweisungen oder in der Historie vorkommt. Setze stattdessen ein Label, zum Beispiel "ausgeschieden", und filtere danach.
Wenn etwas nicht klappt
Ein Beteiligter erscheint nicht in der Auswahl Zugewiesen an.
Die Auswahl kennt nur Personen, die in Personen angelegt sind. Lege die Person an und öffne die
Aufgabe erneut.
Teams-Chat oder WhatsApp fehlen im Kontextmenü.
Zwei Ursachen. Entweder ist der Schalter unter Einstellungen -> Allgemein ->
Kommunikations-Tools aus, oder die Person hat keine E-Mail-Adresse beziehungsweise keine
Telefonnummer. Teams und Slack brauchen die Adresse, WhatsApp und Signal die Nummer.
In Workspace einladen bleibt wirkungslos.
Der Eintrag braucht einen Cloud-Workspace und eine E-Mail-Adresse an der Person. In einem lokalen
Workspace gibt es niemanden, den man einladen könnte.
Die Liste ist leer, obwohl Personen angelegt sind.
Es ist ein Filter aktiv. Öffne Filter & Sortierung und wähle Alle zurücksetzen. Prüfe auch das
Suchfeld.
Die Budget-Übersicht zeigt Nicht gesetzt.
Es ist kein Projektbudget hinterlegt. Trage es unter Kontext -> Ressourcen ein.
Ein Topf zeigt keine Summe, obwohl Aufgaben zugewiesen sind.
Die Aufgaben haben kein Planbudget und kein Ist-Budget. Die Zuweisung allein bringt keine Zahl
mit. Trage die Beträge in Aufgaben nach.
Die Beträge sehen nach einer Einstellungsänderung falsch aus.
Prüfe zuerst, ob nur die Anzeige-Währung gewechselt wurde. Dann sind die Zahlen korrekt, nur in
einer anderen Währung dargestellt. Wurde dagegen die Speicher-Währung gewechselt, wurden alle
Daten umgerechnet. Das lässt sich nur über ein Backup zurückholen, siehe
Einstellungen & Backups.
Wechselkurse aktualisieren ist ausgegraut.
Der Button funktioniert erst, wenn Wechselkurse automatisch aktualisieren eingeschaltet ist. Die
App weist mit einem Hinweis darauf hin.
Der Kursabruf schlägt fehl. TensorPM meldet, dass die Kurse nicht aktualisiert werden konnten und die vorhandenen behalten wurden. Es gehen keine Daten verloren. Prüfe die Internetverbindung und versuche es später erneut.
Der Reiter Budget unter Projekt-Insights zeigt nichts.
Es fehlen Aufgaben mit Budgetangaben, oder das Projekt ist zu jung für einen Verlauf. Der Hinweis
lautet Keine Budgetdaten.
Nächste Schritte
- Arbeit zuweisen und Beträge je Aufgabe pflegen: Aufgaben
- Kosten und Aufwand auf Paketebene zusammenführen: Arbeitspakete
- Positionen mit Lieferant und Beschaffungsstatus: Material & Beschaffung
- Rechnungen und Belege ins Projekt holen: Konnektoren & Freigaben
- Belege wiederfinden und Änderungen nachvollziehen: Dateien, Eingang & Verlauf
- Währung, Kommunikations-Tools und Backups einstellen: Einstellungen & Backups
- Beteiligte in einen gemeinsamen Workspace holen: Workspaces