
Workspaces & teams
In short
A workspace is a container for projects. Every project lives in exactly one workspace. A workspace has its own folder on disk, its own project list and, once it is a cloud workspace, its own members.
On first start TensorPM creates a local workspace called Local for you. If you work alone and
everything should stay on one computer, you never need a second one.
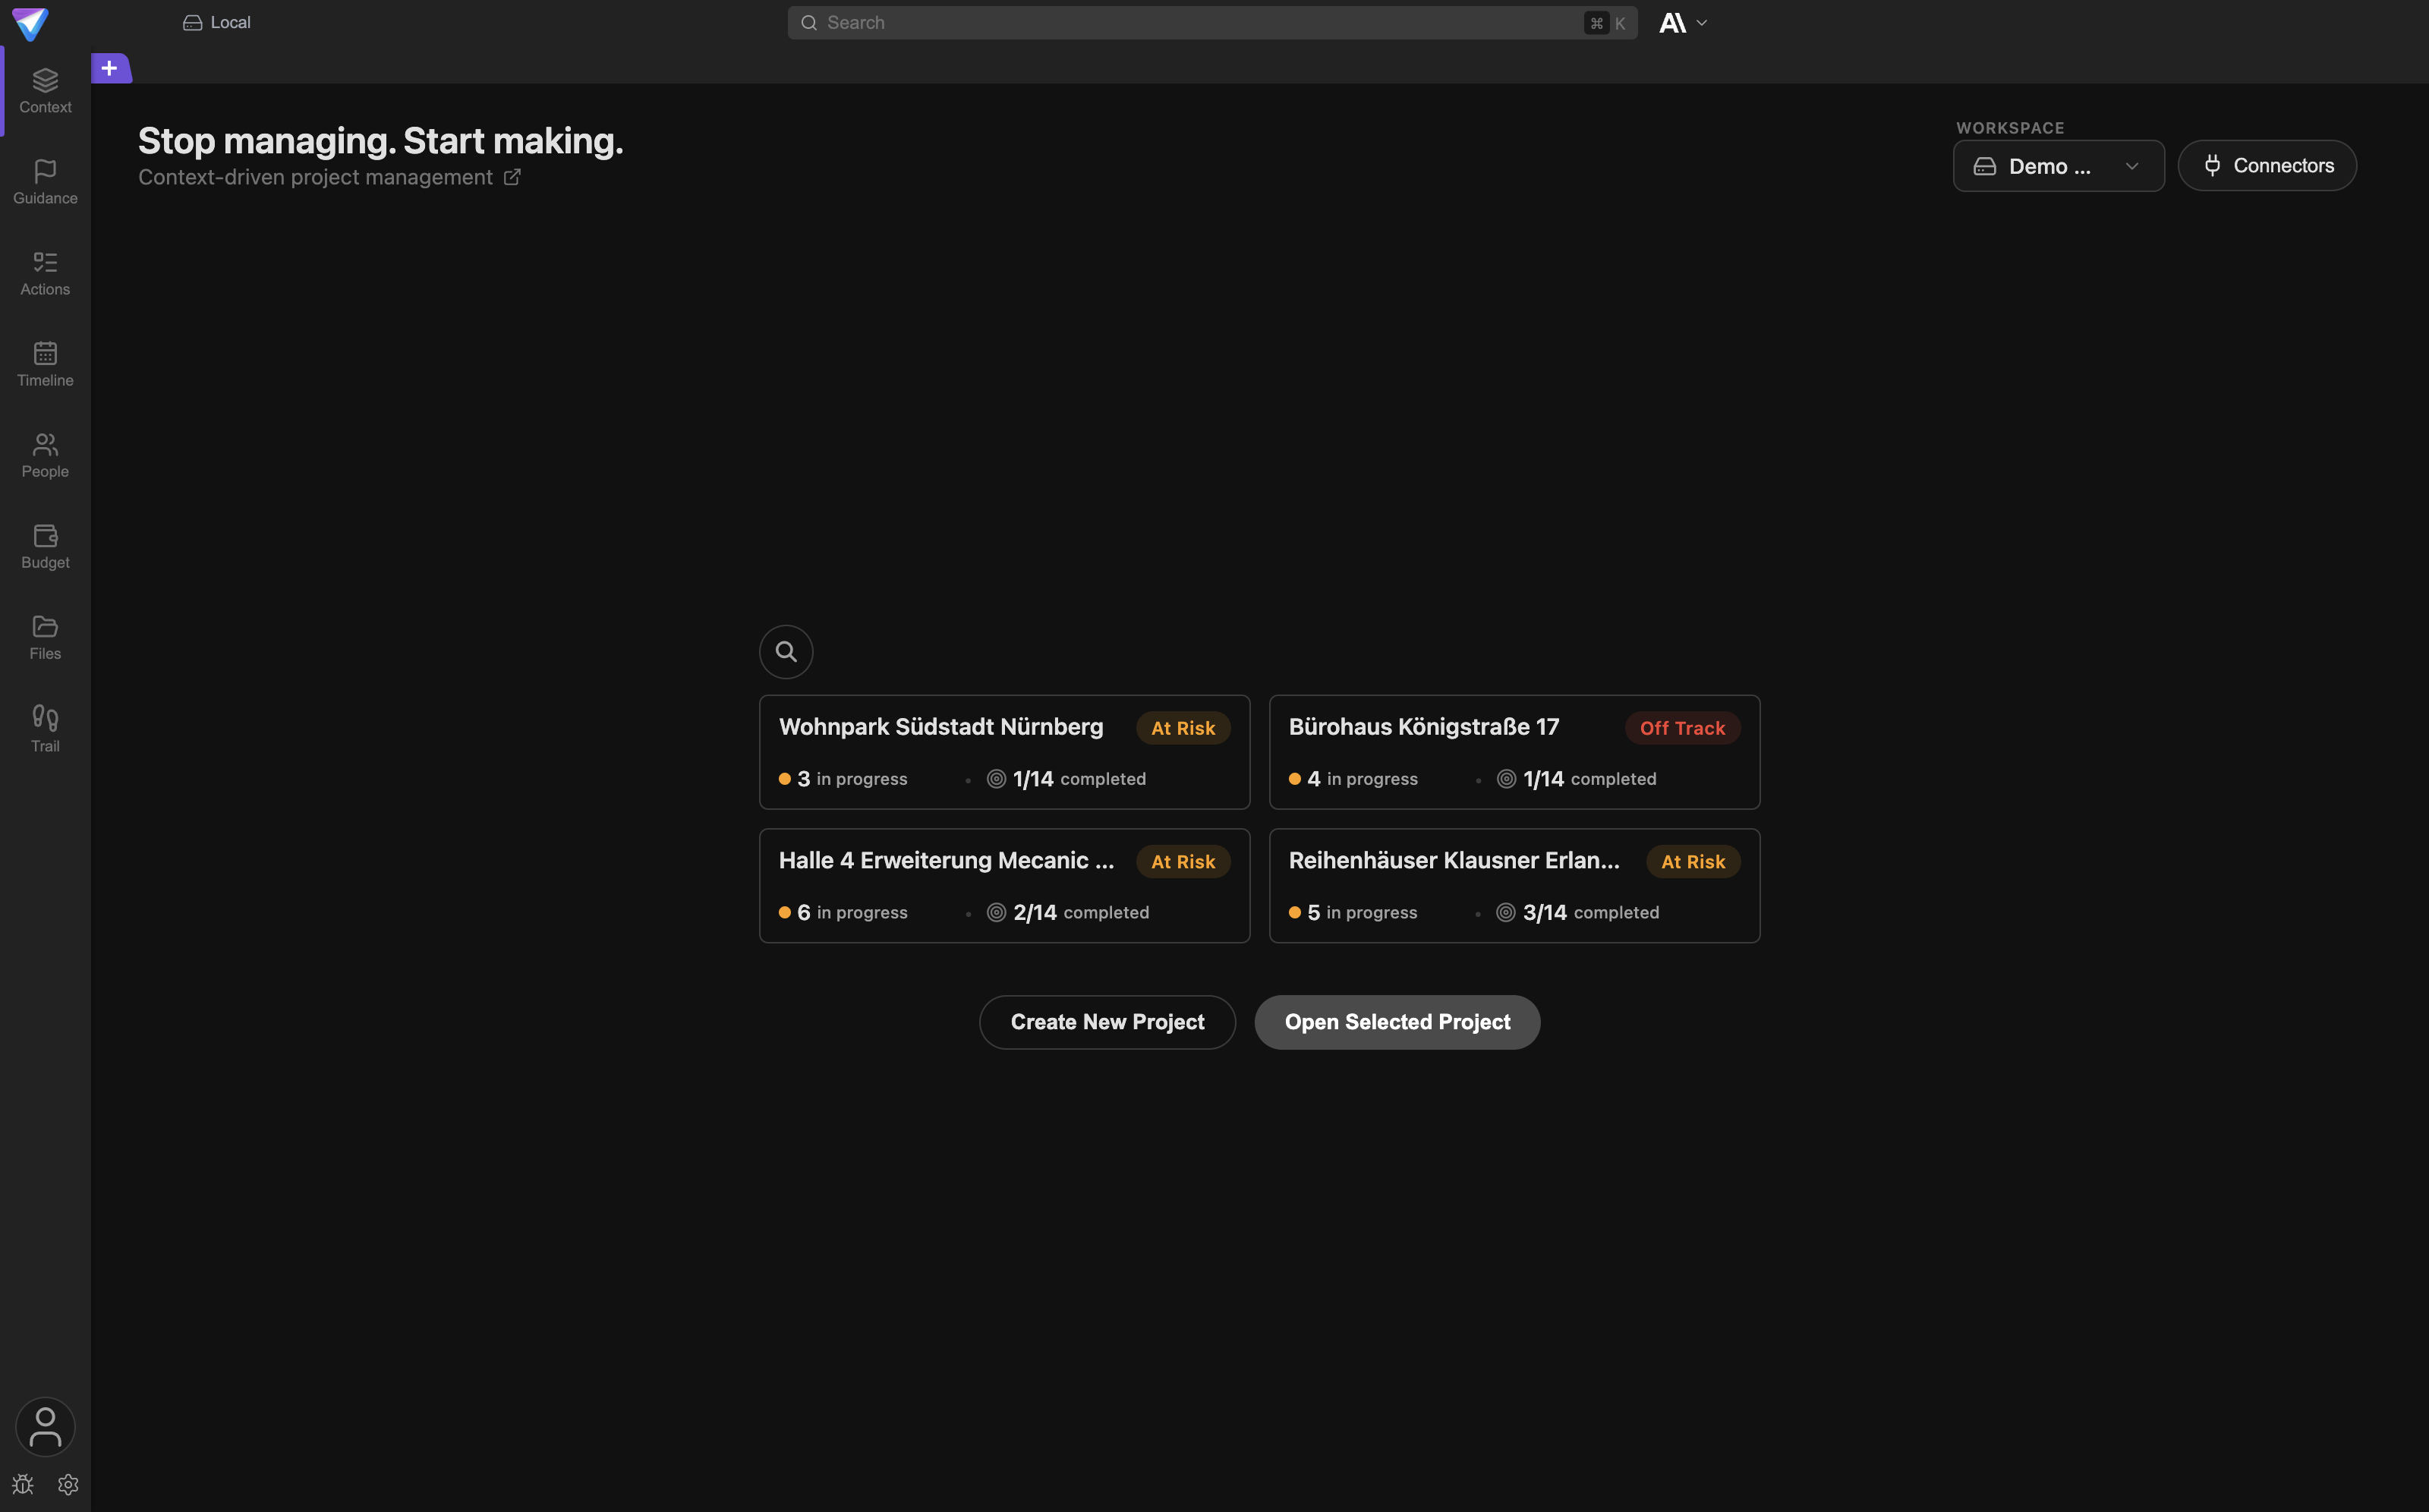
The workspace picker sits in two places: at the top right of the project start screen, and at the
bottom left in the account popover under Workspaces. There is no workspace switcher in the app
header. What you see next to the logo up there is the sync status, for example Local or Live.
When you need more than one workspace
A workspace is an access boundary first and a folder second. One question decides it: should the same people be allowed to see every project inside?
One workspace is enough
- You work alone and every project is yours.
- You work with the same fixed team on all projects.
- You are still trying TensorPM out.
In those cases stay with the built-in Local workspace or with a single cloud workspace. Every
extra workspace costs you attention when switching.
More than one workspace pays off
- You serve several clients and client A must never see projects of client B.
- You have internal projects nobody outside your department should see.
- You want practice projects and experiments kept away from real work.
- Part of your projects should sync and another part deliberately should not. Then keep one cloud workspace and one local workspace side by side.
Do not create a workspace per project. That is what projects are for.
Local workspace and cloud workspace
There are exactly two types. When creating one you choose between Local and Cloud.
What both have in common
Both store locally on your computer first. Both work without internet. Both have a folder on disk that holds the project files. The difference is only whether the project data is additionally encrypted and carried across to your other devices and your team members.
What only a cloud workspace does
- Access from a second computer with the same account.
- Invite members and give them access to every project in the workspace.
- Link people in the
Peopleview to real accounts. - Make connector signals visible to the whole workspace instead of only to you (the setting
Input visibilitywith the valueWorkspace input).
A local workspace does none of that. It carries the badge Local in the list.
What a cloud workspace requires
- You are signed in with your TensorPM account.
- You are still within the workspace allowance. Unpaid accounts may own several workspaces of
their own under a fair-use ceiling,
ProandBusinessown as many as they like. Once that ceiling is hit, creating another one is refused withWORKSPACE_LIMIT_REACHED. - Your operating system provides secure key storage. On Linux that is the
Keyring, meaning GNOME Keyring or KDE Wallet. Without it TensorPM cannot store the encryption key and shows the badgeSync unavailableon the workspace.
Important: Cloud Sync itself is included on every plan,
Trialas well. Unpaid accounts can own several workspaces of their own under a fair-use ceiling; paid plans lift it entirely. Being a member of somebody else's workspace is free and unlimited on top of that.
Where to find workspaces
On the project start screen
Close all projects or open an empty tab. At the top right you see the label Workspace and below it
a picker with the name of the active workspace. An icon shows the type: a hard drive for Local, a
cloud for Cloud. Click the picker to switch. The Connectors button sits right next to it.
In the account popover under Workspaces
Click Account at the bottom left of the sidebar when you are signed in, or Login when you are
not. A popover opens. At its bottom sits the entry Workspaces. It leads to the full management
view: create, rename, switch the type, manage projects, delete.
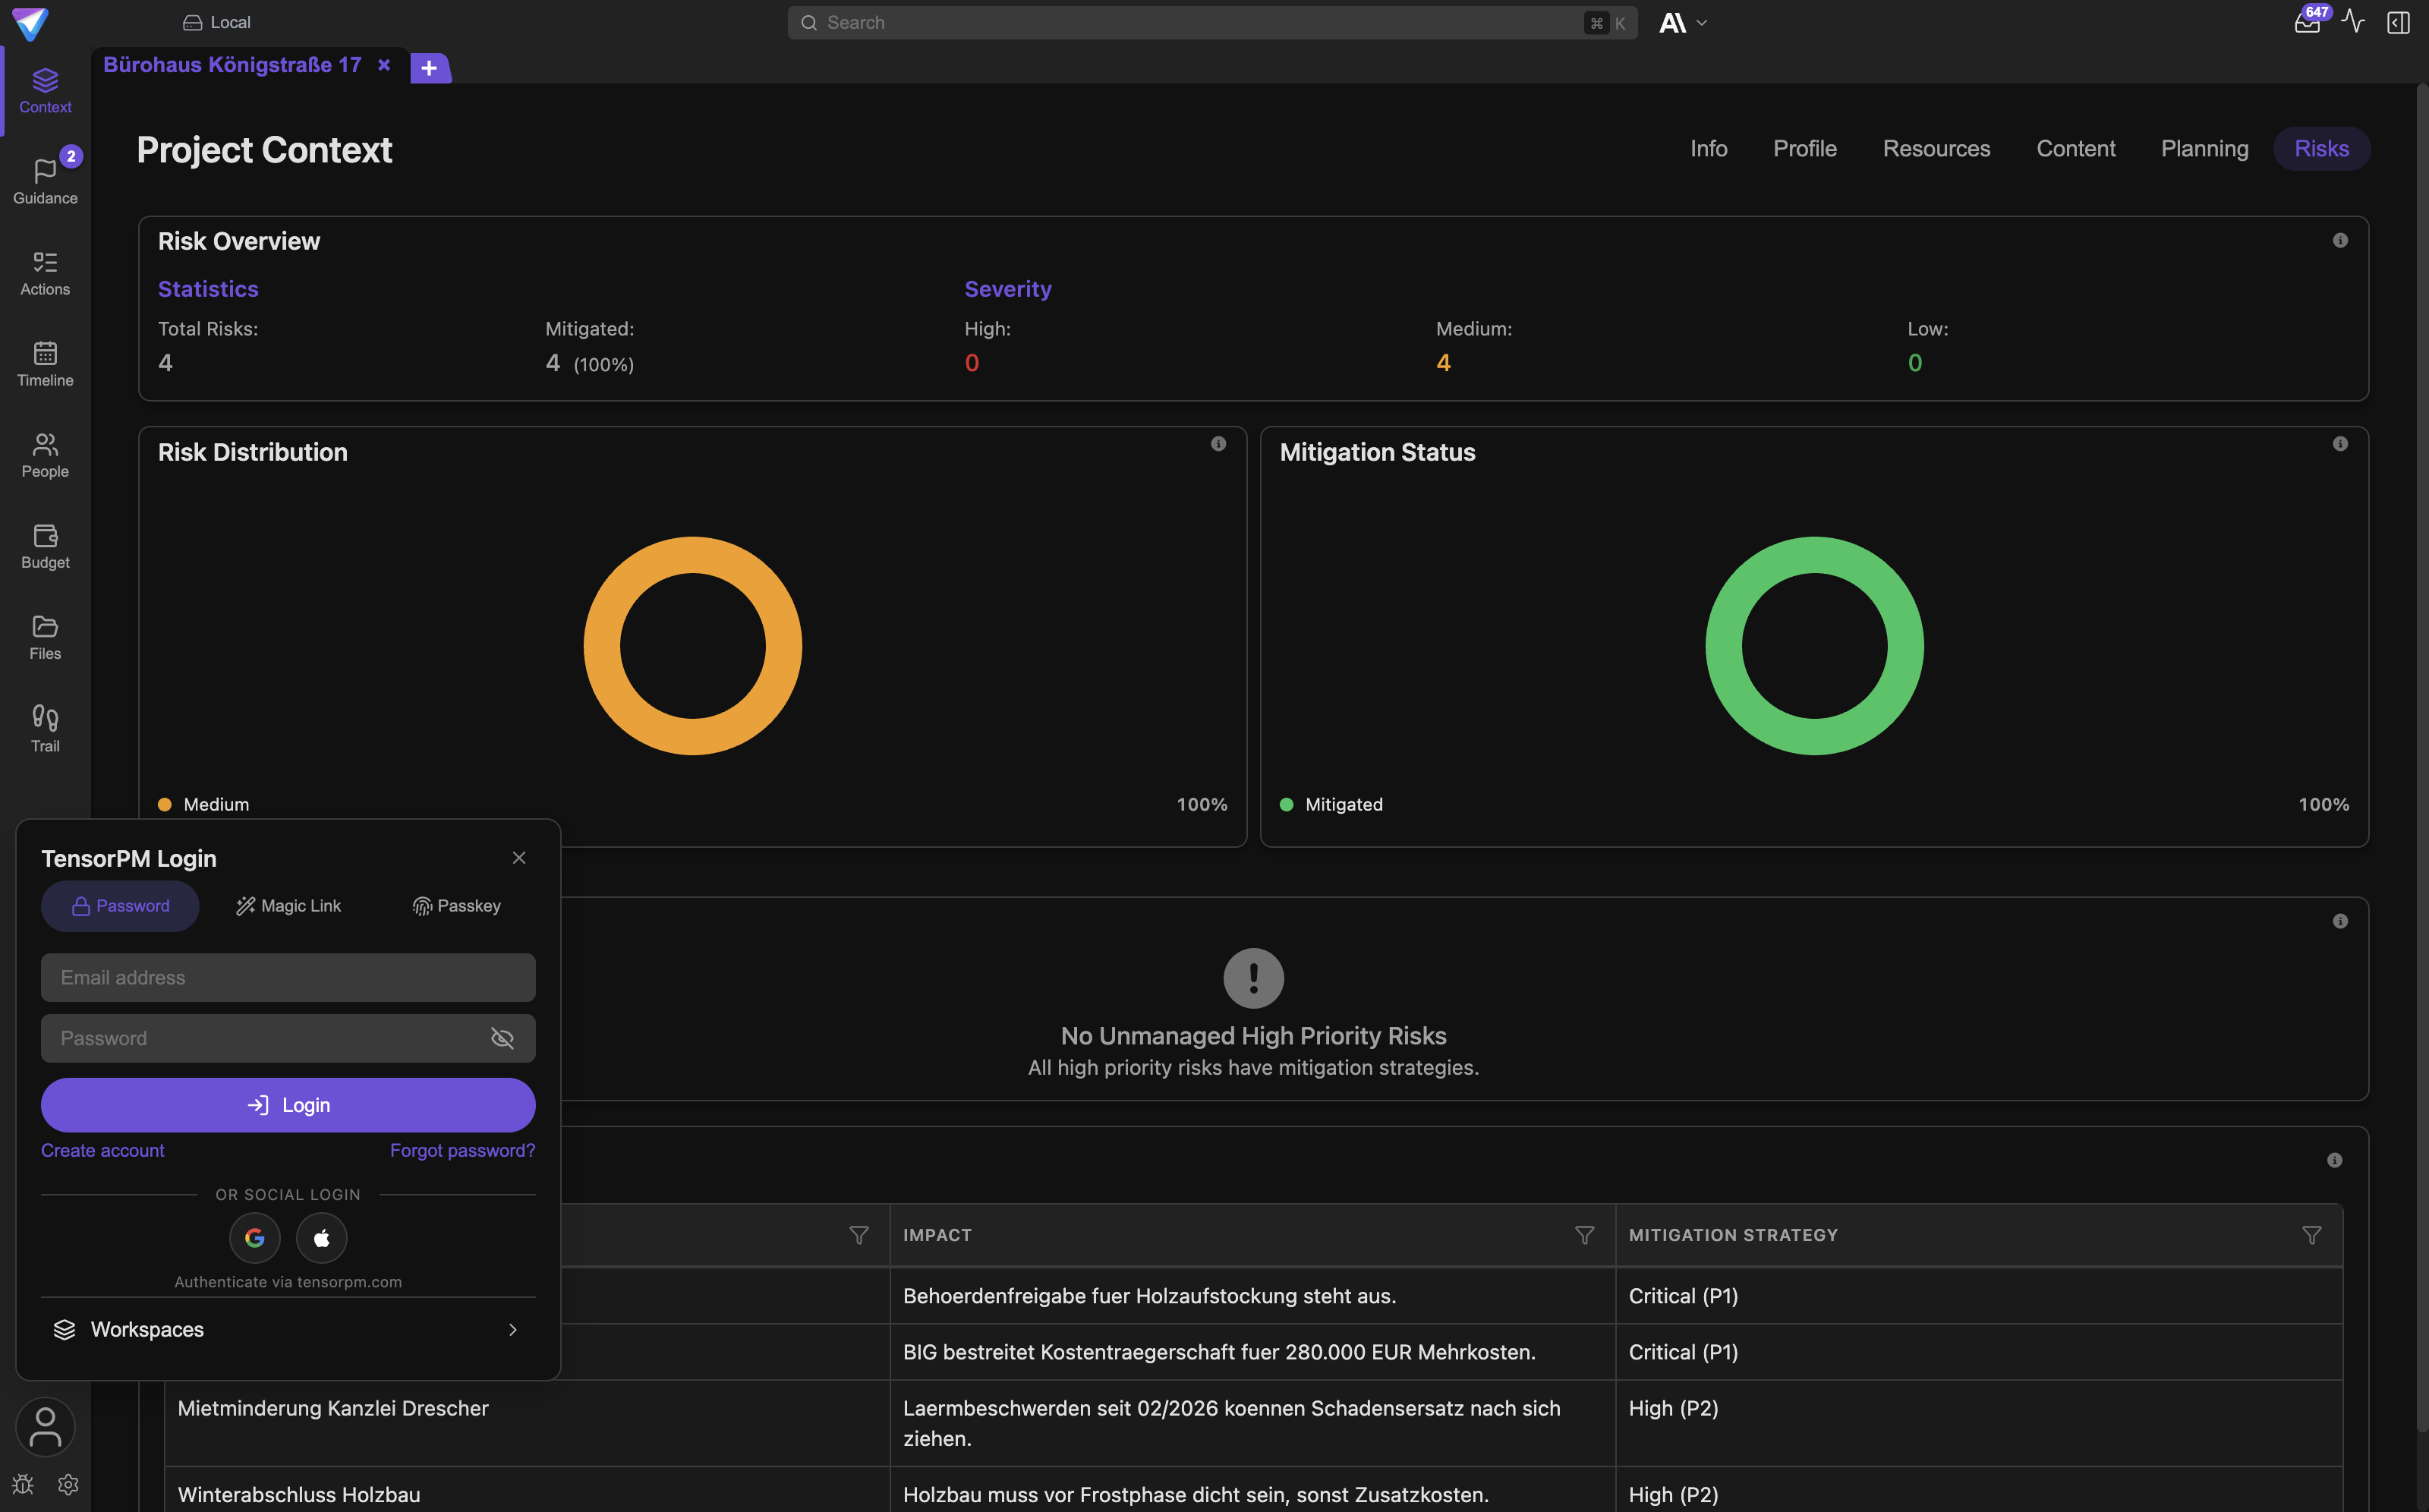
This management view deliberately does not live in Settings. The settings drawer only has the
three tabs General, AI and Info.
Create a workspace
- Open
Account->Workspaces. - Click
Workspaceat the top right. A small form opens. - Enter a name. Pick something you will still recognise in a year, for example the client name.
- Choose
LocalorCloud. - For
Cloudyou can add a description. It is optional and helps team members place the workspace. - Click
Create.
The new workspace becomes the active one immediately. All open projects close, because they belong to the previous workspace. That is expected and costs you no data.
Turn a local workspace into a cloud workspace
You can convert an existing local workspace later. The projects inside are kept and come along.
- Open
Account->Workspaces. - Hover the workspace. Several small icons appear on the right.
- Click the cloud icon with the tooltip
Enable Cloud Sync. - The dialog
Enable Cloud Syncopens. It explains the zero-knowledge architecture: your data is encrypted on this device before upload, only you and your team members can decrypt it, and TensorPM servers never see your unencrypted data. - Confirm with
Enable Cloud Sync.
After that the workspace first shows E2E Setup... and then E2E Ready. Only with E2E Ready does
the transfer actually run.
The reverse route does not exist: a cloud workspace never becomes local again. If you need that, create a new local workspace and move the projects there.
What happens when you switch the active workspace
Switching is not a move. Only what you are looking at changes.
- The project list on the start screen now shows the projects of the new workspace only.
- All open project tabs close. That prevents data from two workspaces sitting open side by side.
- For a cloud workspace, synchronization restarts and connects to this workspace. The sync status at
the top left changes accordingly, for example from
LocaltoLive. - The projects of the previous workspace stay untouched. They are simply out of sight until you switch back.
Check the workspace before you create a project. A project is always created in the currently active workspace. Moving it afterwards works but costs an extra step.
Members
Membership exists in cloud workspaces only. A local workspace has no members.
Do not confuse members with the People view. People describes the stakeholders of a project:
client, structural engineer, subcontractor. Those people need no TensorPM account. Membership, in
contrast, gives a real TensorPM account access to every project in the workspace.
There are three roles: Owner, Admin and Member. Whoever creates the workspace is Owner.
Who may invite
Only Owner and Admin can invite. A Member cannot.
Members are free and unlimited on every plan. There is no allowance to run out of, no cap on how
many people a workspace may have, and nothing to buy per head. TensorPM is billed by active projects, not by head count, and a Trial owner can
invite just as many people as a Business owner.
What the workspace owner does pay for is AI usage: every AI request made inside a workspace is charged to that workspace owner's credit budget, on every plan.
Invite from inside the app
If the person is already listed as a stakeholder, this is the fastest way:
- Open the
Peopleview. - Right-click the person card.
- Choose
Invite to Workspace.
The entry only appears when the person has an email address on file and is not yet linked to an
account. Once the invitation is out, the app reports Invitation sent to …. The invited person
receives an email.
The invitation always targets the currently active workspace. If that one is local, it fails.
Invite from your account on tensorpm.com
The full route, including the role choice, lives in the web account, not in the app:
- Open
https://tensorpm.comand sign in. - Go to the account area and open the
Workspacestab. - Select the workspace.
- Enter the email address and pick the role
AdminorMember. - Send the invitation.
That page also shows the member list and open invitations.
An invitation is valid for seven days. After that you have to send it again.
What an invited Trial user may do
Accepting an invitation is free and costs the owner nothing. From then on:
- They see the workspace projects and work in them.
- Their changes sync like those of any other member.
- They stay on the
Trialplan, and their model choice follows their own plan. - AI requests they make inside this workspace are charged to the workspace owner's credit budget, not to their own.
- They can still own cloud workspaces of their own.
- They cannot add their own AI keys, because that is reserved for
Business.
Remove somebody again
Removal happens in the web account on tensorpm.com, tab Workspaces, member list. Each member has a
change-role and a remove action there, and invitations that have not been accepted yet can be
withdrawn.
What follows:
- The person loses access to the workspace. Their app shows the sync status
No accessorAccess revokedfor it. - Project data already downloaded stays on that person's computer. New changes no longer reach them, and their own changes no longer reach you. Where confidential content is involved, removal is therefore no substitute for a conversation.
You cannot leave a workspace on your own from inside the app. Ask the Owner to remove you.
Project limits per plan
Every plan caps how many projects may be active at the same time.
| Plan | Active projects | Applies to |
|---|---|---|
Trial |
1 active project, unlimited archived | projects in your cloud workspace |
Pro |
1 active project, unlimited archived | projects in your cloud workspaces |
Business |
per level, by default 10 (S), 25 (M) or 50 (L) | projects in the owner's cloud workspaces |
What gets counted
Counted are active projects in the cloud workspaces you own. Archived projects do not count, and their number is not capped. Projects in purely local workspaces do not count either.
The project start screen shows a badge in the form 1 of 1 active projects. Its tooltip reads
Active projects across your Cloud Workspaces, counted against your plan limit.
What happens when the limit is reached
The limit is enforced on the server, not only in the interface. You cannot get around it by working offline. Two messages exist:
Project limit reached (… of … active projects). Archive a project or upgrade your plan. The change is rolled back.Project limit reached. Your project was moved to a local workspace with all of its content.This happens when a new project no longer fits into the cloud workspace. Nothing is lost, the project simply sits locally afterwards and stops syncing. Once you free up room you can move it back.
Archive projects
Archiving is the usual way to free up room again.
- Go to the project start screen.
- Hover the project card and click
Archive project. - Confirm in the
Archive Projectdialog.
The dialog promises what it delivers: the project stays fully preserved and searchable, but becomes
read-only. It moves into the Archive section below the project list. Reactivate project brings
it back, provided a slot is free again by then. Archived projects also stop running check-ins.
Move projects between workspaces
Move a project when its client, team or access boundary changes.
- Open
Account->Workspaces. - On the source workspace click the folder icon with the tooltip
Manage projects. TheManage Projectswindow opens. - Tick the projects that should move.
- Under
Actionspick the destination in theSelect target workspace...field. The list shows the type after each name, so(Local)or(Cloud). - Click
Moveand confirm.
Check three things first:
- Moving into a cloud workspace: do you still have room in your project limit?
- Moving into a different cloud workspace: who is a member there? Every member of the target workspace will see the project afterwards.
- Moving out of a cloud workspace into a local one: the other members lose access. Tell them beforehand.
Rename, leave, delete
Rename
- Open
Account->Workspaces. - Click the pencil icon with the tooltip
Rename workspace. - Change the name. On cloud workspaces you can also adjust the
Description. - Confirm with the check mark.
Renaming is harmless. It only changes the label. Projects, files and memberships stay untouched. On a cloud workspace the action needs an internet connection, because the name changes on the server too.
Leave a workspace
If you are a member of somebody else's cloud workspace, the app has no leave button. Ask the Owner
to remove you from the member list in their web account. The workspace then disappears from your
picker.
Delete an empty workspace
- Switch to another workspace first. The active workspace cannot be deleted. The bin icon is greyed
out then and the tooltip reads
Cannot delete active workspace. - Make sure no projects are left inside. Move or delete them first via
Manage projects. As long as projects remain, TensorPM refuses to delete. - Click the bin icon with the tooltip
Delete workspace. - Confirm in the
Delete Workspacedialog.
Because the workspace is empty at that point, no project data is lost.
Delete a workspace including its projects
There is a second route that removes everything at once.
- Switch to another workspace.
- Open
Manage projectson the workspace in question. - Expand the
Advancedsection. - Tick
Delete workspace "…" and all … projects. - Click
Delete Workspace & All Projectsand confirm.
Important: This is the one dangerous action in this article. It deletes the projects together with their files on disk and cannot be undone. On a cloud workspace the workspace is also removed from the server, and every member loses it. Create a backup first:
Settings->General->Database Backup->Create Backup. Remember that a database backup does not cover the project folder on disk. Copy that folder as well if the files inside matter to you.
When in doubt, archive the projects instead of deleting the workspace. Archiving is reversible, deleting is not.
What happens behind the scenes
TensorPM is local-first. All project data lives in a database on your computer, cloud workspace or not. The cloud copy is a copy, not the original.
For a cloud workspace, TensorPM encrypts the data on your device before uploading it. The key stays
with you and is stored through your operating system's Keyring. New members receive the key from a
device that already has it. That is why a workspace can briefly show E2E Pending with the tooltip
Waiting for a team member to share E2E access. It resolves as soon as another member opens the app
once.
Only workspace-level information travels to the server: name, description, memberships and billing data, plus the encrypted project content. Creating, renaming and deleting a cloud workspace therefore need a connection. Working inside a project does not.
Common questions
A project has vanished. Where is it?
Almost always the wrong workspace is active. Check the picker at the top right of the project start
screen. Also look into the Archive section below the project list.
Can a project live in two workspaces? No. A project belongs to exactly one workspace.
Does an archived project count against my limit? No. Only active projects count, and only those in your cloud workspaces.
Do I have to buy something extra per team member?
No. Members are free and unlimited on every plan, Trial included. Nothing is sold per head.
Does my team member need their own plan?
No. A Trial account is enough to work in your cloud workspace after accepting an invitation.
Can TensorPM read my project content in the cloud? No. Content is encrypted on your device. On the server it is unreadable.
Can I turn a cloud workspace back into a local one? Not directly. Create a new local workspace and move the projects there.
What is the workspace I never created?
Local. TensorPM creates it on first start so your projects have a home from the beginning.
If something does not work
Creating another cloud workspace is refused.
You are not signed in, or you have used up how many cloud workspaces your plan lets you own
(Trial owns one, Pro and Business unlimited). The server answers with
WORKSPACE_LIMIT_REACHED. Sign in, reuse an existing workspace, or move to Pro.
The workspace shows Sync unavailable.
Hover it, the tooltip names the reason. Common ones are Sign in to sync,
Workspace access revoked, or missing secure key storage. On
Linux the hint is Install and unlock GNOME Keyring or KDE Wallet to enable Cloud Sync.
The workspace stays on E2E Pending.
The key exchange is missing. Ask a member who already uses the workspace to open the app once and
stay online. If you are the only member, check whether your second device is signed in.
The colleague you invited sees nothing. Check in this order:
- Was the invitation accepted at all? Open invitations appear in the app under
Account->Workspacesin thePending Invitationssection with anAcceptbutton. - Is the invitation older than seven days? Then it has expired. Send it again.
- Is the person signed in with exactly the invited email address?
- Did they switch to the right workspace in the picker on the start screen?
- Does their sync status show something actionable, such as
No networkorLog in?
The bin icon on the workspace is greyed out. That workspace is currently active. Switch to another one and try again.
Deleting reports that the workspace still contains projects.
That is by design. A workspace with projects is not deleted silently. Move or delete the projects via
Manage projects, or take the deliberate route through Advanced.
After creating a workspace all project tabs are closed. That is intended. The new workspace becomes active immediately, and projects from the old workspace do not belong there. Switch back and they are all still present.
Next steps
- Understand synchronization in detail: Cloud Sync
- Encryption and key recovery: Encryption & Security
- Plans, credits and AI modes: Account & AI Modes
- Maintain stakeholders and contacts: People & Budget
- Create a backup before deleting anything: Settings & Backups