
Navigation & Views
In short
TensorPM shows one project through several views. You are not creating separate copies of the plan: Context, Pulse, Actions, Timeline, People, Budget, Files, and Trail all work with the same project data. This article is the map. It explains what each area of the window is for, what sits behind every entry in the left navigation, and which click or keyboard shortcut gets you there.
If another article mentions a view and you cannot find it, look it up here.
When you need this
- You have just installed TensorPM and want to know what you are looking at.
- A colleague describes a view and you cannot locate it.
- You work on several projects and want to jump between them quickly.
- You are looking for an action, a person, or a file and no longer remember where it lives.
- You want the interface lighter, darker, narrower, or in a different language.
The screen, zone by zone
The window always has the same layout. There are six zones. Once you know these six, everything else follows.
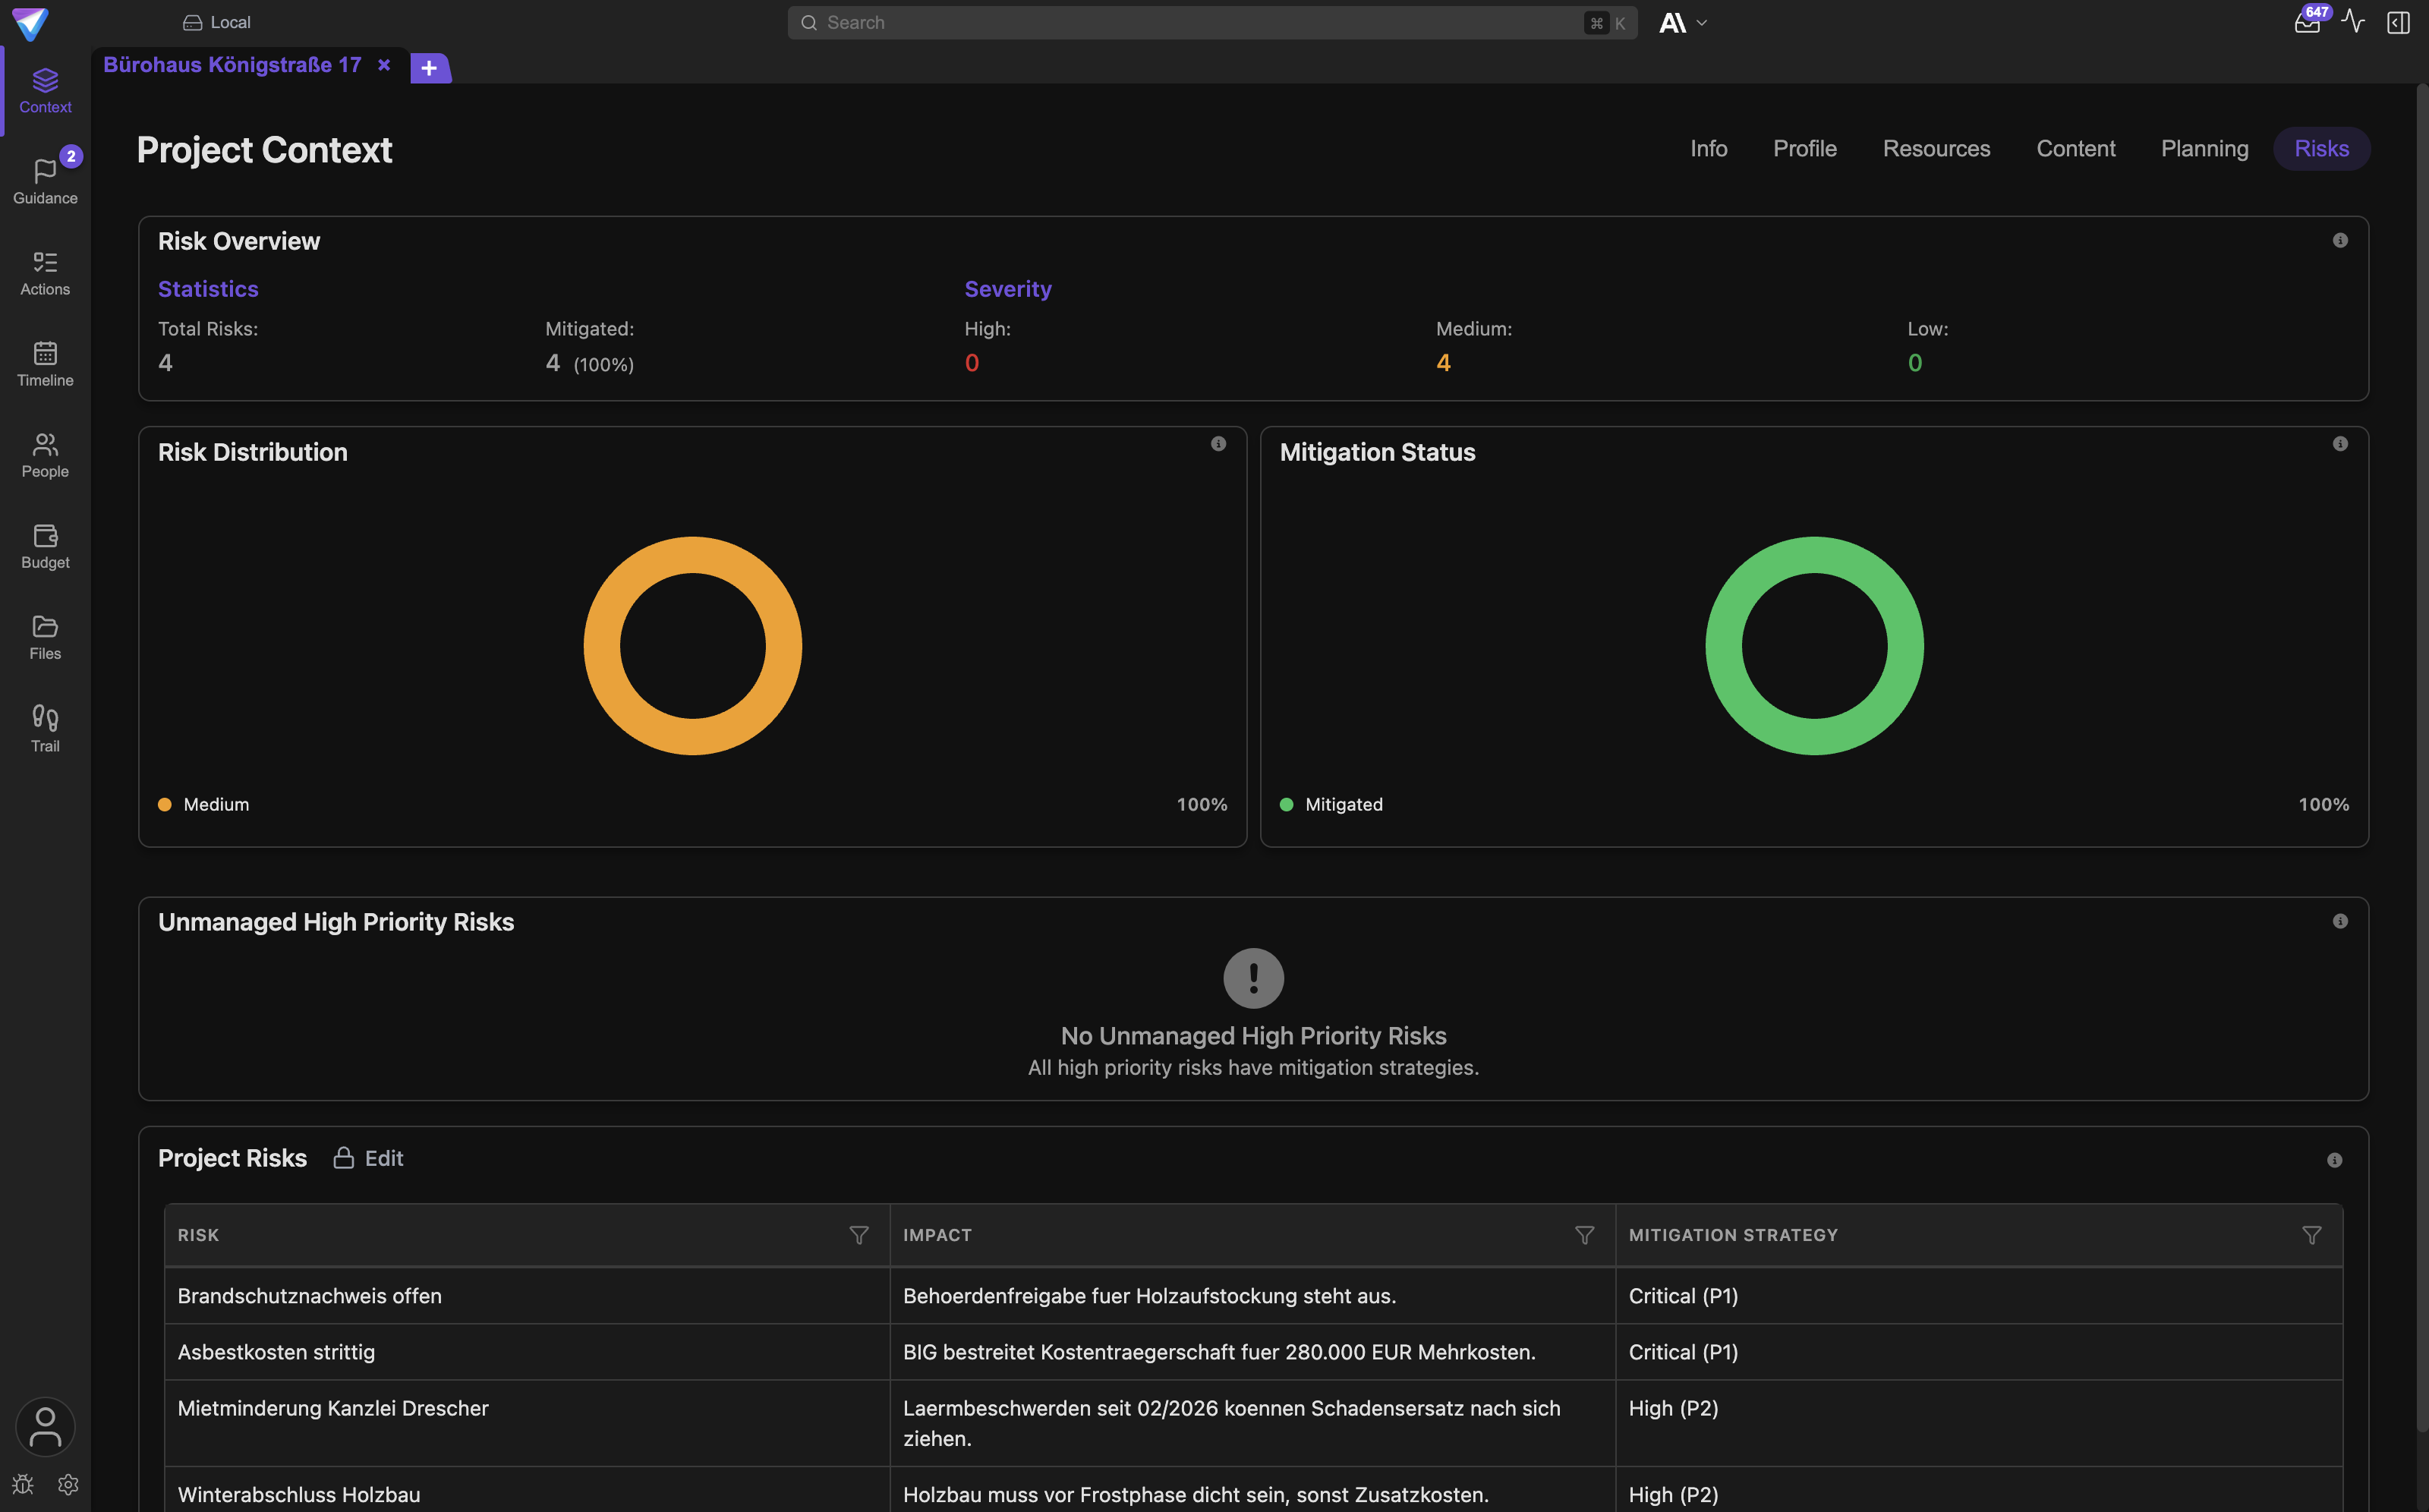
All six zones at a glance. The middle changes, the frame stays.
Zone 1: the header bar at the top
From left to right you will find:
- the TensorPM logo
- the subscription badge showing your plan (
Trial,Pro, orBusiness) - the sync status, meaning whether this project is local only or being synced with the cloud
(
Live,Local,Offline, and other values) - the
Searchfield - the model selector, meaning the AI model the project agent uses
- small indicators for a running timer, for incoming signals (the mailbox icon), and for AI activity history
- on the far right the toggle
Show AI PanelorHide AI Panel
Important: The header bar contains no workspace switcher. Earlier versions of this documentation claimed otherwise. Where the switch actually lives is explained below in the section "Where you switch workspaces".
Zone 2: the project tabs
Directly below the header bar sits a row of tabs, one per open project. Each tab shows the project
name, a small archive icon for archived projects, and an × on the right to close it. At the far
right there is a + tab with the tooltip Add new project.
Zone 3: the left navigation
The narrow rail on the left edge switches the view in the main area. It is greyed out while no project is open or while the project wizard is running. Every entry has a tooltip that appears when you hover over it.
Zone 4: the main area
The large surface in the middle. It shows exactly what you picked on the left. Almost every view has its own toolbar on top with sub-tabs, filters, and view modes.
Zone 5: the project agent panel
The chat with the project agent. By default it sits to the right of the main area, and you open or close it with the toggle at the far right of the header bar.
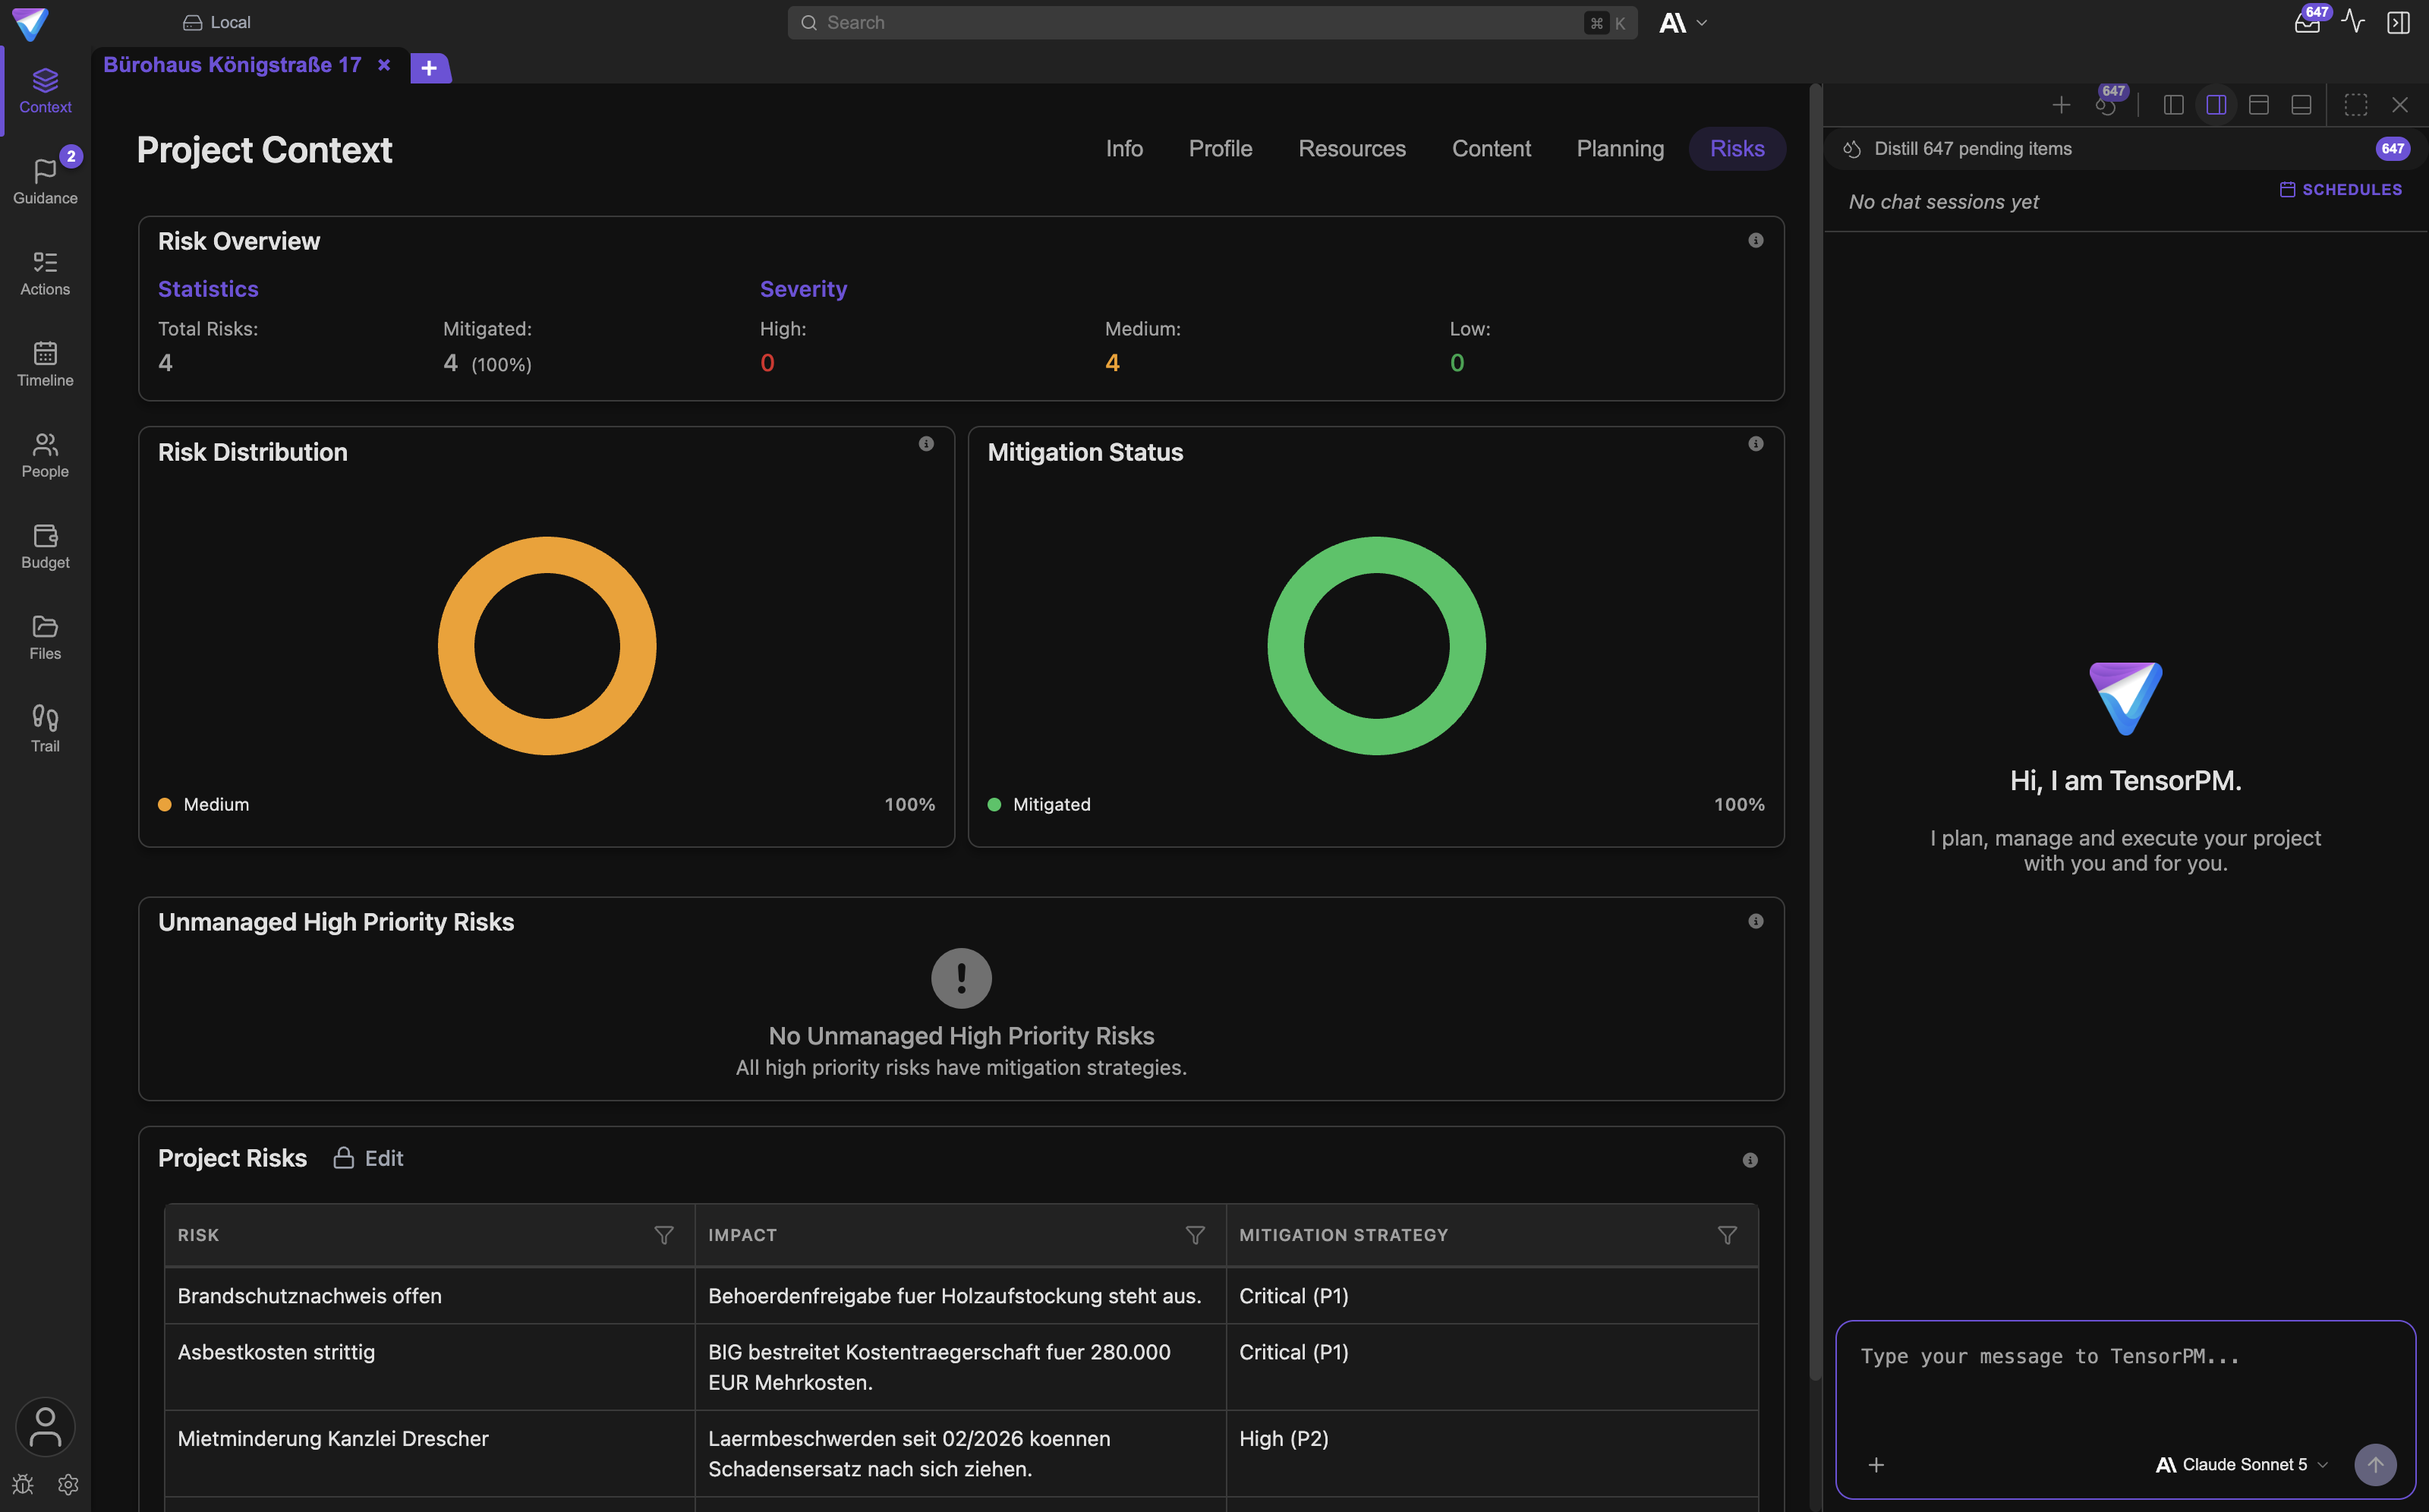
The panel sits beside the view, not on top of it. You keep seeing what you are discussing.
The panel is not locked to the right. From the panel header you can move it with Dock to left,
Dock to right, Dock to top, or Dock to bottom, and expand it with Open full page chat.
Details are in AI Panel.
Zone 6: the footer at the bottom left
Three things sit at the bottom of the left rail:
Account: opens the account popover with your plan, AI Credits,Workspaces, passkeys, voucher redemption, andLog out. If you are not signed in, the entry readsLogin.- a bug icon for reporting a problem
- a gear with the tooltip
Open settings
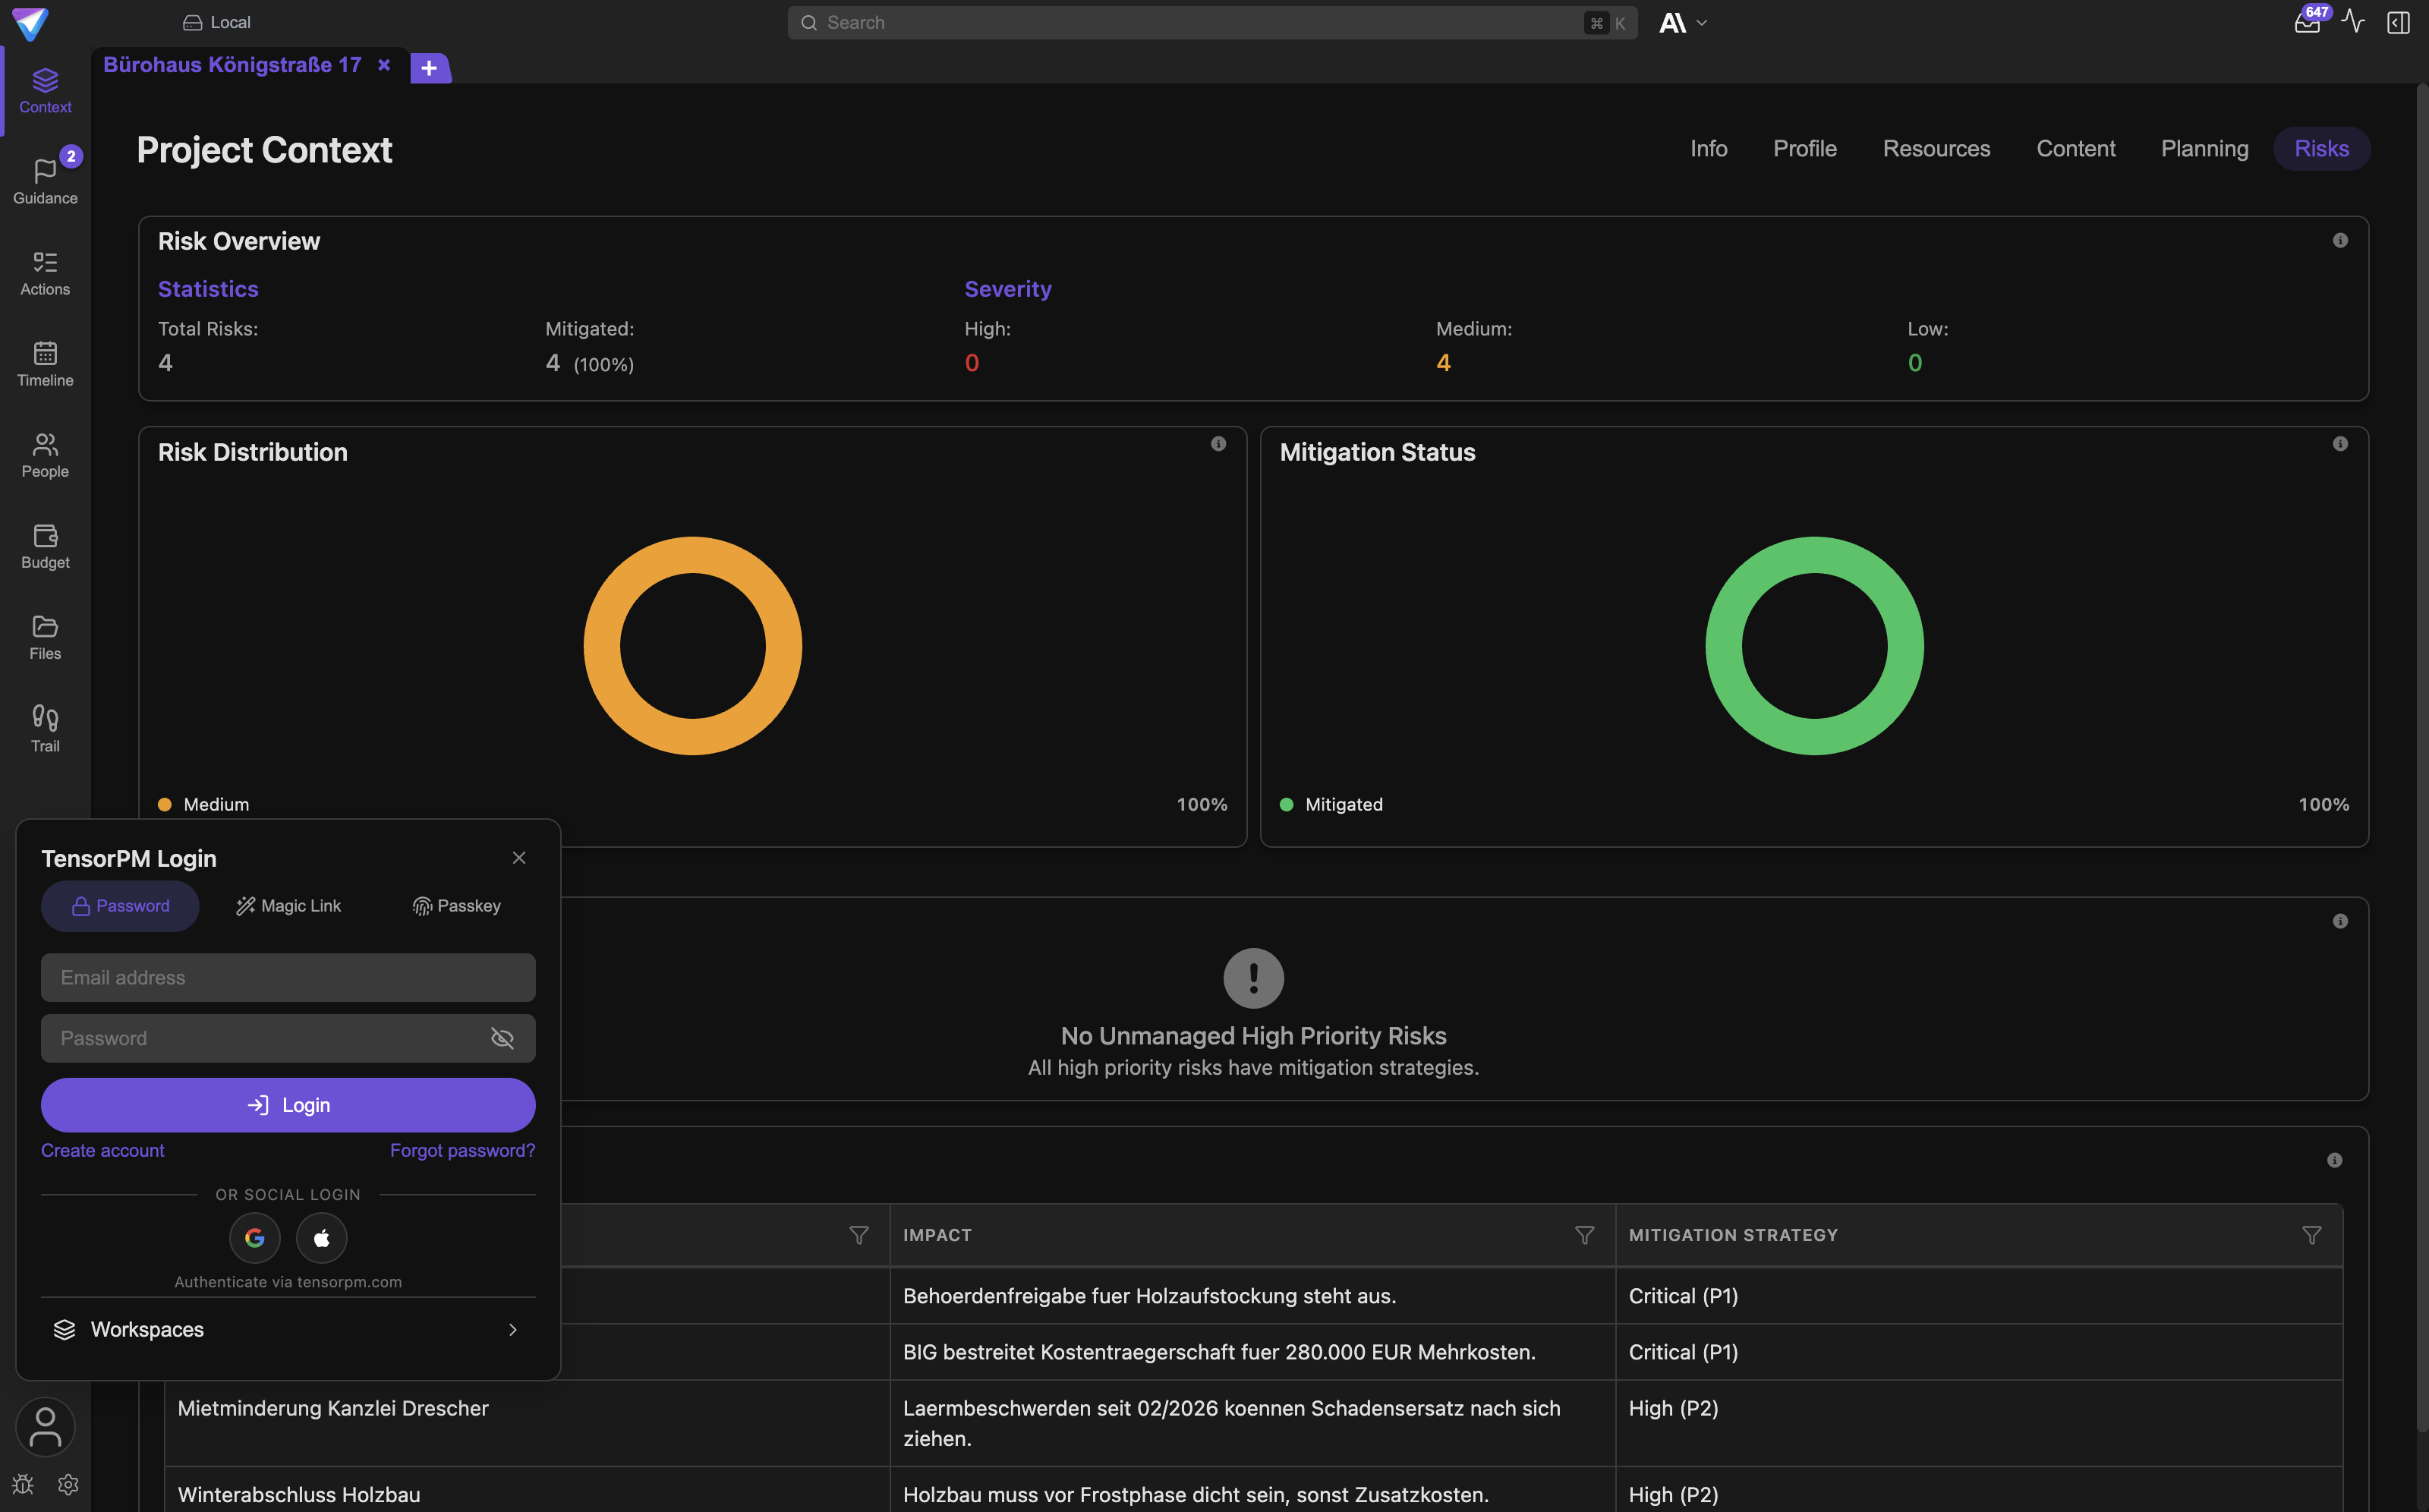
Account and Settings are two separate buttons. You do not have to go through the account to reach settings.
Where you switch workspaces
A workspace is the container your projects live in. There are local workspaces that exist only on this device, and cloud workspaces that sync across your devices.
You switch the active workspace in exactly two places, and neither of them is the header bar:
- On the project start screen. That is the screen you see when no project is open, so right
after launch or via the
+tab. A dropdown at the top lists every workspace. Pick a different one and TensorPM reloads the project list. - In the account popover at the bottom left. Click
Account, thenWorkspaces. That is where you create workspaces, rename them, accept invitations, and delete them.
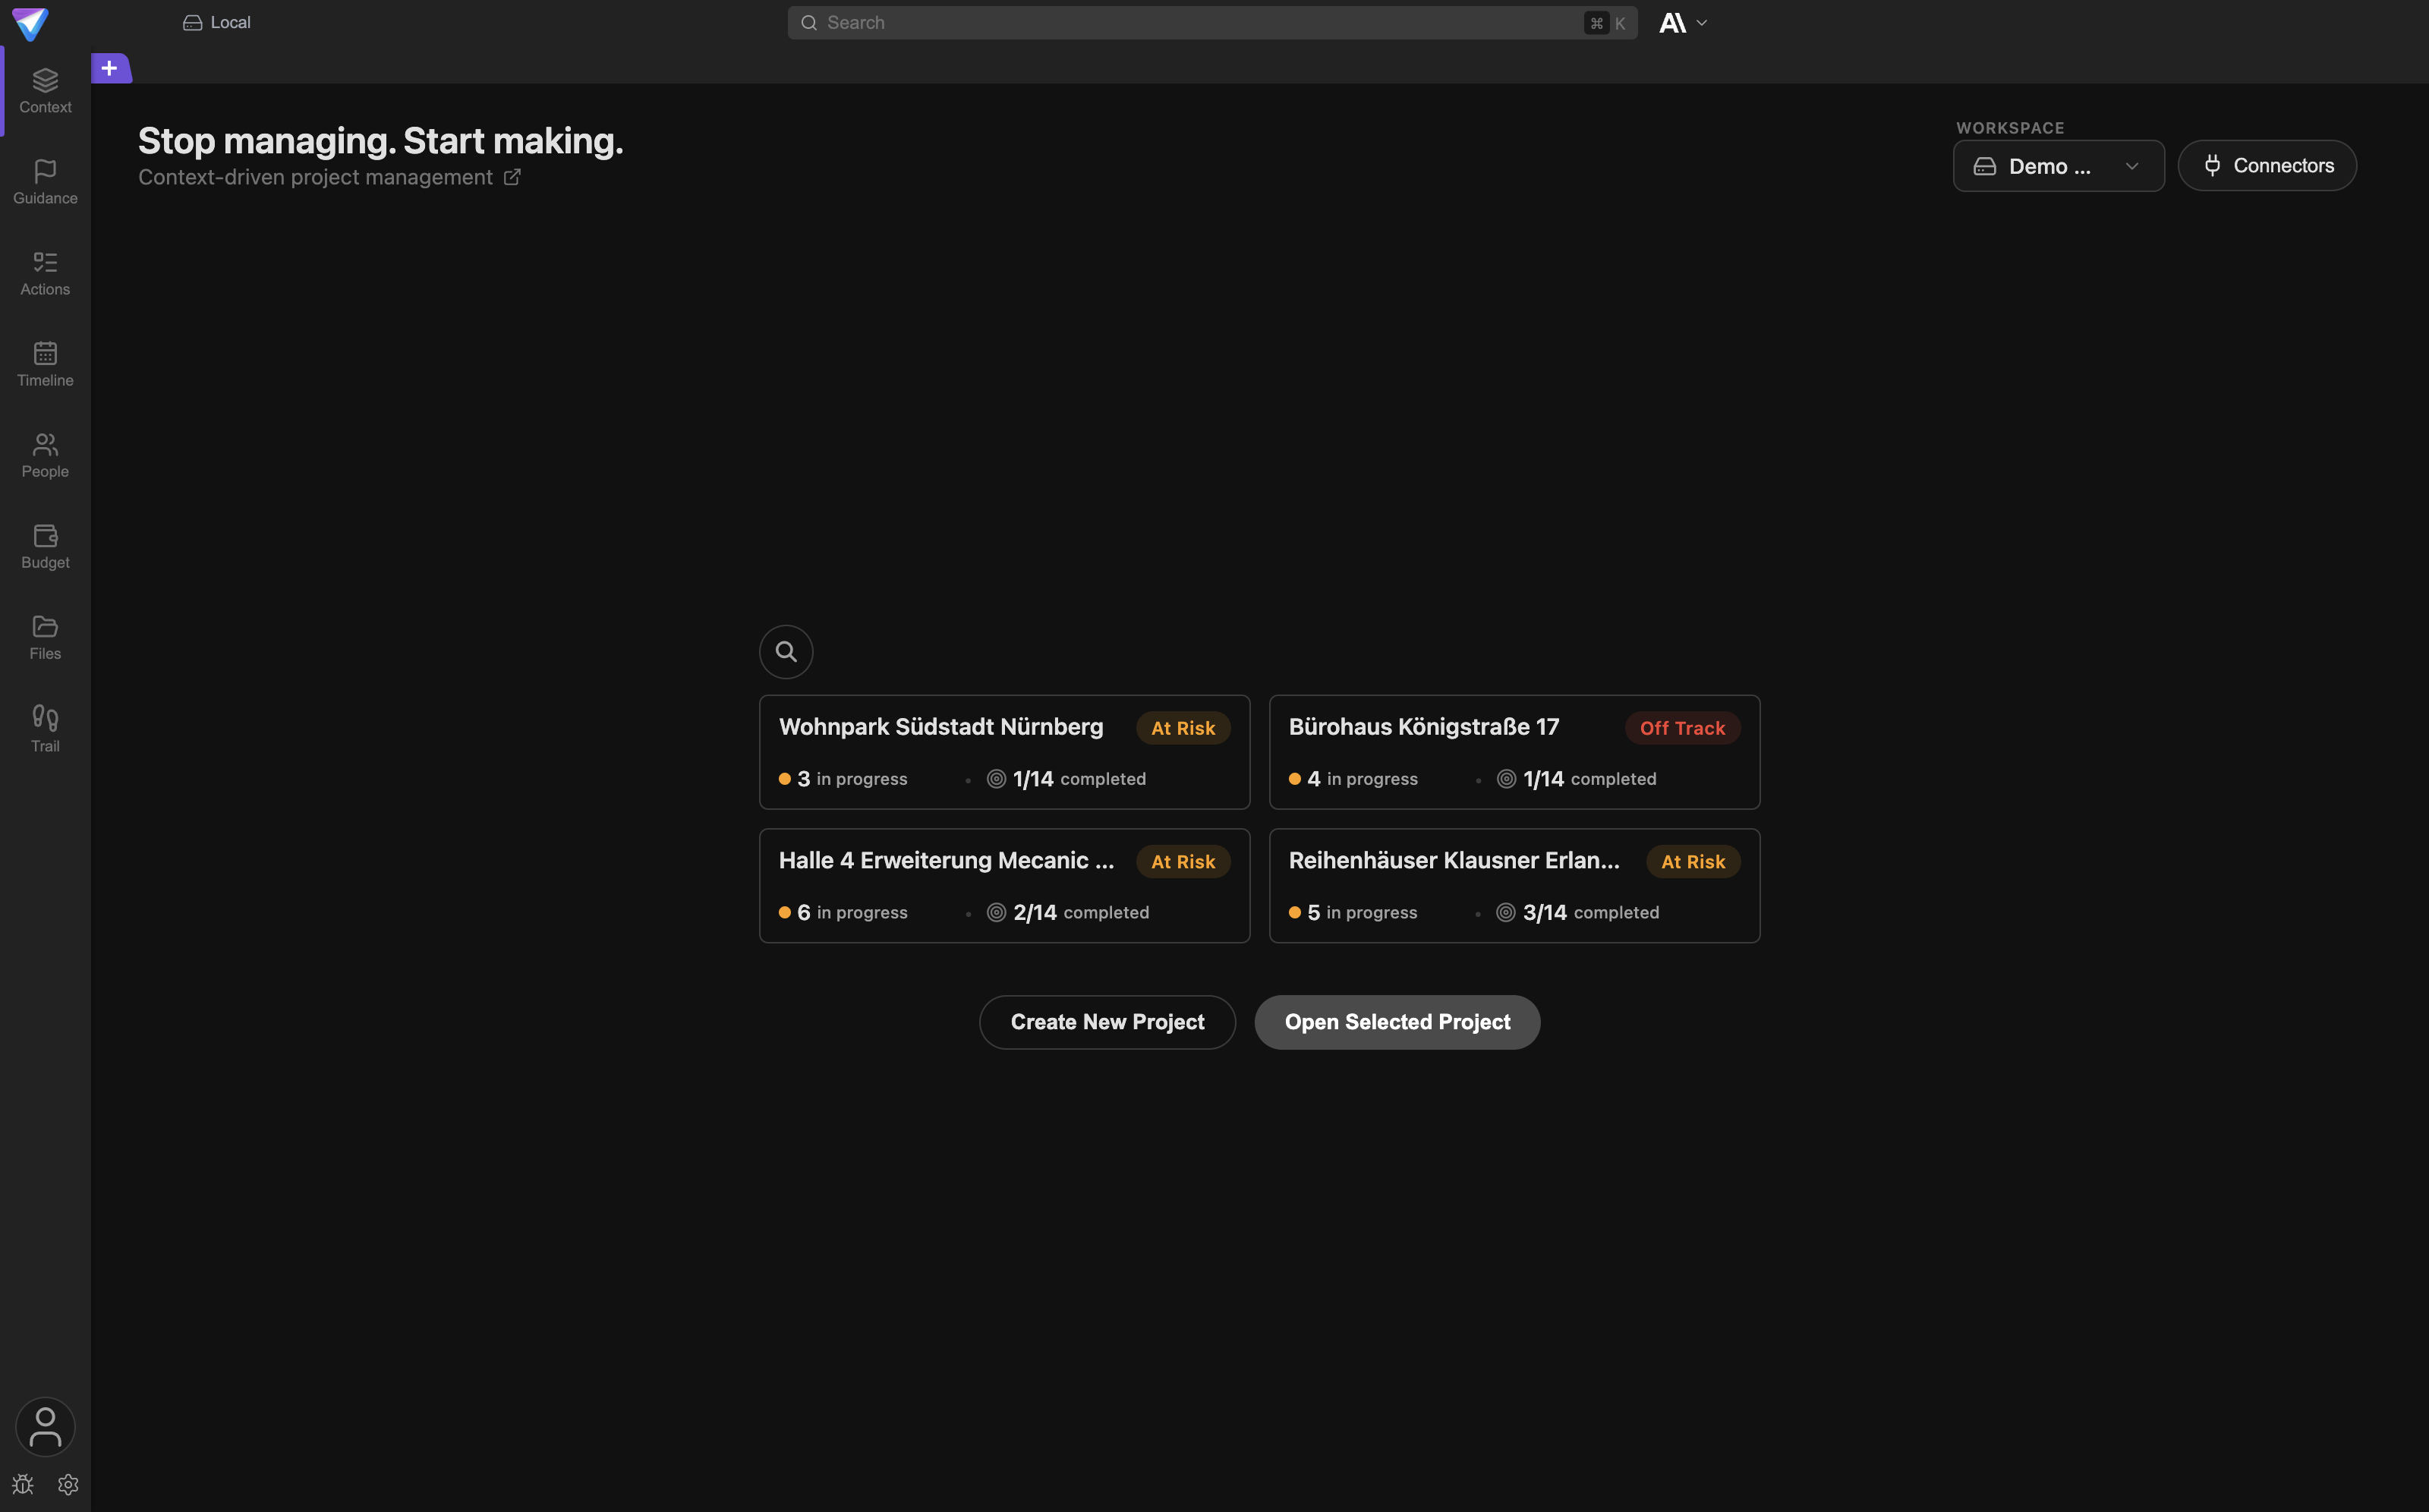
The start screen is the place for switching workspaces and picking projects.
If a project seems to be missing, check here first whether the right workspace is active. More on this in Workspaces.
The left navigation, entry by entry
The order in the rail is fixed from top to bottom. Each section gives the exact label, what the view shows, and which question it answers.
Context
Tooltip: Project Info and Context. The view title is Project Context.
This holds the confirmed picture of the project: everything known about it that a human has approved. The view has six sub-tabs:
Info: overview dashboard with focus, bottleneck, and a risk summaryProfile: description, goals, scope, and success criteriaResources: timeframe, budget frame, participants, and responsibilityContent: requirements, technologies, and methodsPlanning: milestones and dependenciesRisks: risks and mitigations
Question answered: What do we agree is true about this project?
Details in Project Structure.
Pulse
Tooltip: What needs your attention today?.
Pulse is the steering view. It does not tell you what to do; it tells you what deserves attention
and why. The number next to the entry is the count of active suggestions, not a count of errors.
The dashboard it opens carries the Suggestions card at the top of its right-hand column. Every
suggestion names the observation, its effect, and a proposed next step, and offers Apply,
Discuss in chat, and Dismiss. Filter chips narrow the list to Context, Strategy, Coverage,
or Execution.
There is no separate Guidance view any more. The recommended order of work is now the Order tab
inside the Action Items view.
Question answered: Where do I need to intervene as the project lead?
Details in Suggestions & Order.
The Work Packages area
To save space, the tab in the rail only shows the shortened text Work. You see the full name only
in the tooltip: Work packages and project structure. In the running text of this documentation we
therefore call it the Work Packages area.
This entry is not always there. It appears only in projects that use a work breakdown structure
(WBS). You enable it under Settings -> General -> Work Breakdown Structure. In projects without
a WBS the entry is absent entirely rather than sitting there as a dead tab.
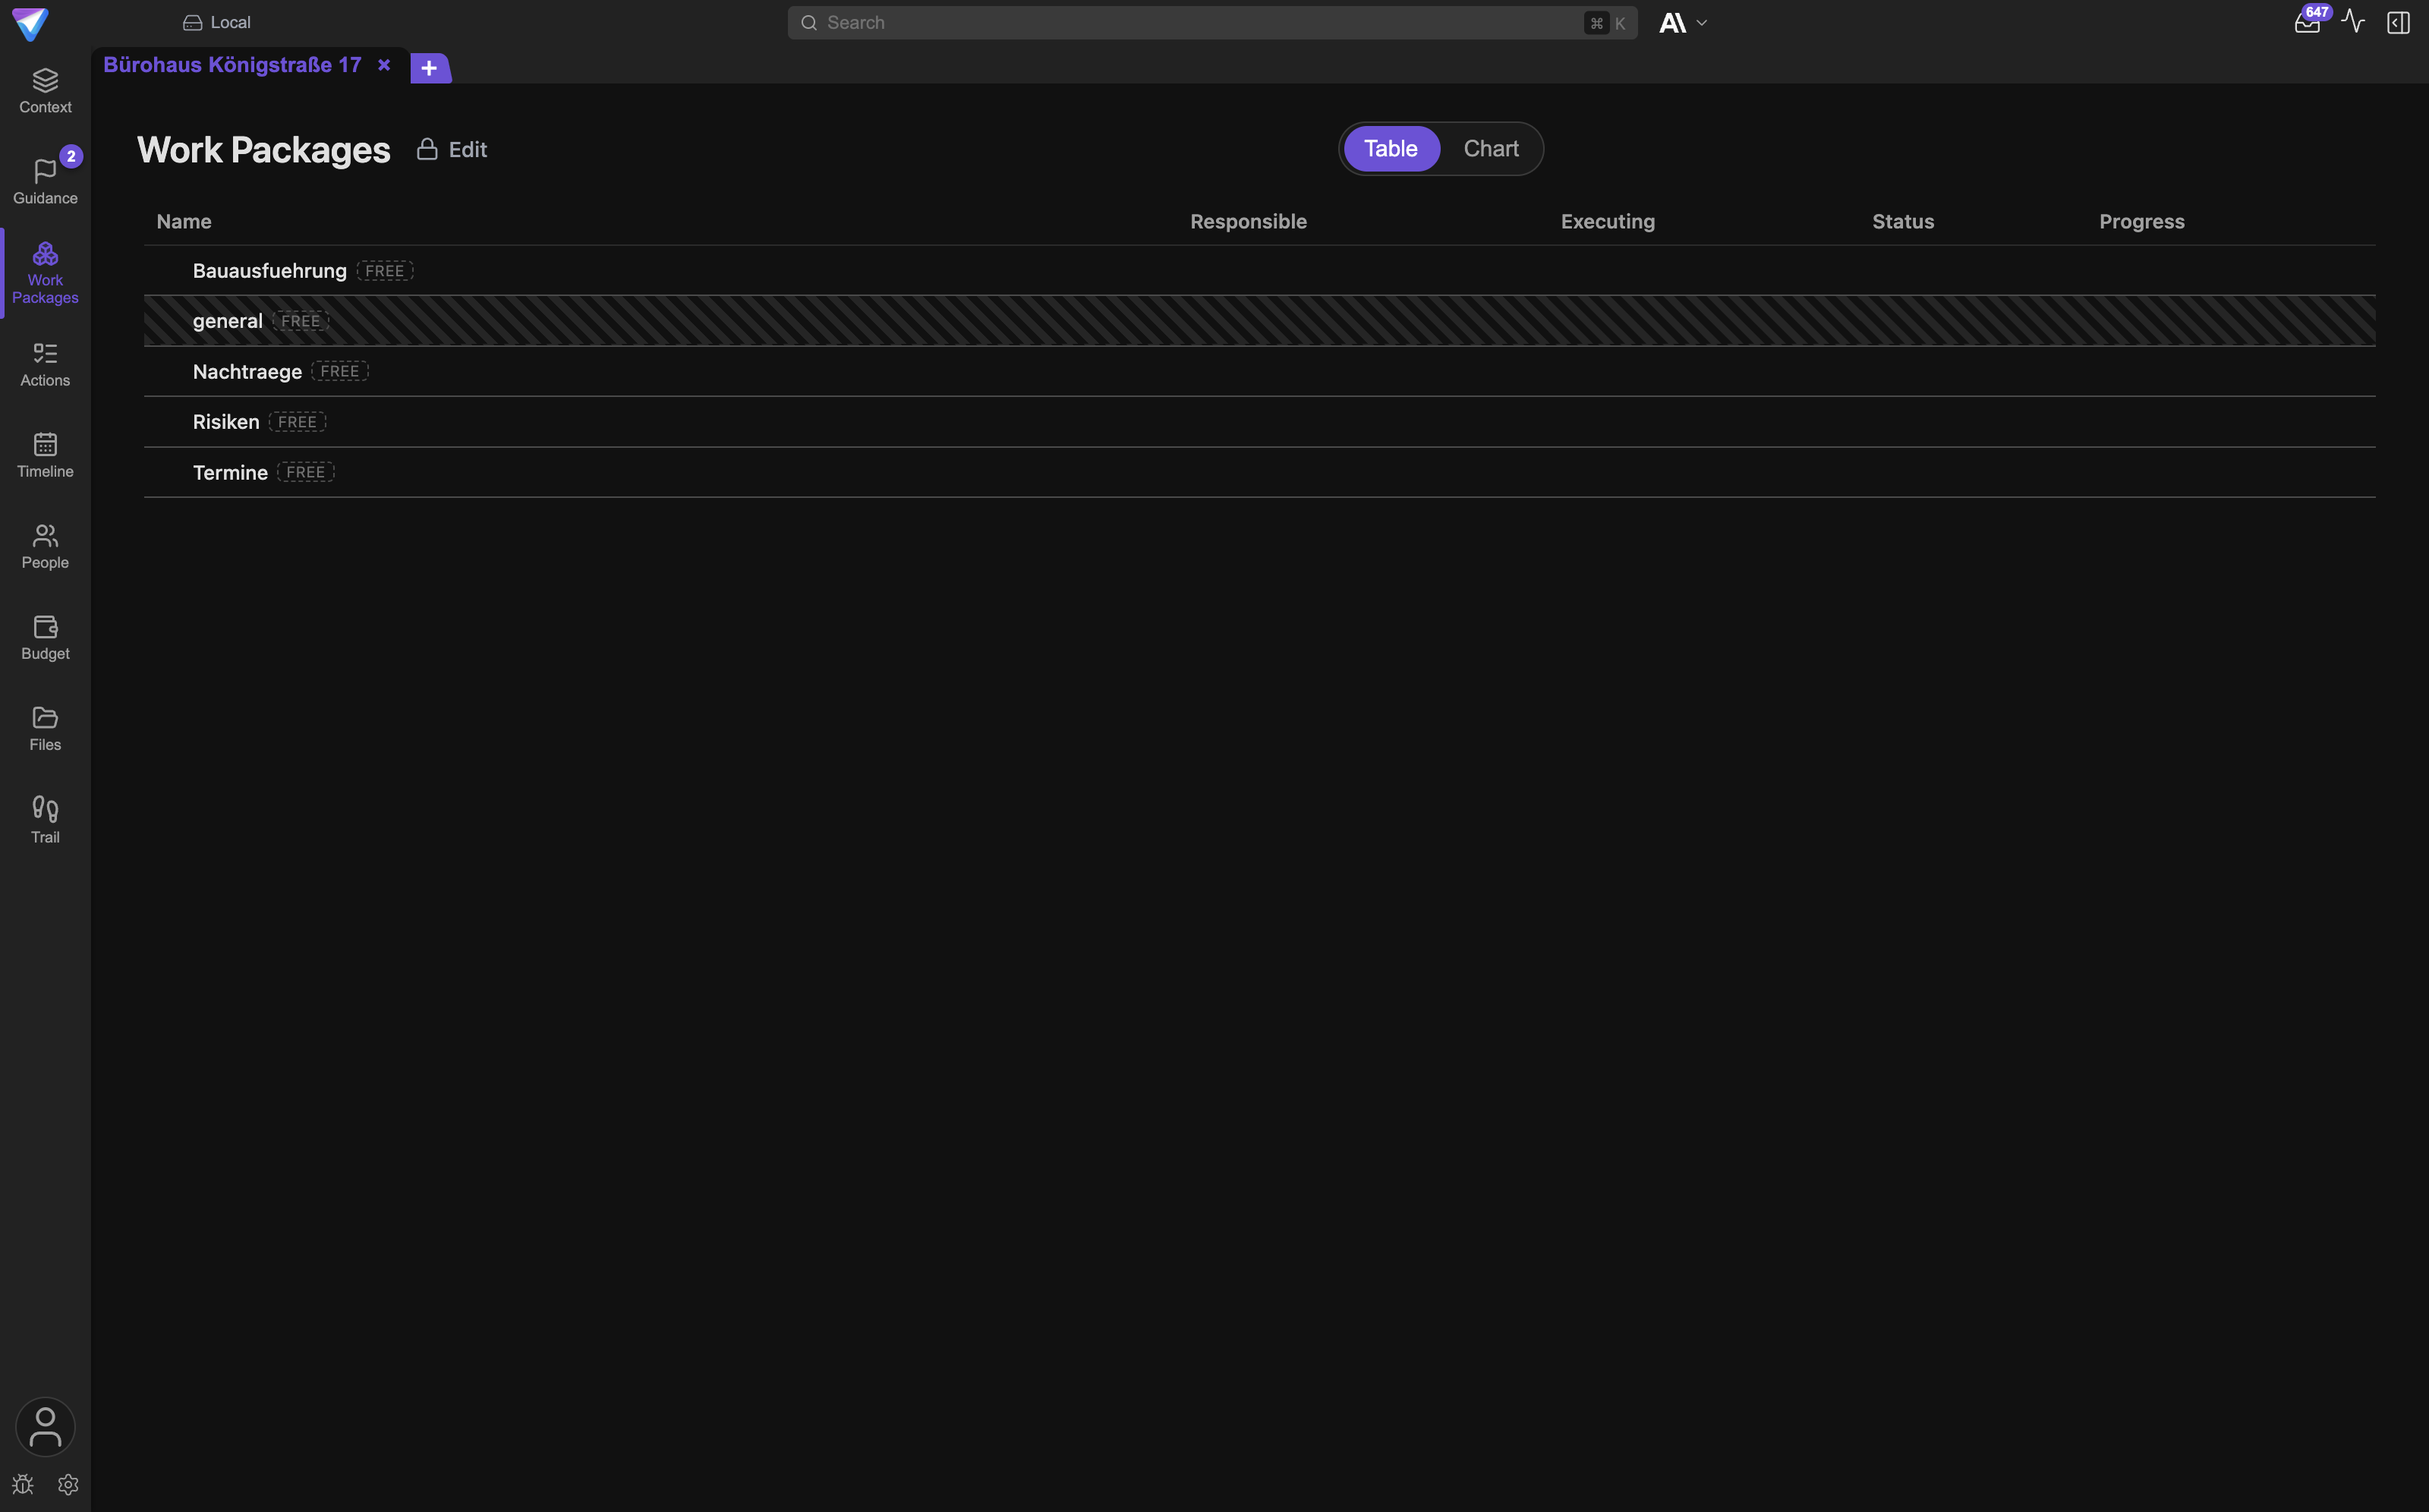
The table is for steering, the chart is for structure.
The view has two representations: Table for responsibility, status, cost, effort, dates, and
acceptance, and Chart for the hierarchy. Only turn on Edit when you genuinely intend to change
the structure.
Question answered: How is the work broken down, and how far along is each package?
Details in Work Packages.
Actions
Tooltip: Manage Action Items. The view title is Action Items.
This is the concrete work with due dates, ownership, status, and priority.
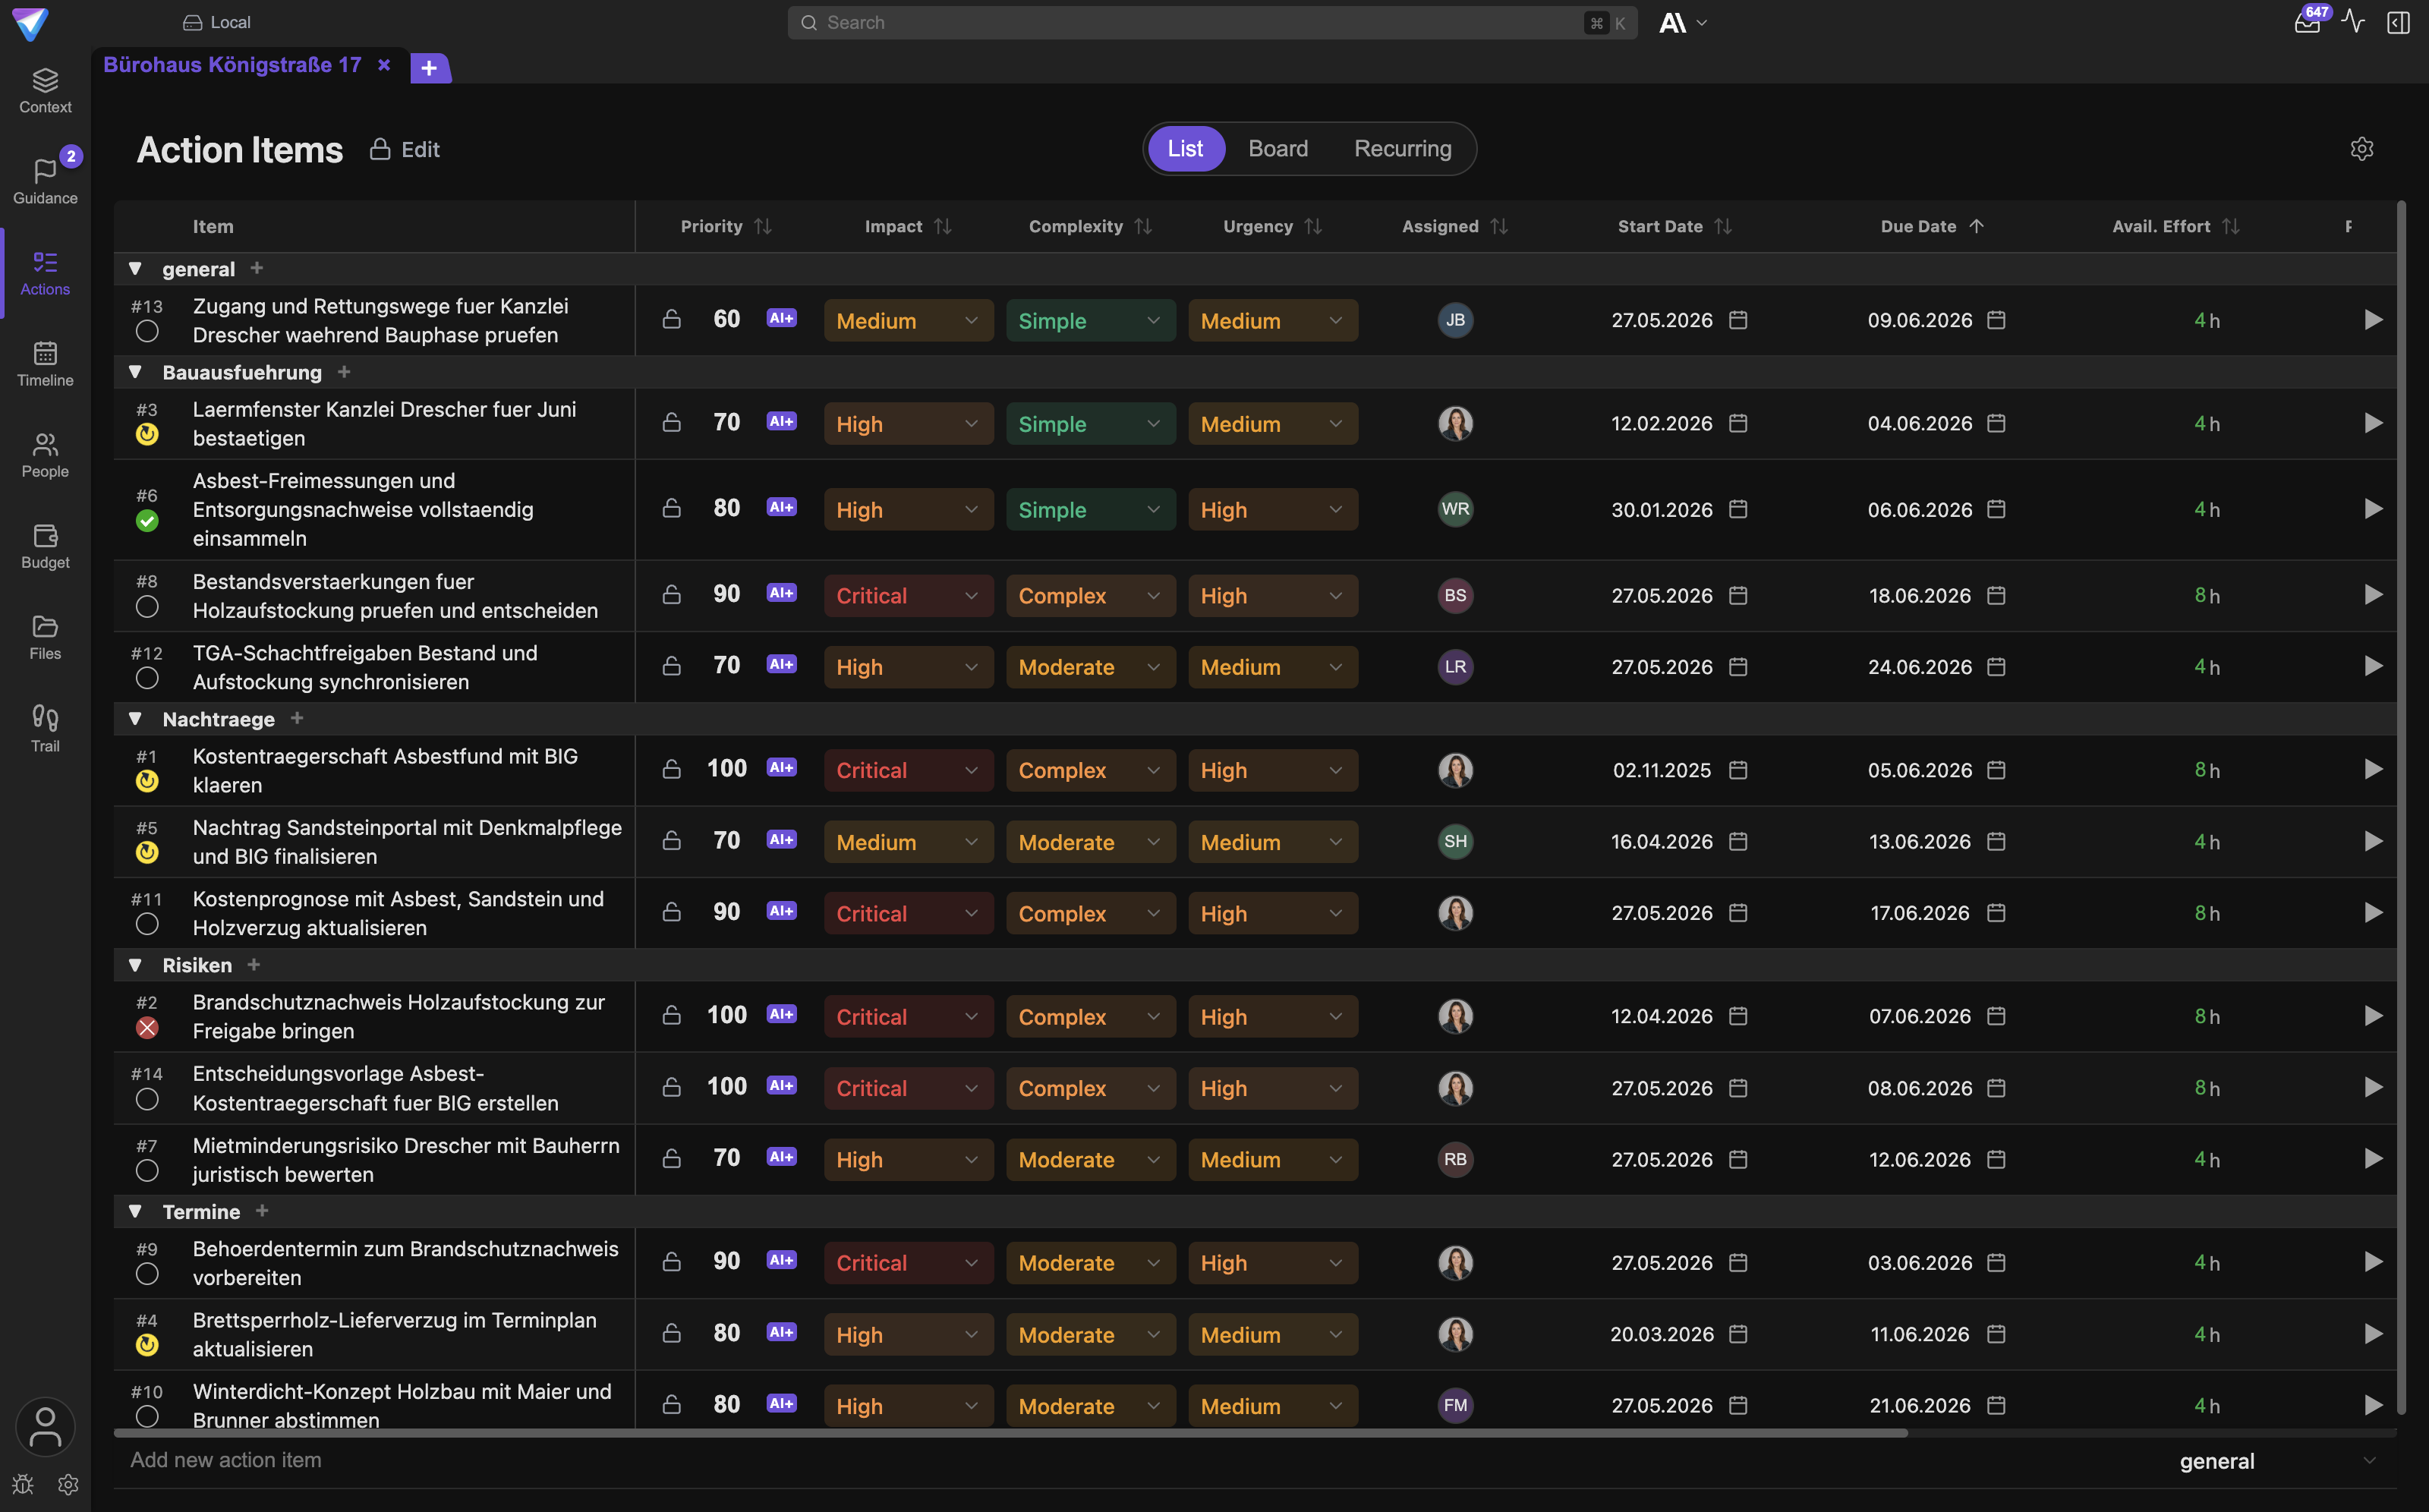
The list is the most precise working mode because you can filter, sort, and select several entries.
There are three view modes:
List: precise editing, filtering, and selectionBoard: overview asKanbanor byPriorityRecurring: templates for repeated obligations such as inspections or reports
Question answered: What comes next, and who does it?
Details in Actions & Recurring Work.
Timeline
Tooltip: View project timeline. The German label is deliberately Gantt, the English one
Timeline.
The schedule view shows whether dates, dependencies, work packages, and actions fit together.
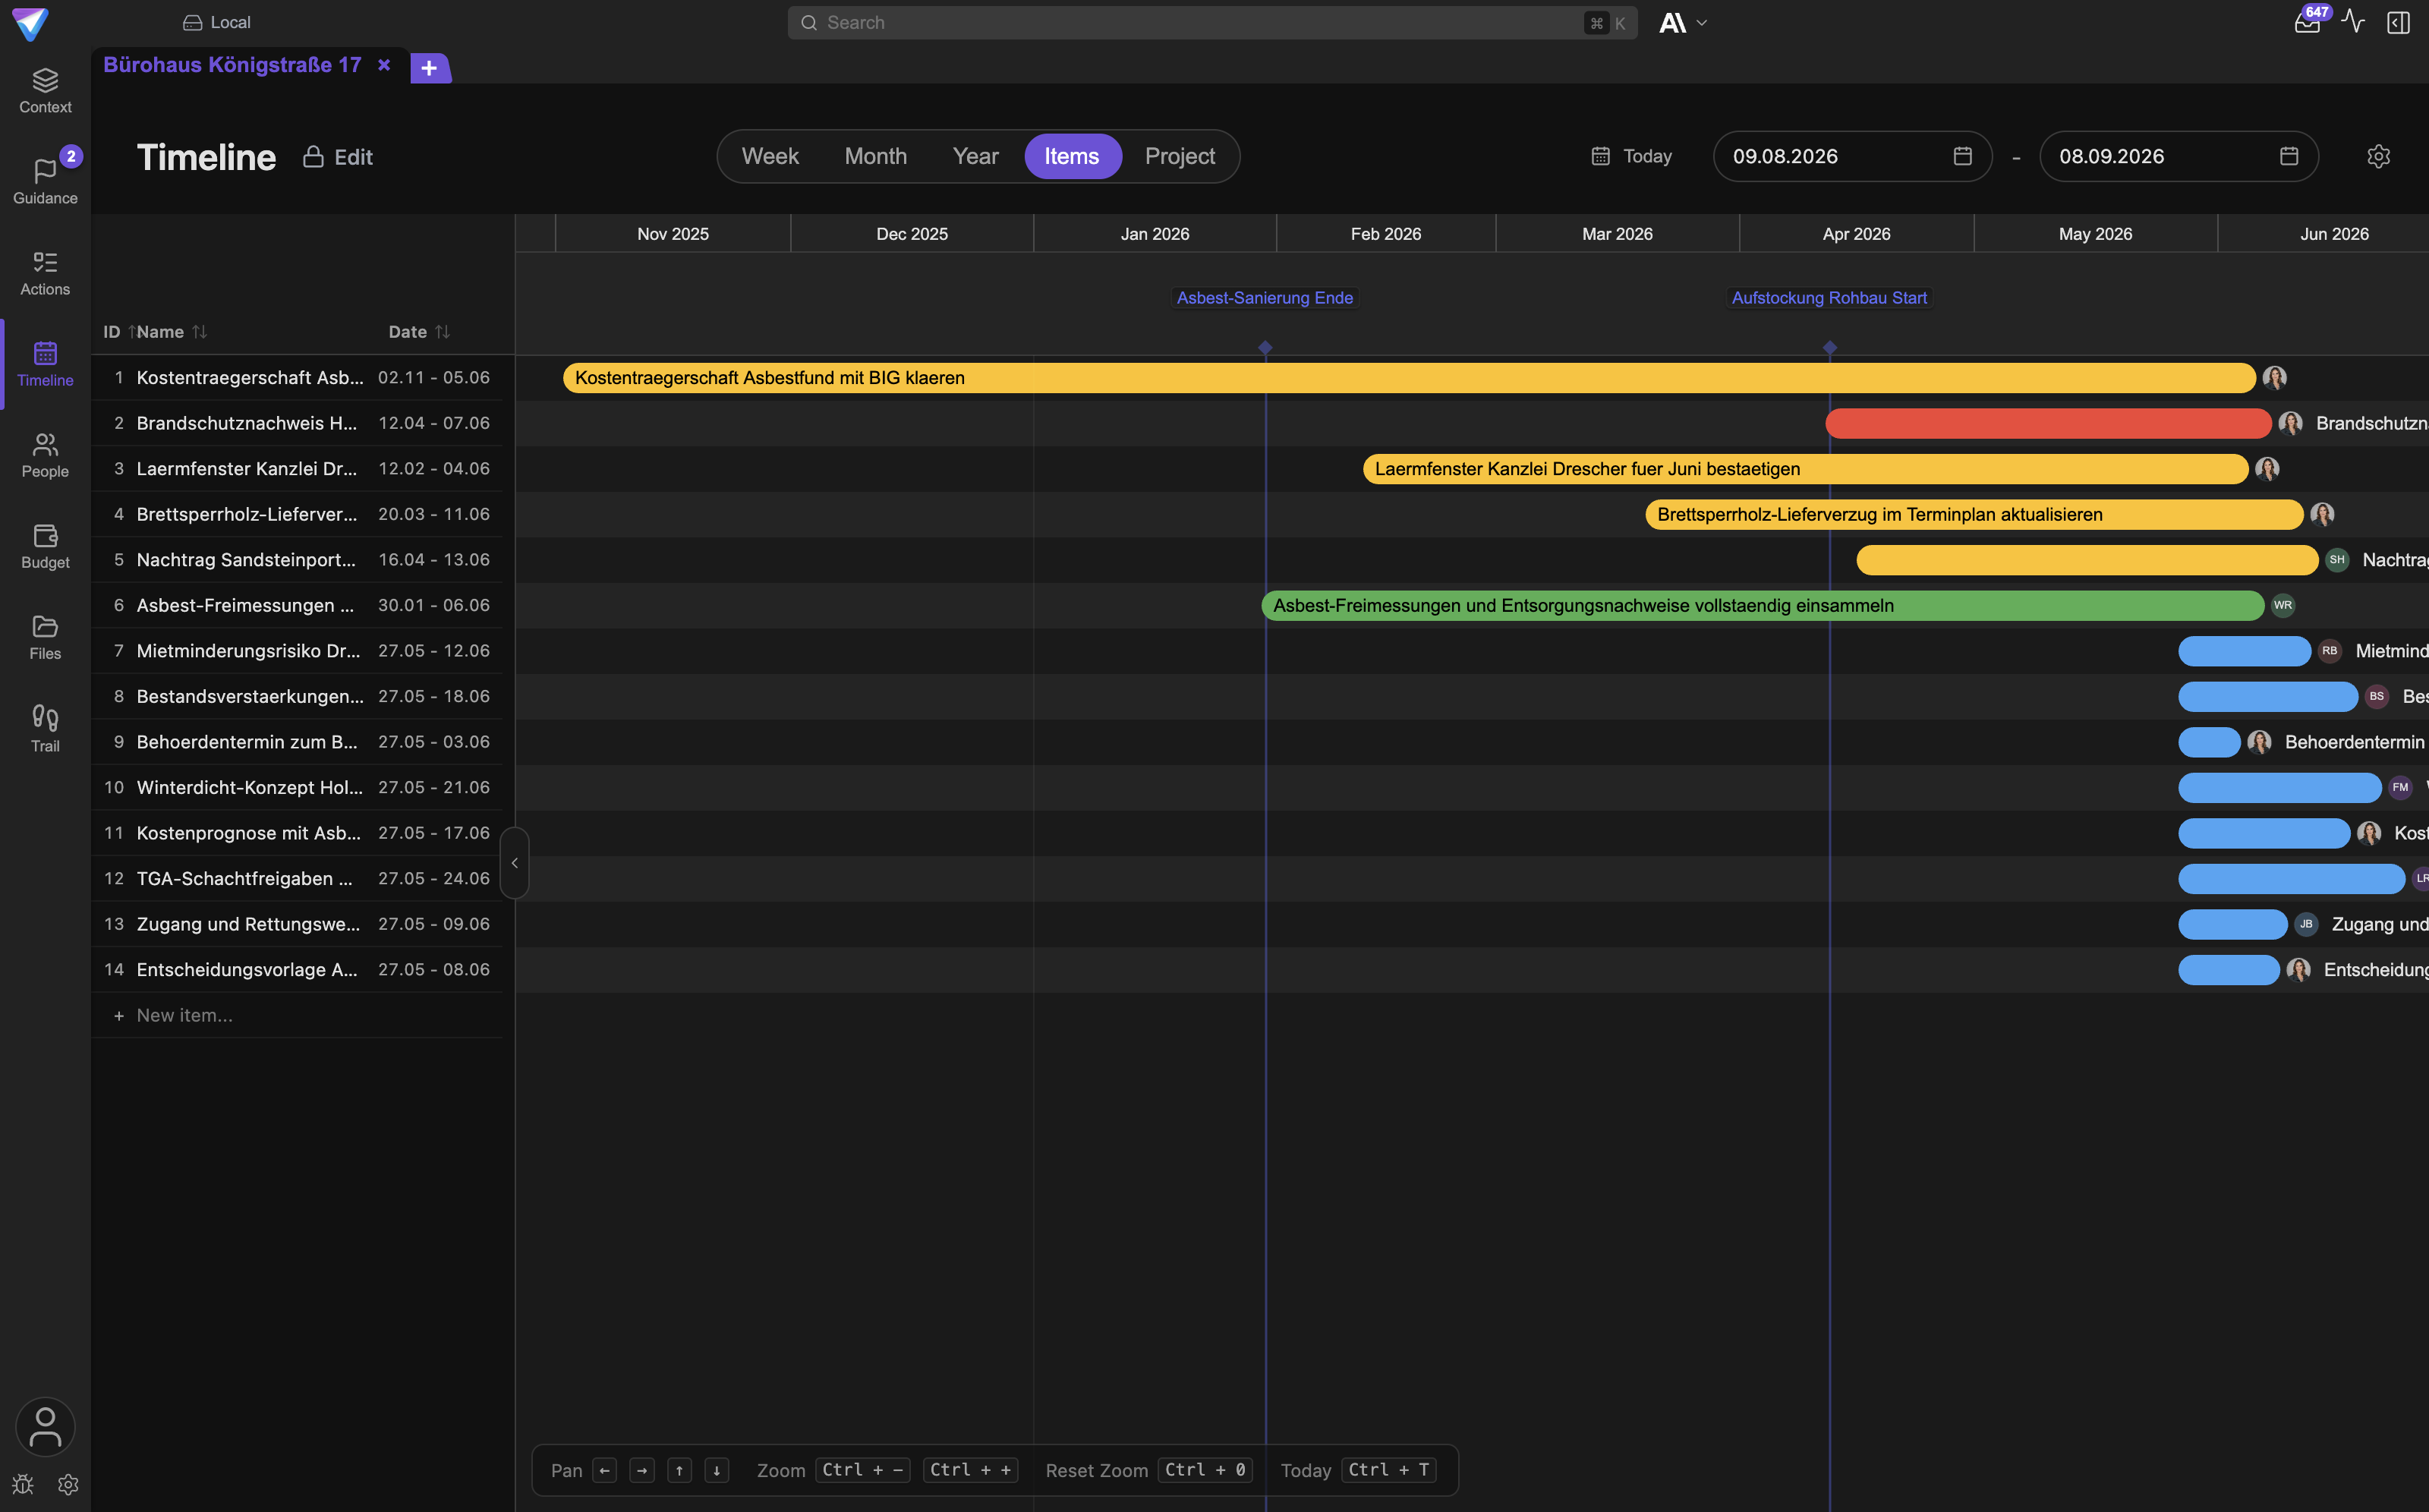
The Timeline makes sequencing and schedule pressure visible without leaving the project context.
The toolbar on top lets you pick the scale Week, Month, or Year, and the row grouping Items
or Project. A broad project view suits steering, the item view suits detailed scheduling.
Question answered: Are we on schedule, and what is blocking what?
People
Tooltip: Manage project people.
The people view holds stakeholders, contacts, roles, influence, and assignments.
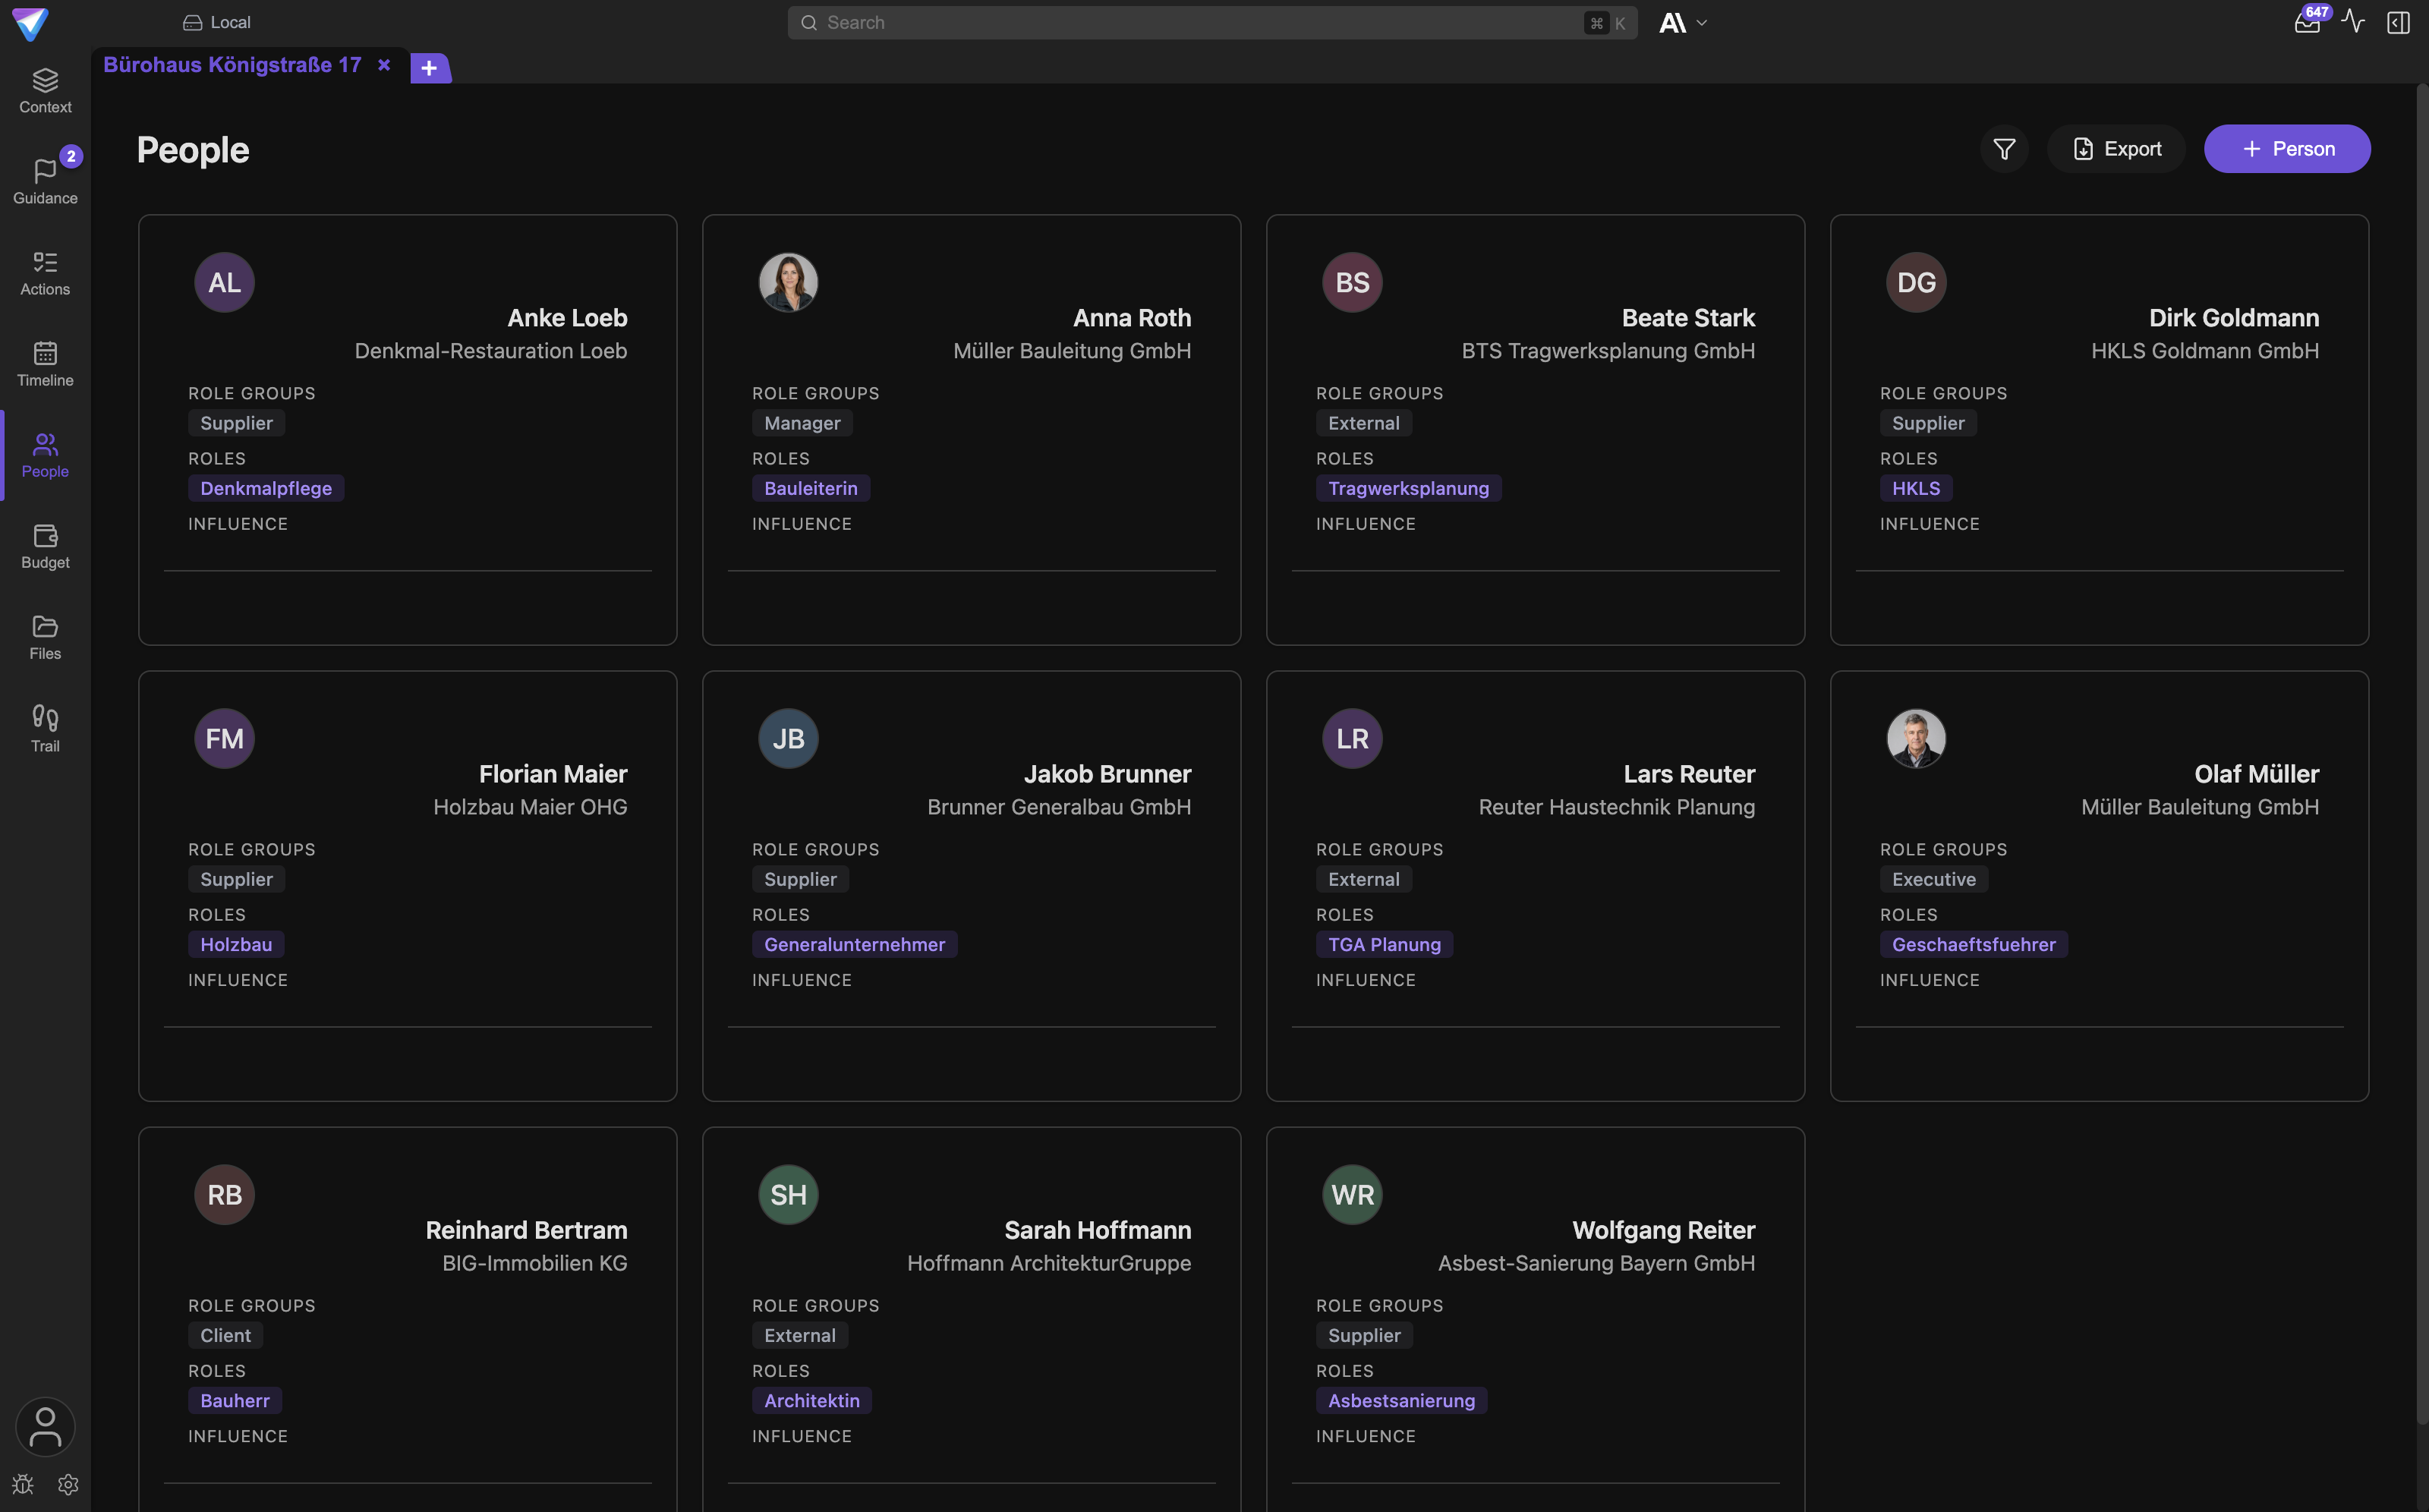
You can search, filter, sort, and export the list as a CSV file.
Question answered: Who is involved, who decides, and who needs to be informed?
Details in Resources & People.
Budget
Tooltip: Manage project budget. The view title is Budget & Material.
The area has two sub-tabs:
Budget: project budget, buckets, expenses, and the plan versus actual comparisonMaterial: procurement with supplier, estimated and actual cost, and its own status model fromPlannedthrough toCompleted
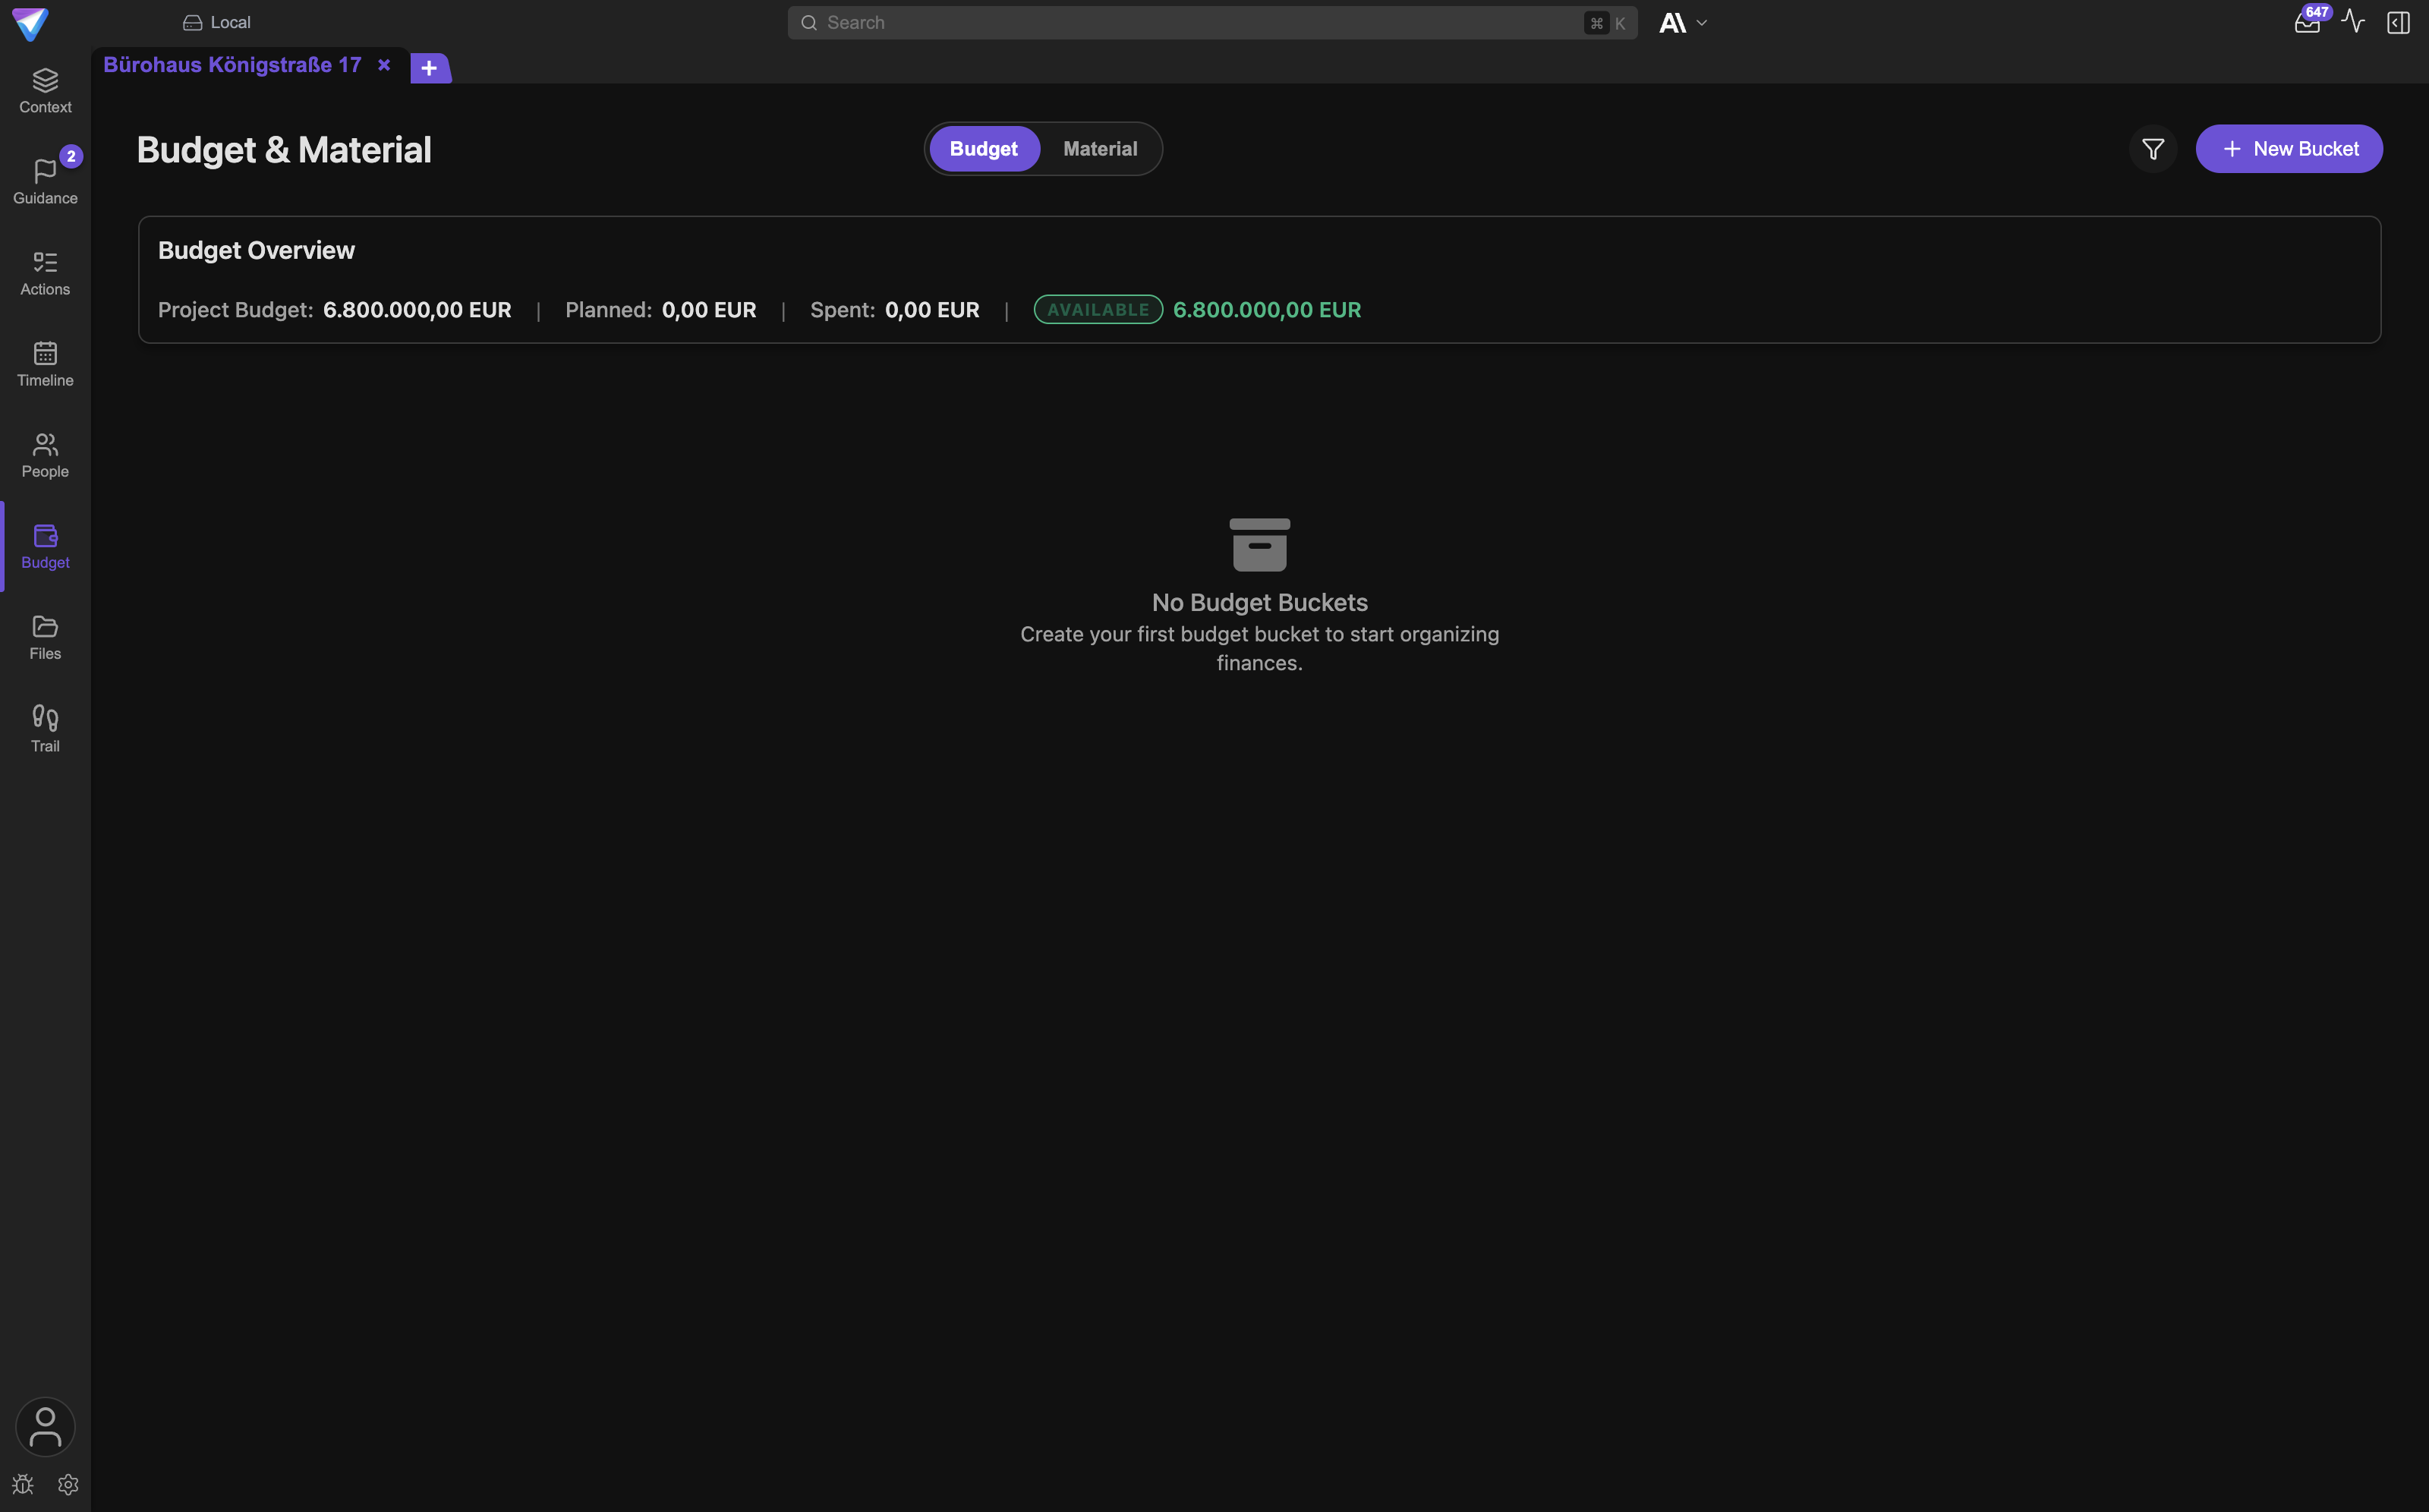
The Material tab is often overlooked. For procurement it is the central view.
Question answered: Is the money enough, and what has been ordered or delivered?
Details in Materials & Procurement.
Files
Tooltip: Browse project files.
The project's working folder with all attachments and generated documents. The skills folder lives here too; its context menu opens the catalog.
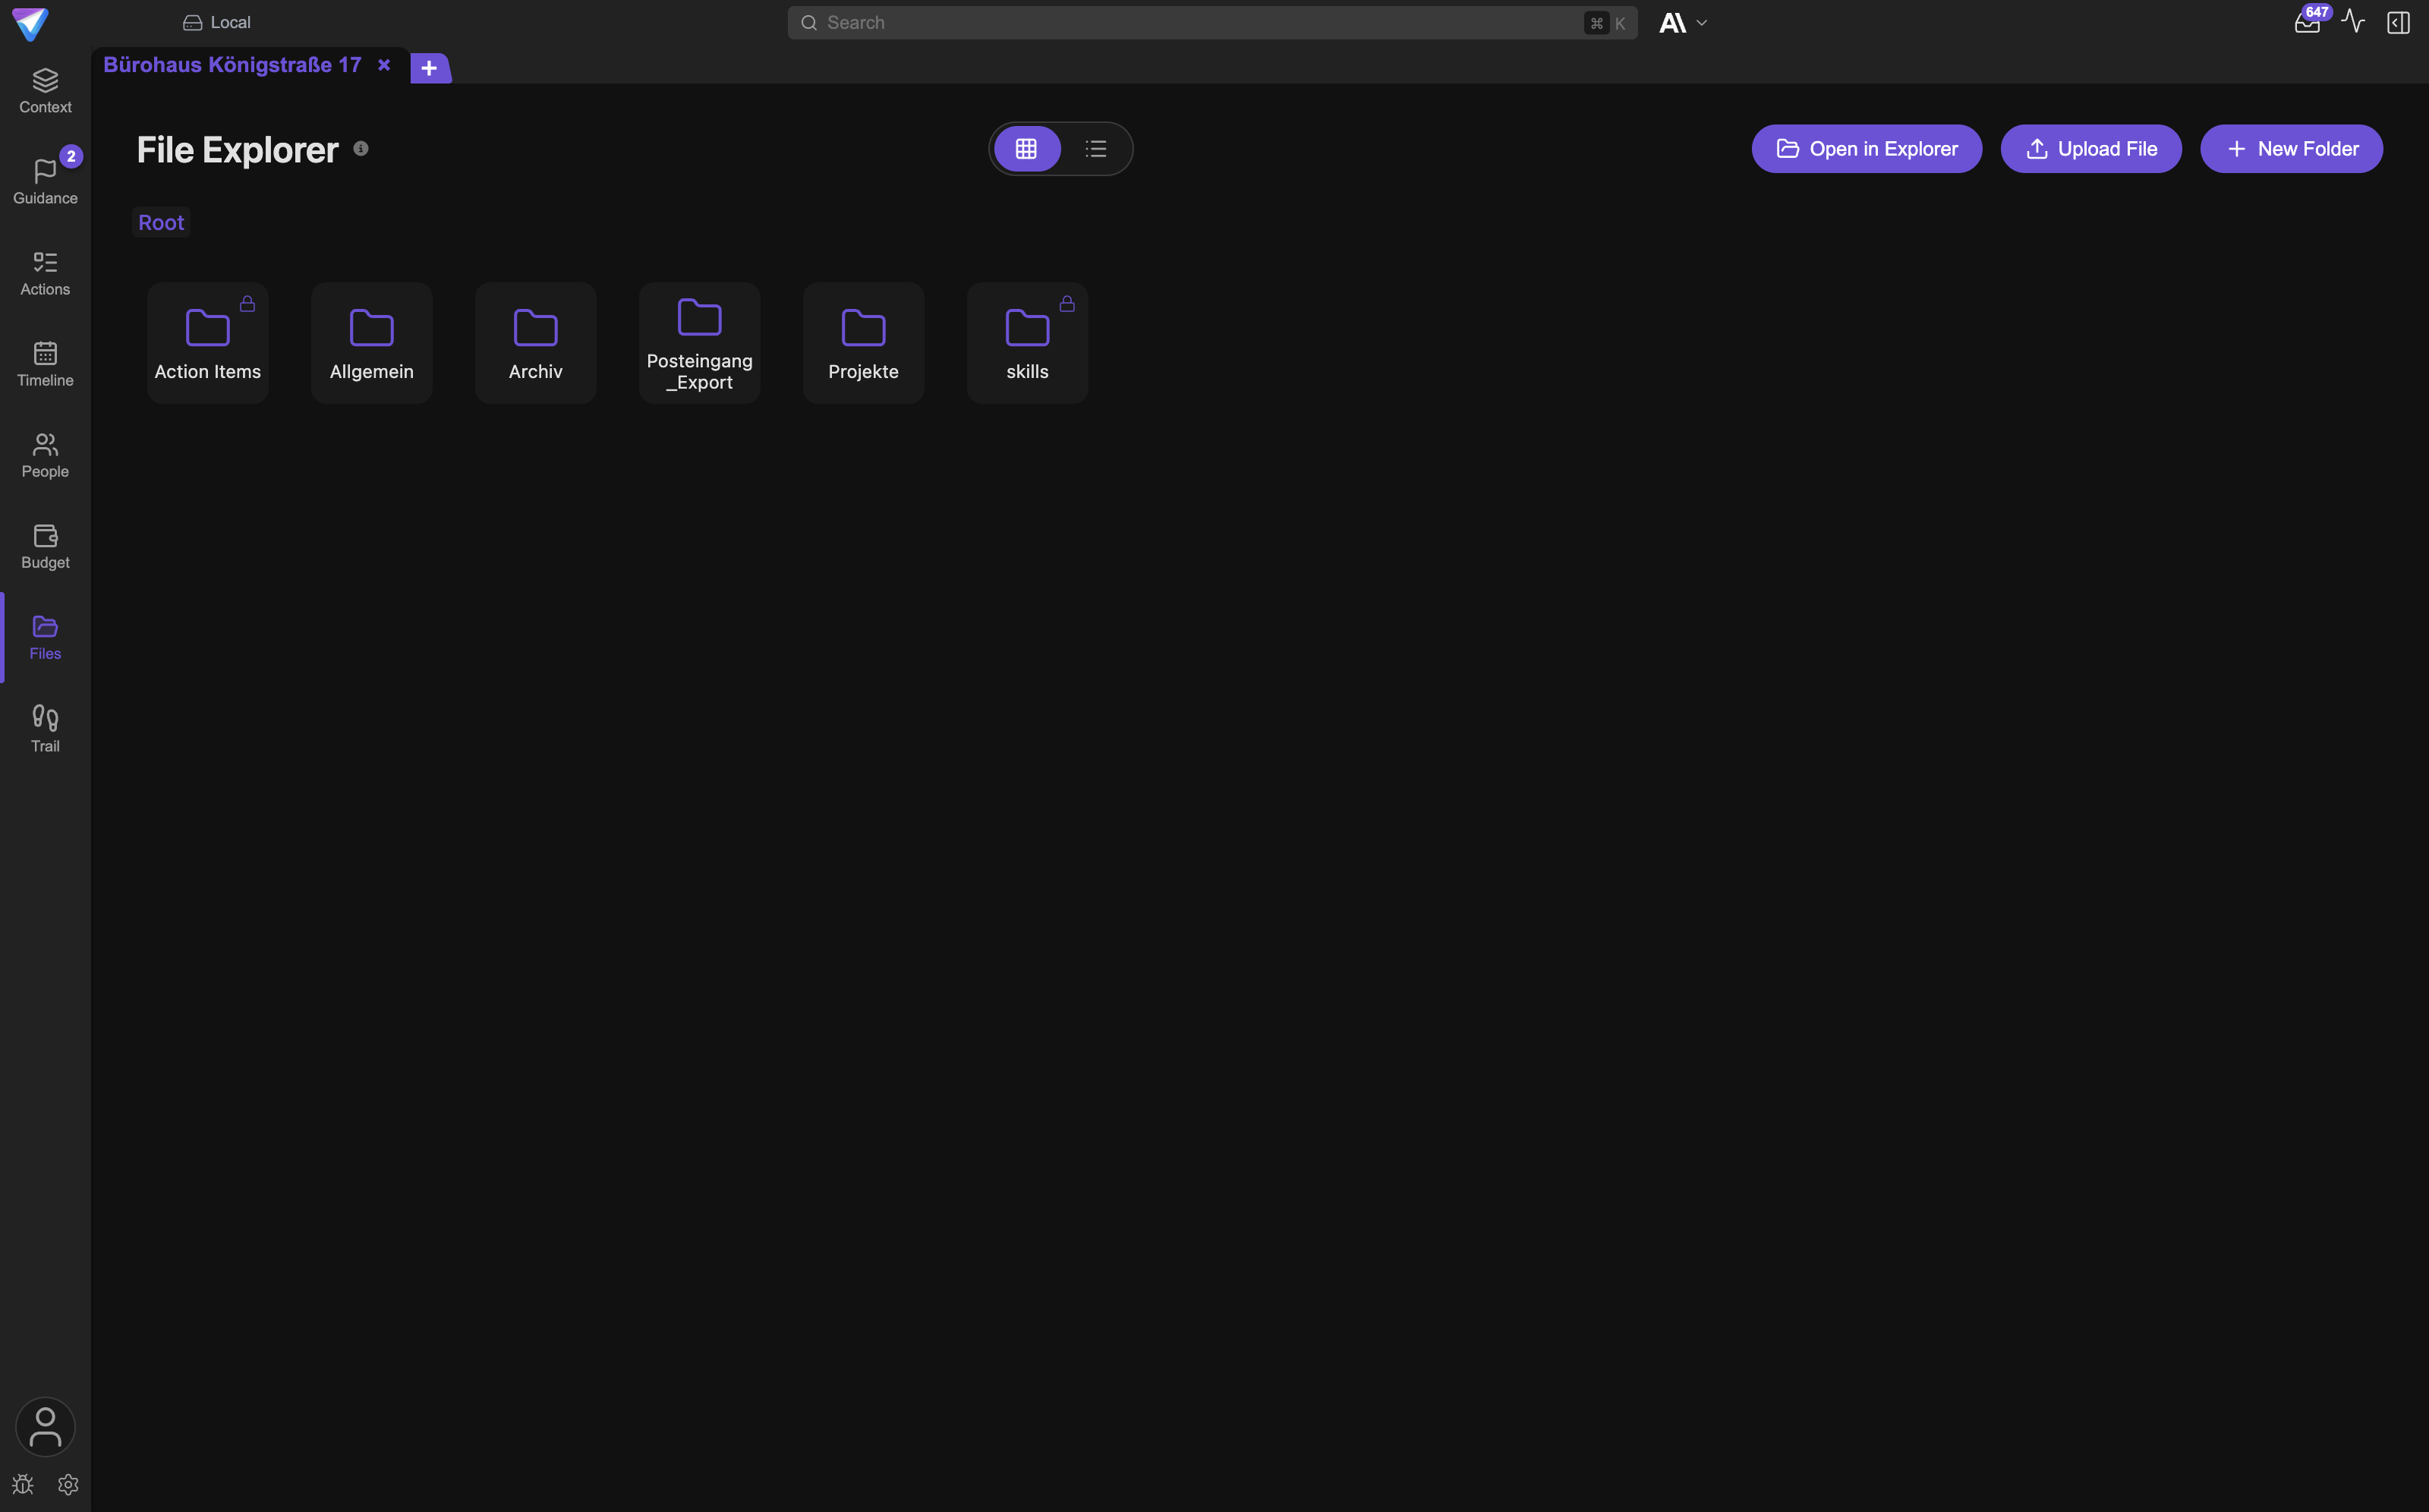
The project folder is a real folder on your disk, not an app-internal store.
Question answered: Where is that document, and what did the agent produce?
Details in Files & Trail.
Trail
Tooltip: View trail.
The Trail shows what changed in the project picture and who or what triggered the change. Two views:
Changes: every confirmed change to the project context, with its originDecisions: durable commitments with status and a supersede chain
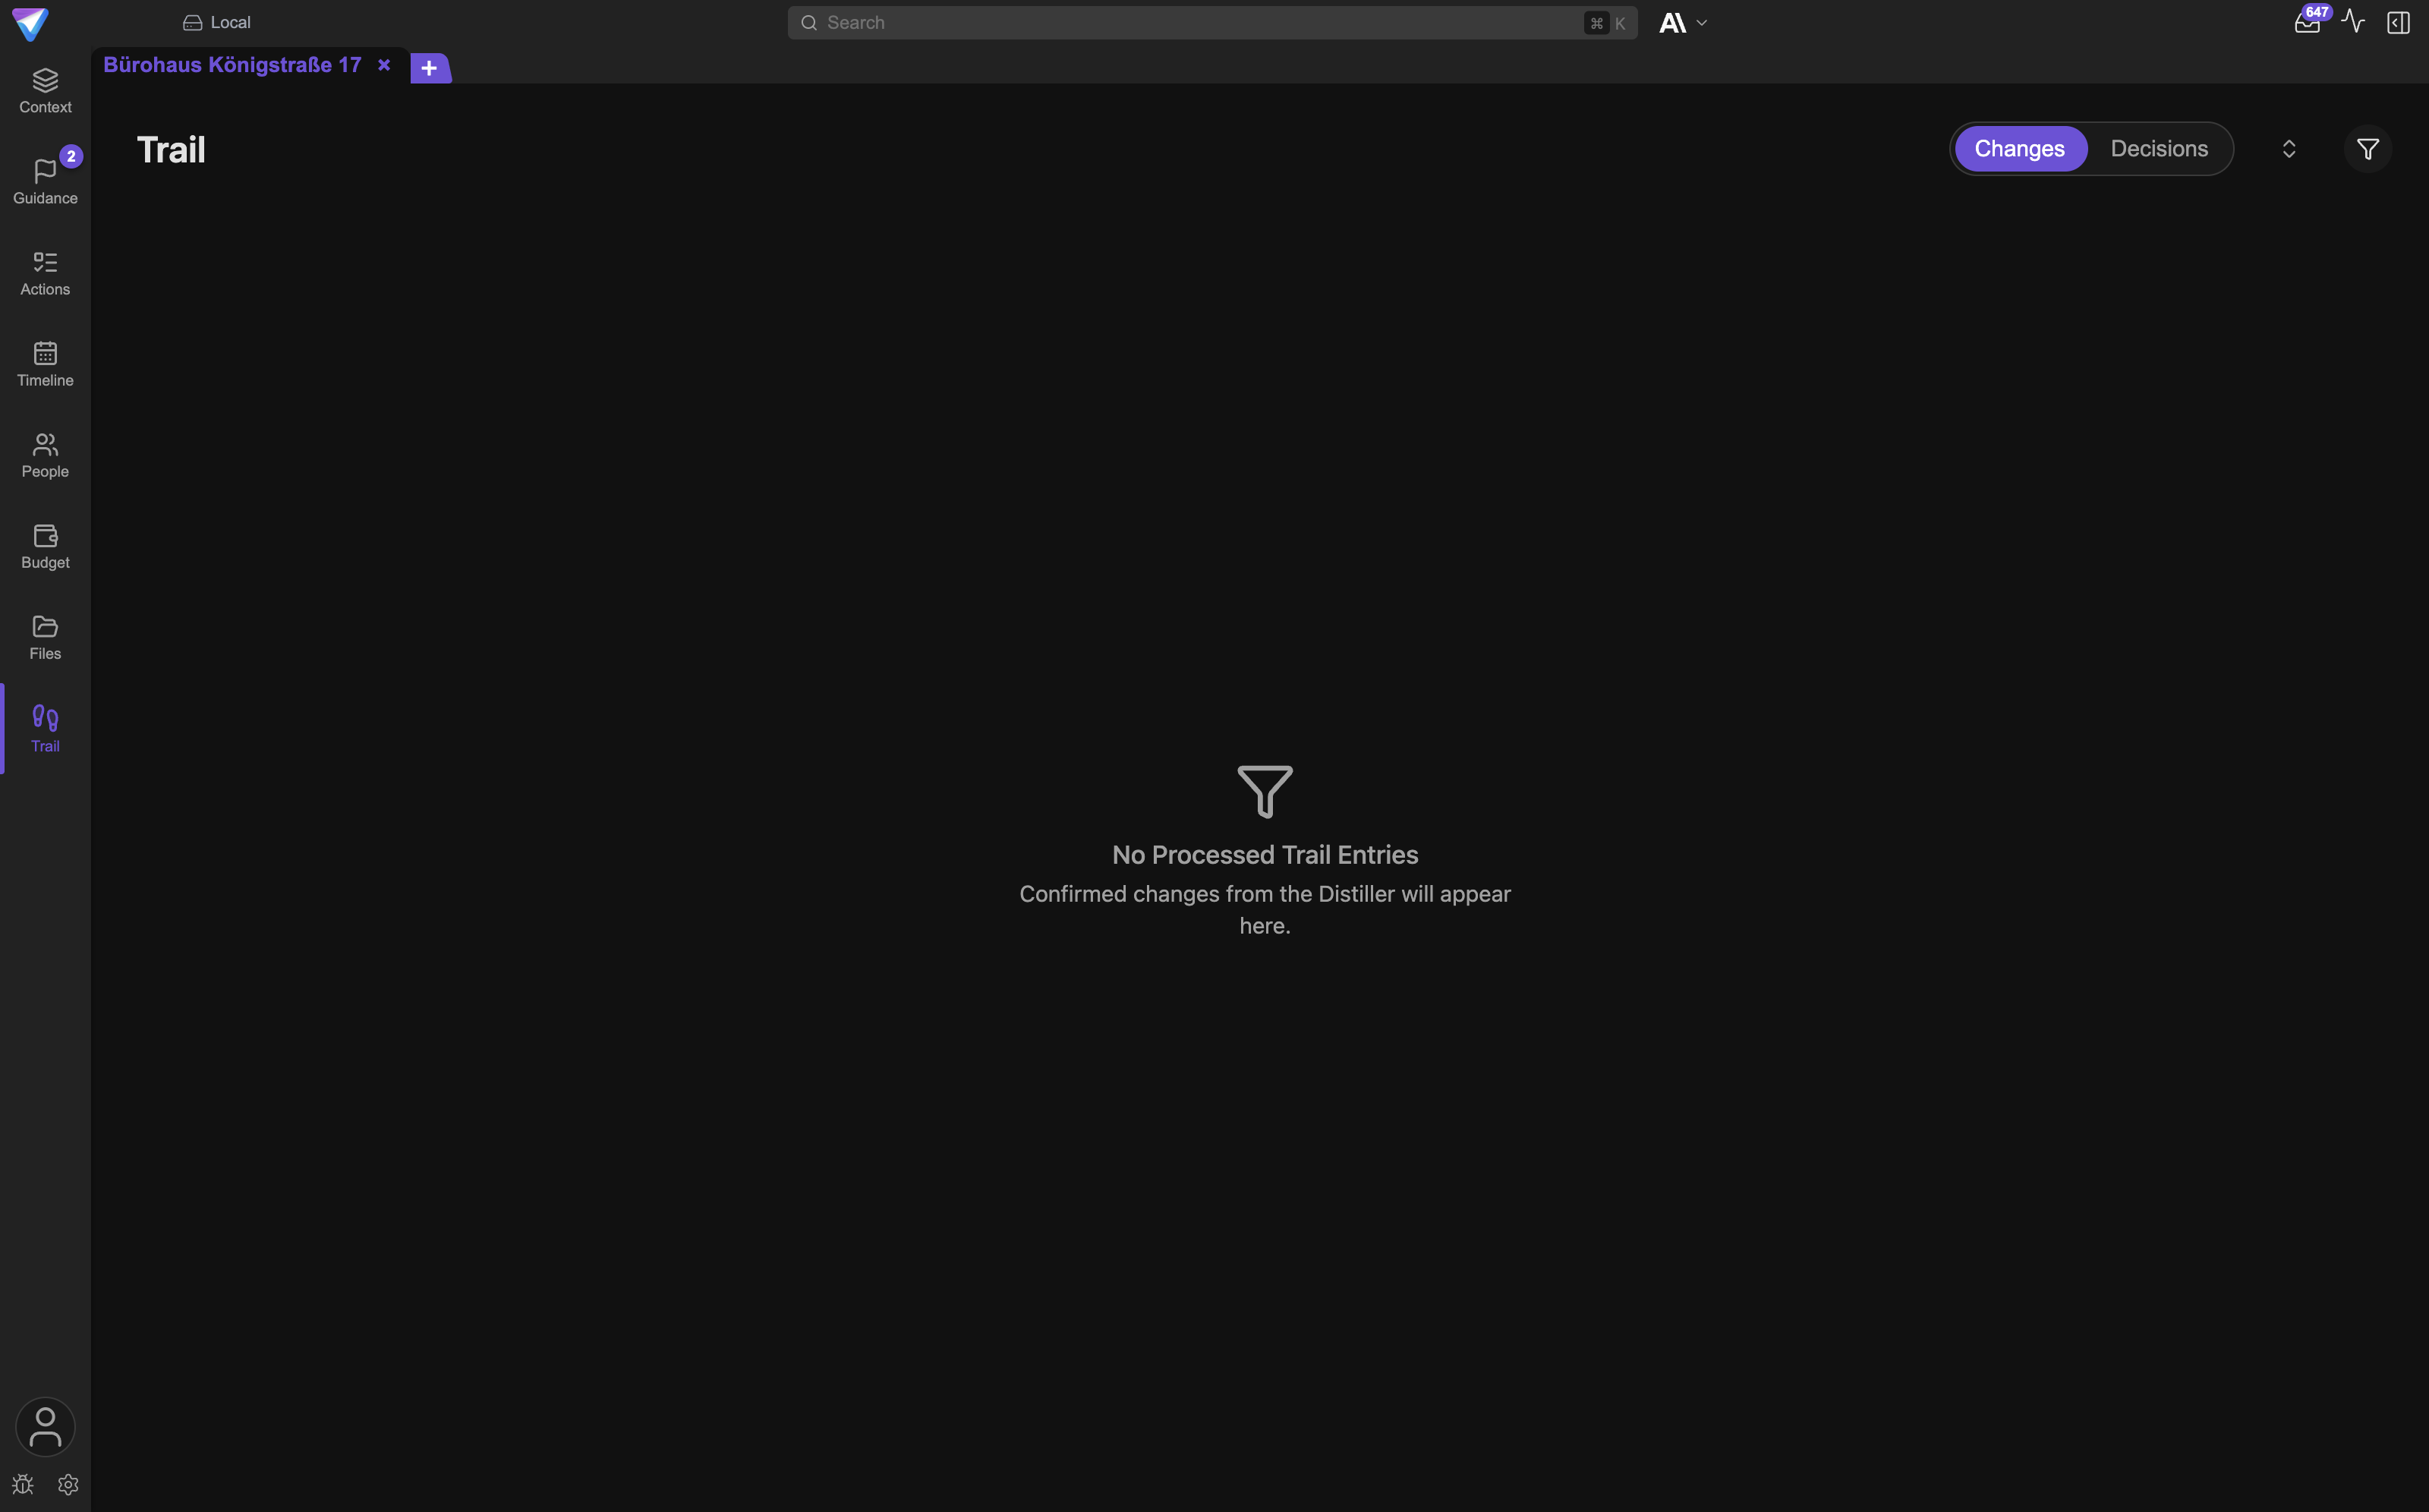
Every change carries a source chip. If it came from a chat, you can jump to the message that caused it.
Question answered: Why does the project say this, and since when?
Details in Files & Trail.
Keeping several projects open at once
Opening a project
Click the + tab at the far right of the tab row. You land on the project start screen and pick a
project from the list. It opens as an additional tab, and the ones already open stay put.
Switching between projects
Click the tab you want. The main area switches immediately. TensorPM remembers per tab which view was
last open there: if you switch from a project showing the Timeline to a project where you were last
in Actions, you land back in Actions.
Closing a project
Click the × in the tab. That closes the tab only. It deletes nothing and archives nothing.
If Restore Session on Startup is enabled under Settings -> General, TensorPM reopens the same
tabs next time you start the app.
What this means for the project agent
This is the most important point in this section: the project agent always works in the project of the active tab. It does not see all open projects at once.
That has consequences:
- Every project has its own chat history. Switching tabs switches the chat.
- A task running in the background keeps running when you switch tabs. You see it again as soon as you come back.
- The agent also knows which view you are in. If you ask about "the numbers" while in Budget, it means this project's numbers in that area.
- If an answer does not fit the project, check which tab is active first.
Archived projects can still be opened; their tab then carries a small archive icon.
Search
How to open it
The search field sits in the middle of the header bar with the placeholder Search. Click into it,
or use the shortcut Cmd + K on macOS, Ctrl + K on Windows and Linux. The shortcut is
deliberately inactive while your cursor is already in a text field, so it never interrupts typing.
What gets searched
Search is not a full-text search across file contents. It searches:
- Projects across all projects in the active workspace, by name and description
- Actions in the active project, by text and description
- Categories and folders in the active project, by name
- People in the active project, by name and organization
- Decisions in the active project, by text, rationale, and the person they are attributed to
- Files and directories in the project folder, by file name
Every hit carries a label such as project, action item, person, file, folder, category,
or decision. Archived projects are marked archived.
Using it
Type at least one character. After a short pause the result list appears. Use the arrow keys to move
through the hits, Enter to open the selected one, and Esc to close the list. Clicking a hit jumps
straight to the right place, for example into the action list or the matching folder in the Files
view.
Keyboard shortcuts
Only these shortcuts are actually wired up in the app. Where Cmd is listed, use Ctrl on Windows
and Linux.
| Shortcut | Where it applies | Effect |
|---|---|---|
Cmd + K / Ctrl + K |
anywhere, except inside a text field | jump to the search field |
| Arrow up / arrow down | in the search result list | select a hit |
Enter |
in the search result list | open the selected hit |
Esc |
in the search result list | close the result list |
Enter |
in the chat input field | send the message |
Shift + Enter |
in the chat input field | line break without sending |
Cmd + C / Ctrl + C |
in Files |
copy a file or folder |
Cmd + X / Ctrl + X |
in Files |
cut a file or folder |
Cmd + V / Ctrl + V |
in Files |
paste into the open folder |
Esc |
in Files after cutting |
cancel the cut |
| Arrow up / arrow down | in Timeline |
scroll rows up or down |
Ctrl + + |
in Timeline |
zoom in |
Ctrl + - |
in Timeline |
zoom out |
Ctrl + 0 |
in Timeline |
reset the zoom |
Ctrl + T |
in Timeline |
jump to today |
The Timeline shortcuts use the Ctrl key on macOS as well, not Cmd.
Display options
All of the following settings live under Settings -> General. The gear that opens them sits at
the bottom left next to Account.
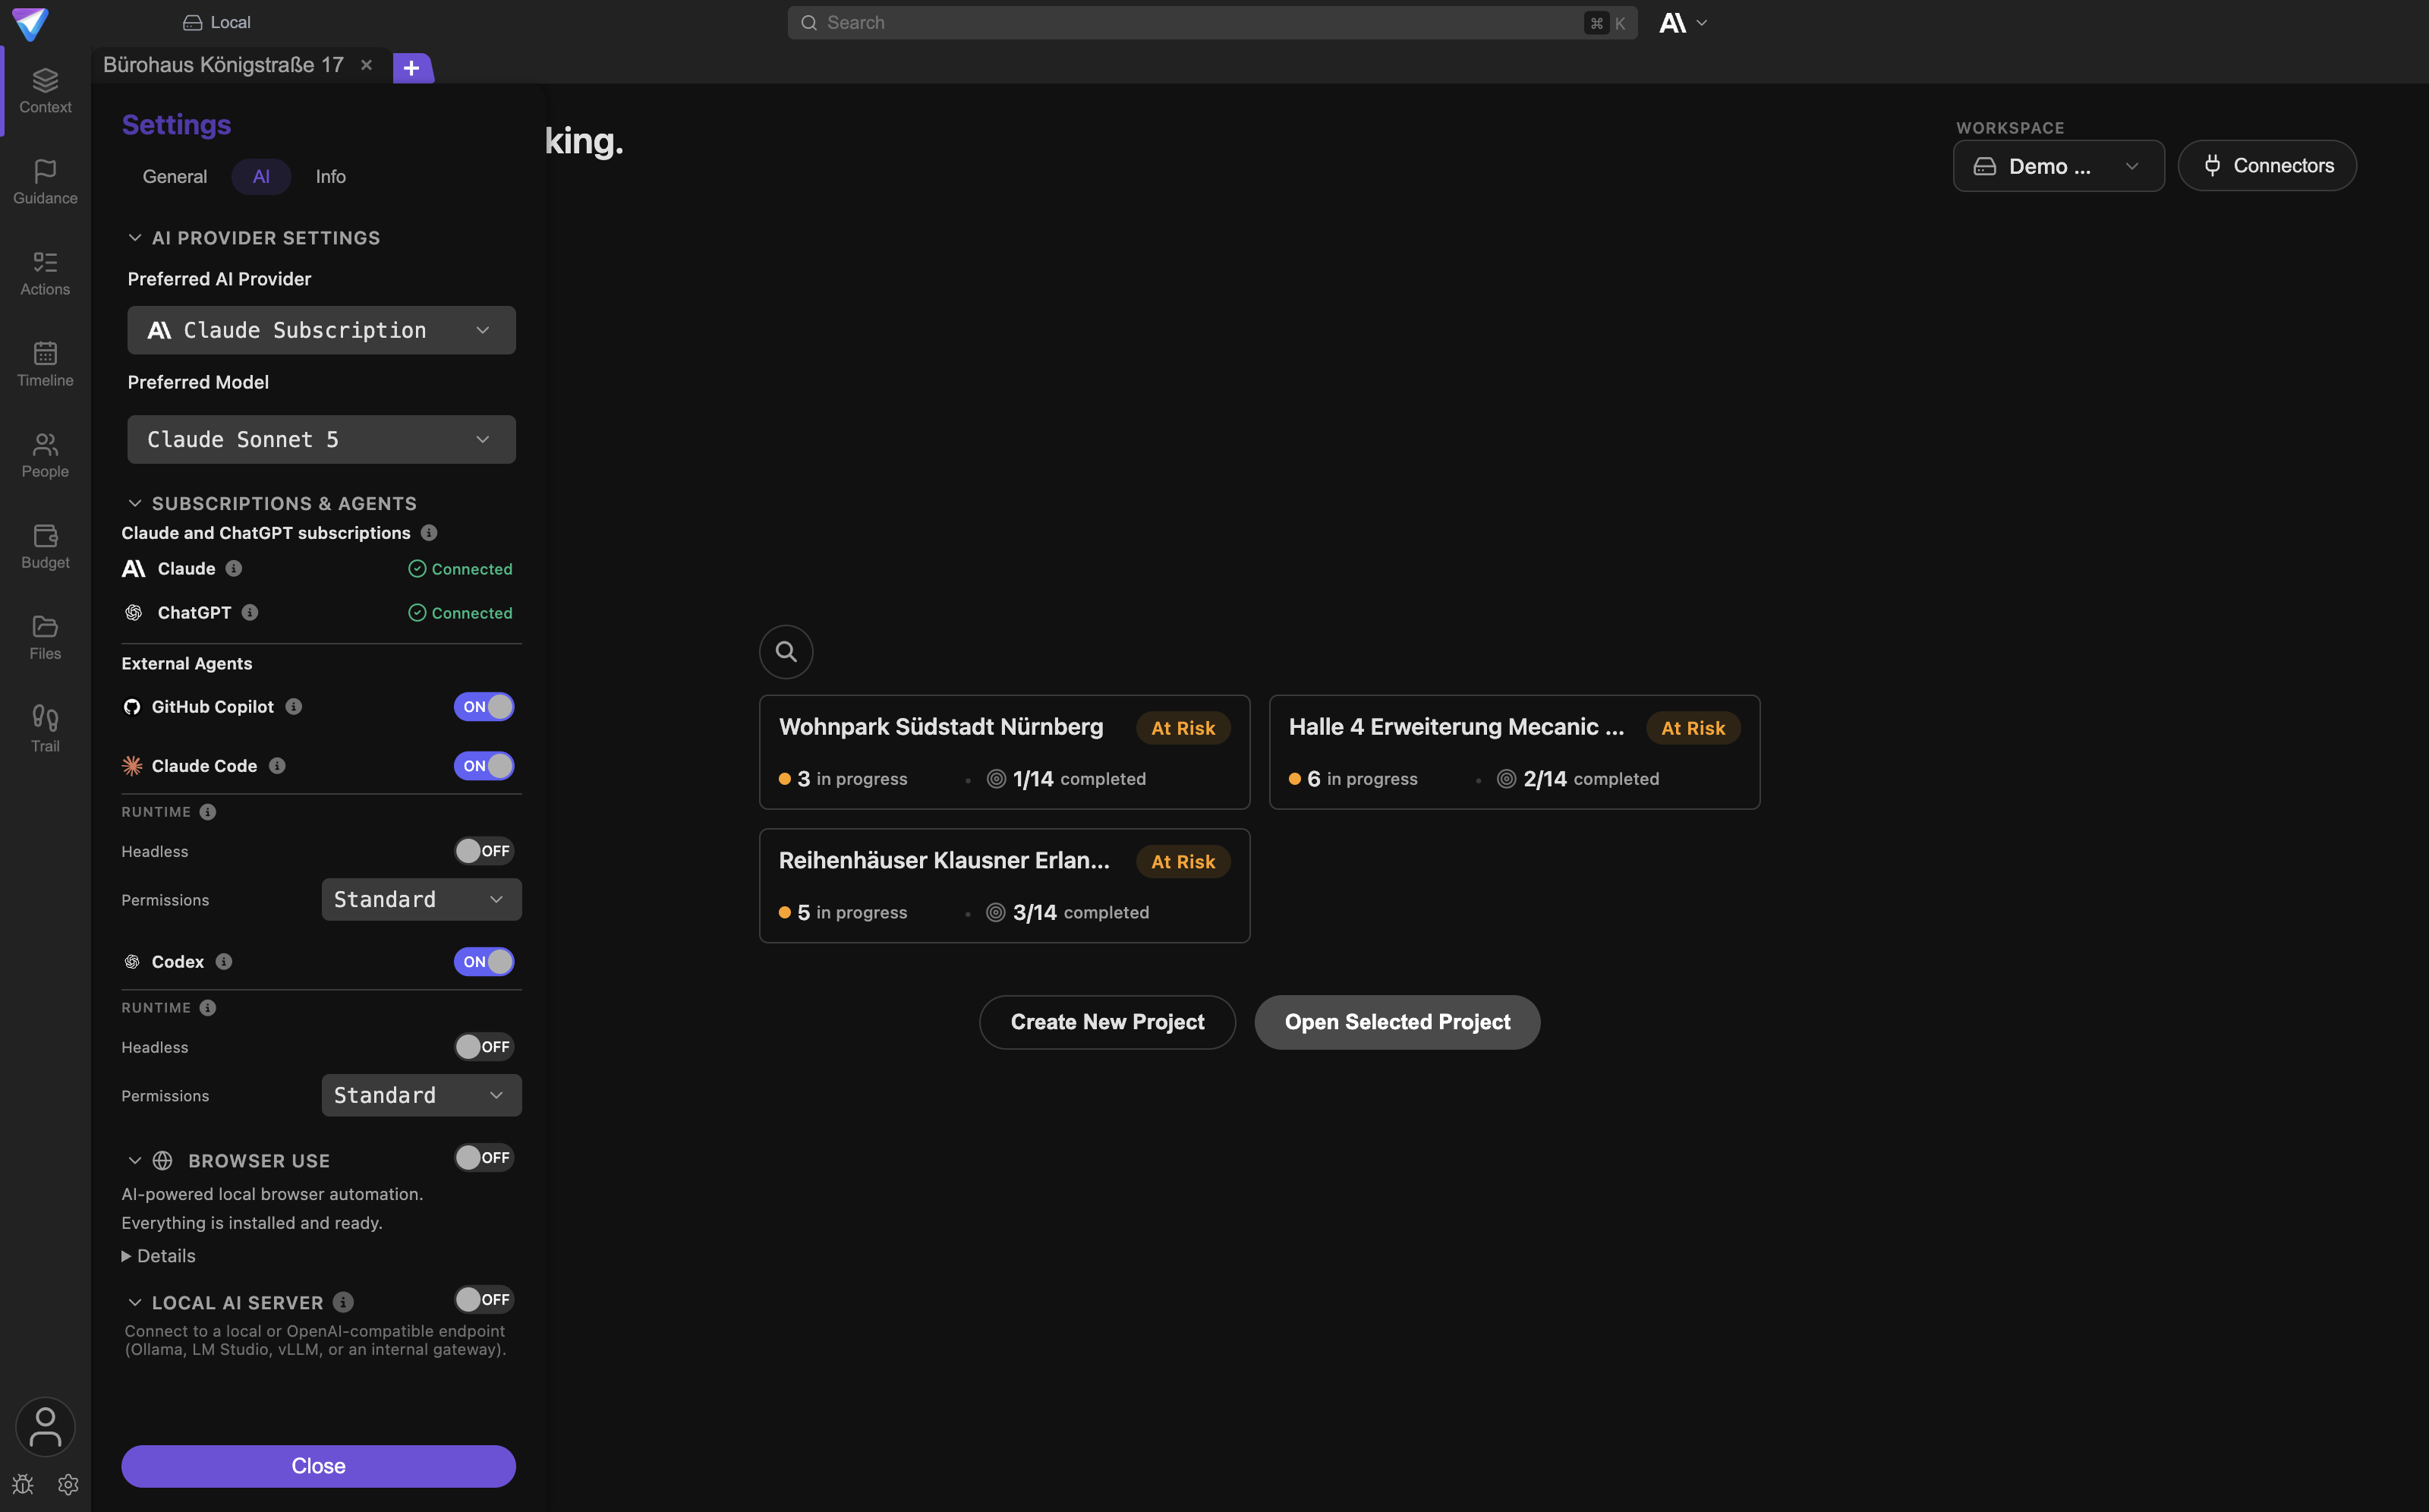
The groups are collapsible. Appearance controls the look, System the language.
Light or dark theme
The Appearance group holds the Theme selector with three values:
Use system setting: TensorPM follows your operating systemLightDark
The screenshots in this documentation were taken in the dark theme. Nothing about the content changes.
Language
The System group holds the Language selector with the values System, English, and Deutsch.
This changes the labels of the interface. It does not translate your project data.
Further appearance switches
Also in the Appearance group:
Show Row Borders: draws separator lines in tables and listsShow Animations: turns transitions on or off. Off feels calmer on older machines.Compact Sidebar: shows the left navigation as a narrow icon-only rail. Labels stay available on hover.Simplified Priority Scale: shows priorities on a 1 to 10 scale instead of 1 to 100. This is display only; internally the AI keeps using 1 to 100.
The System group also holds Restore Session on Startup. With that switch on, TensorPM reopens the
same project tabs on the next launch.
What TensorPM remembers per project
TensorPM stores many view choices per project: the tab last selected in the left navigation, sub-tabs, filters, sorting, hidden columns, and collapsed branches in the work breakdown structure. These settings are personal. If a colleague sees the same project laid out differently, the underlying project data can still be identical.
Common questions
I cannot see the Work Packages entry. Did it disappear?
No. It only appears in projects with a work breakdown structure. Enable the WBS under Settings ->
General -> Work Breakdown Structure and the tab shows up.
Why does the rail only say Work?
There is not enough room for the full name. Hover over it and the tooltip shows Work packages and project structure.
Where do I switch workspaces? I cannot find it in the header bar.
Correct, it is not there. The selector sits on the project start screen and in the account popover at
the bottom left under Workspaces.
Can I see two projects side by side? No. You can keep any number of projects open as tabs, but only one is visible at a time.
Does the project agent lose track when I switch tabs? No. Every project has its own chat history. A running task keeps working in the background.
Do I have to go through Account to reach the settings?
No. The gear right next to it opens the settings directly.
Does search look inside my PDFs? No. It searches names and descriptions, and for files the file name. For questions about document content, ask the project agent.
Why is the left navigation greyed out? No project is open, or the project wizard is running. Open a project or finish the wizard.
When something does not work
A project is missing from the list. Cause: the wrong workspace is active, or the project is archived. Fix: switch the workspace on the project start screen. Also check whether the project is listed as archived.
Search finds nothing although the entry exists. Cause: actions, people, decisions, categories, and folders are only searched inside the active project. Only projects themselves are searched across the whole workspace. Fix: open the project first, then search again.
Cmd + K does nothing.
Cause: your cursor is inside a text field, for example the chat. The shortcut is deliberately
disabled there.
Fix: click once into an empty area and press the shortcut again.
The agent's answers do not match the project. Cause: a different project tab is active. Fix: check the tab row below the header bar and switch back.
The interface is cramped and labels are missing.
Cause: Compact Sidebar is switched on.
Fix: turn it off under Settings -> General -> Appearance, or hover over the icons.
All tabs are closed after a restart.
Cause: Restore Session on Startup is off.
Fix: enable it under Settings -> General.
View toolbars and filters look different for a colleague. Cause: view settings are personal and stored per project. Fix: nothing to do. The project data is the same.
More symptoms and remedies are in Troubleshooting.
Next steps
- Understand the project data: Project Structure
- Use the steering view: Suggestions & Order
- Maintain execution: Actions & Recurring Work
- Work with the agent: AI Panel
- Understand workspaces: Workspaces
- Look up terms: Glossary