
Work Packages & WBS
In short
A work breakdown structure (WBS) splits a project into pieces you can actually manage. Every piece has a responsible person, a time window, and a completion percentage. You no longer see only how many individual tasks are open, you see how far a whole section of the project has come.
You switch this structure on per project. The project then gets its own Work Packages area, where
you build, maintain, and read the tree. Without it, the project stays a flat list of categories and
Action Items.
What a work breakdown structure is
A work breakdown structure is an outline. You keep splitting the project until each piece is small enough for one person to take responsibility for it. The lowest piece, the one you no longer split, is called a work package.
Three attributes make a work package steerable:
- Responsibility: who commits to getting this package done?
- Time window: when should it start, when should it be finished?
- Completion: how far along is it today, in percent?
Everything above that is pure ordering. The levels above the work packages carry no work of their own, they only summarize what sits below them.
An everyday example
An office building is being refurbished. As a flat list you would have 200 Action Items side by side. As a work breakdown structure the same project looks like this:
1     Shell
1.1   Interior demolition       Work package, responsible: Meier, week 12 to 15
1.2   Concrete works            Work package, responsible: Meier, week 14 to 20
2     Fit-out
2.1   Electrical
2.1.1 Risers                    Work package, responsible: Ritler, week 18 to 24
2.1.2 Final installation        Work package, responsible: Ritler, week 30 to 34
2.2   Plumbing                  Work package, responsible: Schwarz, week 20 to 28
1, 2, and 2.1 are pure outline levels. The rows with names, dates, and an owner are the work
packages. The individual Action Items ("install cable trays", "write handover protocol") hang below
the work packages.
The benefit shows up in the question "how far along is the fit-out?". Without a structure you add up 80 Action Items. With a structure you read one row.
The three roles in the tree
Every node in the tree has exactly one role. The app calls them:
Structure node: a pure outline level, such as a phase, a building, a system, or a trade. It holds no Action Items and no dates of its own. Its values come from what sits below it.Work package: the lowest level, with scope of work, responsibility, dates, budget, progress, and completion criteria. Action Items only live here.Free: a category that stays available for loose grouping but is kept out of the structure. It appears in no rollup.
A work package is always a leaf, so it can never have child nodes. As soon as a node needs children,
it stays a Structure node and you create work packages below it. The app does not even offer the
Work package role while a node has children.
When a WBS pays off and when it does not
A work breakdown structure costs maintenance effort. It is not always worth it.
A simple task list is enough when:
- the project stays below roughly 50 Action Items
- one person keeps the overview alone
- nobody outside asks for a completion percentage per section
- there is no formal acceptance
- budget and effort are not tracked per section
A work breakdown structure pays off when:
- several companies or trades work in parallel and every deliverable must have an owner
- you report regularly on how far individual sections have come
- deliverables are formally accepted and the acceptance date starts a deadline
- you want to compare plan against actual at section level
- the flat category list has become unreadable and nobody knows where a new task belongs
Important: You can start flat and switch later. TensorPM builds the proposed tree from your existing categories, so you never start over.
Switch the work breakdown structure on for a project
The setting applies per project, not to the whole app. One project can use a structure while another does not.
Step by step
- Open the project that should use the structure.
- Open
Settingsusing the gear icon at the bottom left. - Go to the
Generaltab. - Expand the
Work Breakdown Structuregroup. - Turn on
Enable work breakdown structure. TheSet up the work breakdown structurewindow opens. - Review the proposed table. It lists every existing category with its future role and its code.
TensorPM proposes: categories that have sub-categories become
Structure node, categories without sub-categories becomeWork package. - Change individual roles where the proposal does not fit. A node that should stay out of the
structure gets the role
Free. - Adjust codes if you need to. Otherwise the code is derived from the position in the tree and updates immediately when you change a role.
- Resolve the warning about Action Items on structure nodes. Affected rows carry a note such as
3 tasks on this node. Those items will not count toward progress and effort. - Choose
Apply and activate.
Only Apply and activate switches the project over. Until then nothing changes, and Cancel
discards the proposal completely.
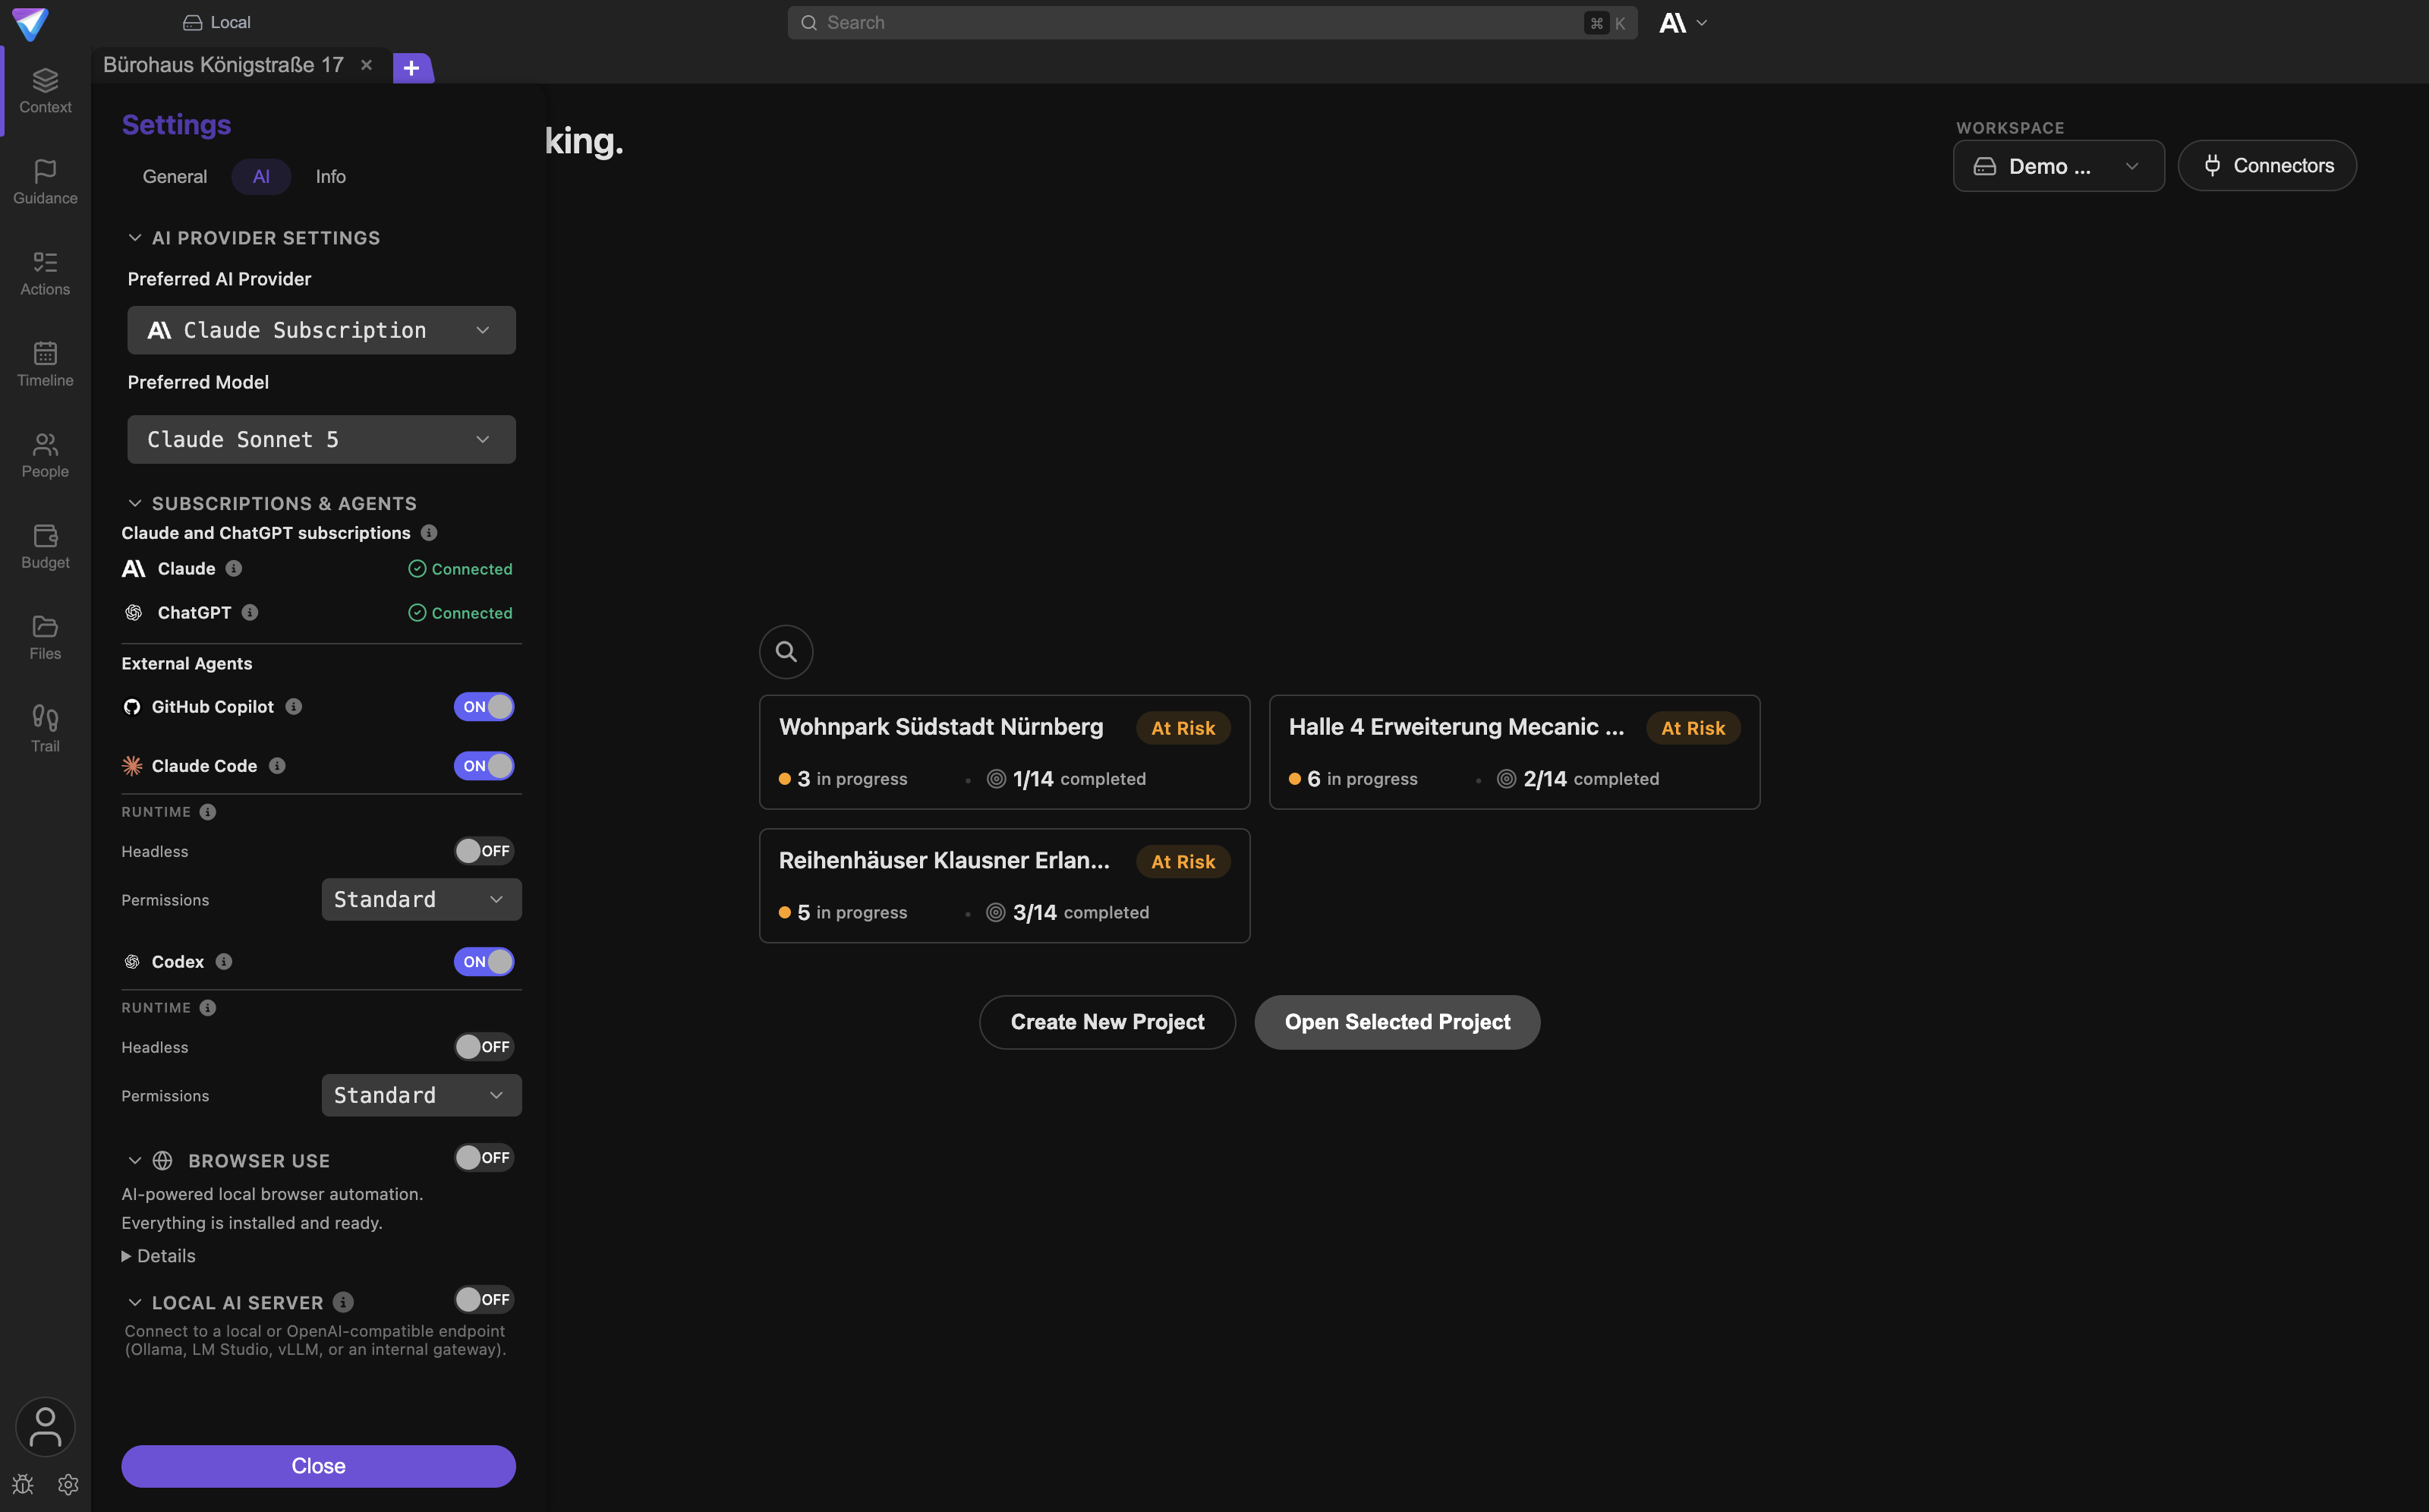
The warning about Action Items on structure nodes is not an error, it is advance notice. Items that
hang directly on an outline level keep working. They simply stay out of the structure's numbers.
After activation, move them into a work package or set the affected node to Free.
What changes in the interface
- An extra tab appears in the left bar between
PulseandActions. It is narrow and shows onlyWork. Its tooltip readsWork packages and project structure, and the view itself is calledWork Packages. Without an active structure the tab does not exist. - In the Action Items view you now have to pick a work package when you create an item. The input
field prompts you with
Select work package. - Categories in the Action list can no longer be reordered there. The app points out that structure is maintained in the Work Packages area.
- Every work-package row in the Action list gets an
Open work packagebutton that jumps straight to the detail sheet. - In
Timeline, structure nodes, work packages, and Action Items appear in the fixed order of the tree. The identifier column shows WBS codes instead of running numbers.
Switching it off again
Just turn the switch in Settings -> General -> Work Breakdown Structure back off. Switching off
is loss-free: roles, codes, scope descriptions, dates, and completion values stay stored. Only the
view and the rules disappear. Switch it back on later and your structure is unchanged.
The Work Packages view
Open the area from the tab in the left bar. At the top you find the title Work Packages, the pencil
icon for edit mode, and in the middle the switch between the two views Table and Chart.
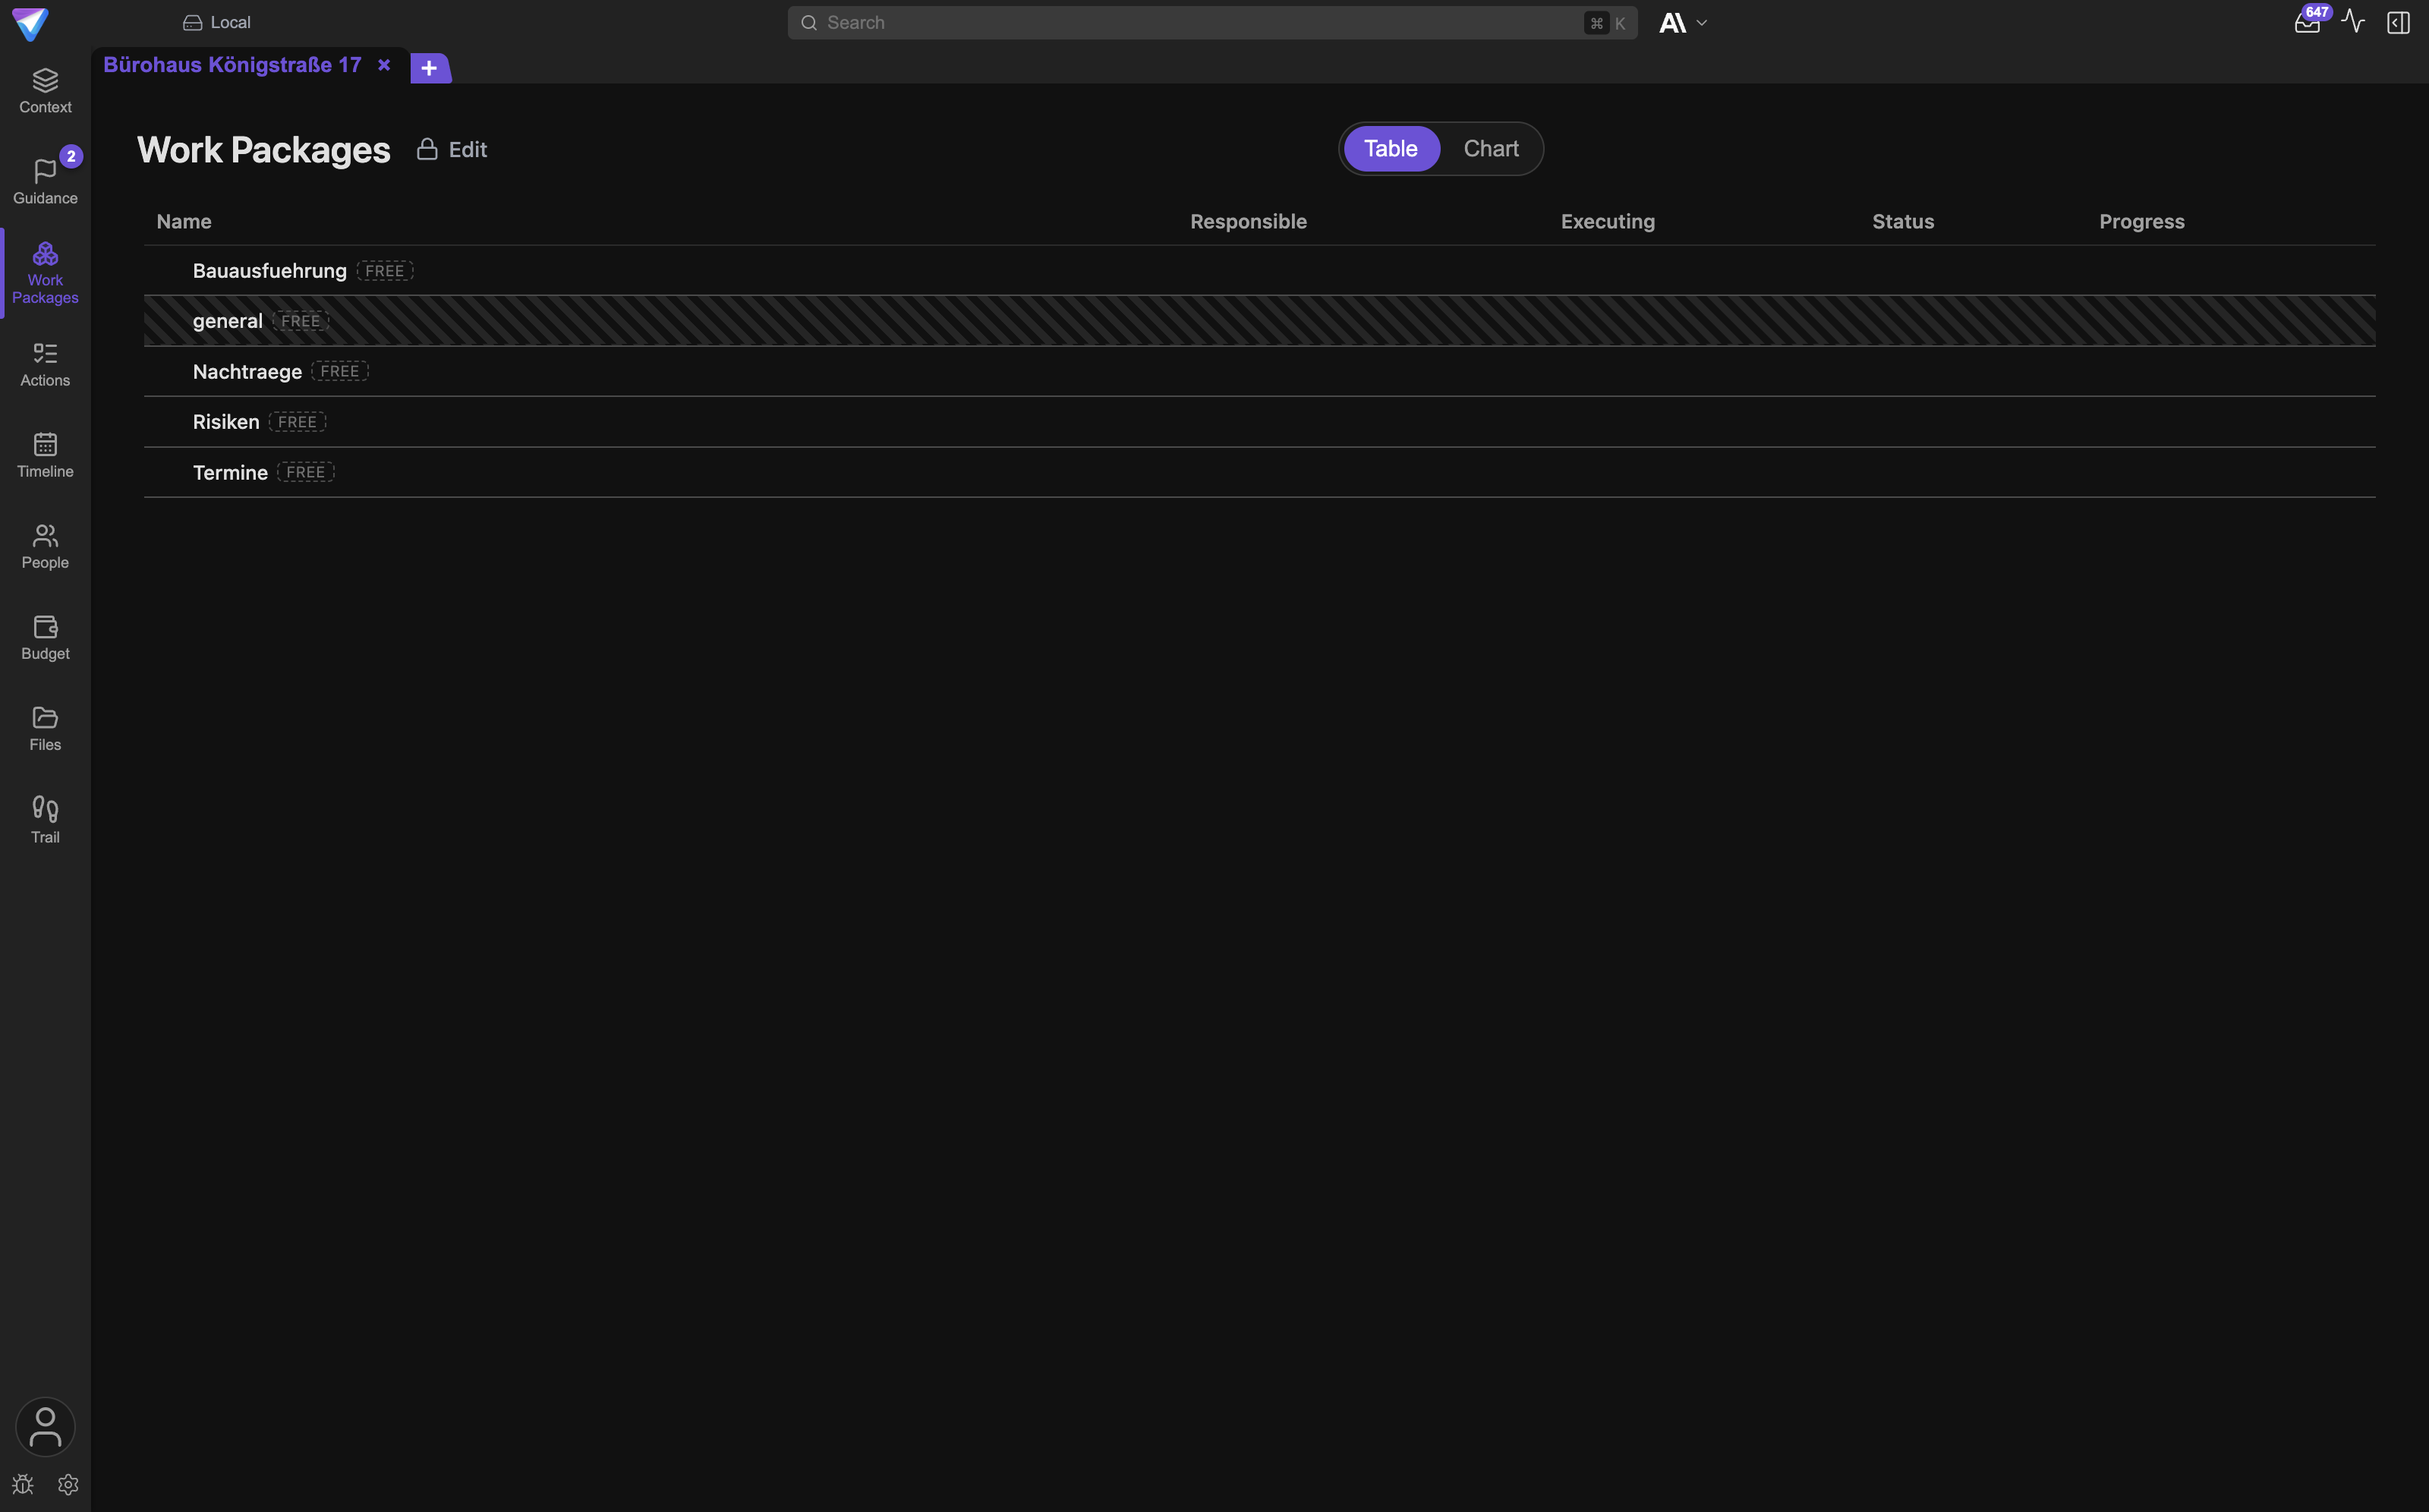
Table
The table is the steering view. It has five columns:
| Column | Content |
|---|---|
Name |
indented by level, preceded by the WBS code and followed by a short role tag: WP for a work package, Structure for a structure node, Free for free categories |
Responsible |
the internally responsible person |
Executing |
the executing company or person |
Status |
for work packages the status you set, for structure nodes the derived status |
Progress |
a bar with a percentage |
The status values of a work package are Planned, Released, In progress, Done, and
Accepted. Structure nodes have no status of their own. They show a derived value, which can be
Not started, In progress, Done, or Accepted.
Clicking a work-package row opens the detail sheet. Clicking the arrow in front of a name collapses or expands a branch. Double-clicking a name renames the node, even outside edit mode.
Chart
Chart shows the same tree as a graphical structure plan with boxes and connecting lines. This is
the view for meetings and for the moment you want to judge the outline as a whole. Here too you can
collapse and expand branches, select nodes, and move them while editing. A legend explains the
colors.
Edit mode
The pencil icon next to the title switches to Edit. Only then do you change the structure itself.
Available actions:
NodeandWork packagein the toolbar create a new element at the top level.- The plus buttons inside a row create a sub-node or a work package directly below that node.
- The handle on the left edge moves a row by dragging. Drop onto the middle of a row to nest the branch below it. Drop onto the top or bottom edge to change the order only.
- The dropdown in the row changes the role.
- Clicking the code makes it editable.
Renumber codesreassigns every code from the current tree position.- The trash icon deletes a node.
Done leaves edit mode.
Important:
Renumber codesalso overwrites codes you typed by hand. If codes appear in contracts, invoices, or bills of quantities outside TensorPM, check that first. The app asks for confirmation before it runs.
Duplicate codes are flagged with Code conflict. The app does not block you, but it makes the
problem visible.
Build a useful hierarchy
Use exactly one organizing logic per level. For example:
- Project phase
- Building or system
- Trade or discipline
- Work package
Do not mix locations, disciplines, and lifecycle stages as siblings. When "Shell", "North hall", and "Electrical" sit next to each other, nobody knows where a new deliverable belongs, and the rollup loses its meaning.
Two rules of thumb:
- A work package should be small enough that one person can commit to it, and large enough that maintaining dates and budget for it is worth the effort.
- If you cannot name who is responsible for a node, it is not a work package, it is an outline level.
The work package detail sheet
Clicking a work-package row opens the detail view. There you maintain:
- the status, with its own button for acceptance
Responsible (internal)Executing company- the
Scope of work, meaning what is included and what is not - the
Completion criteriaas a list of individual points Planned startandPlanned end- the
Planned budgetin the project currency - the progress method
- the list of
Tasksthat belong to this package
Write the scope so another person can decide on their own whether requested work belongs in the package or is a variation. Completion criteria should be observable. "System runs" is not a criterion. "Signed commissioning protocol on file" is one.
Work package and Action Item: how they relate
A work package is the deliverable somebody stands behind. An Action Item is a single step inside it. A work package holds any number of Action Items, and an Action Item belongs to exactly one work package.
Example
Work package 2.1.2 Final installation, electrical, responsible Ritler, planned end 22 August,
planned budget EUR 48,000. Below it sit the Action Items:
- install sockets and switches
- label the distribution board
- write the measurement protocol
- clear the defects list
With two of the four items completed, the work package sits at 50 percent by calculation. The work package itself stays as it is even when ten more Action Items appear during execution. The commitment to the client does not change because of them.
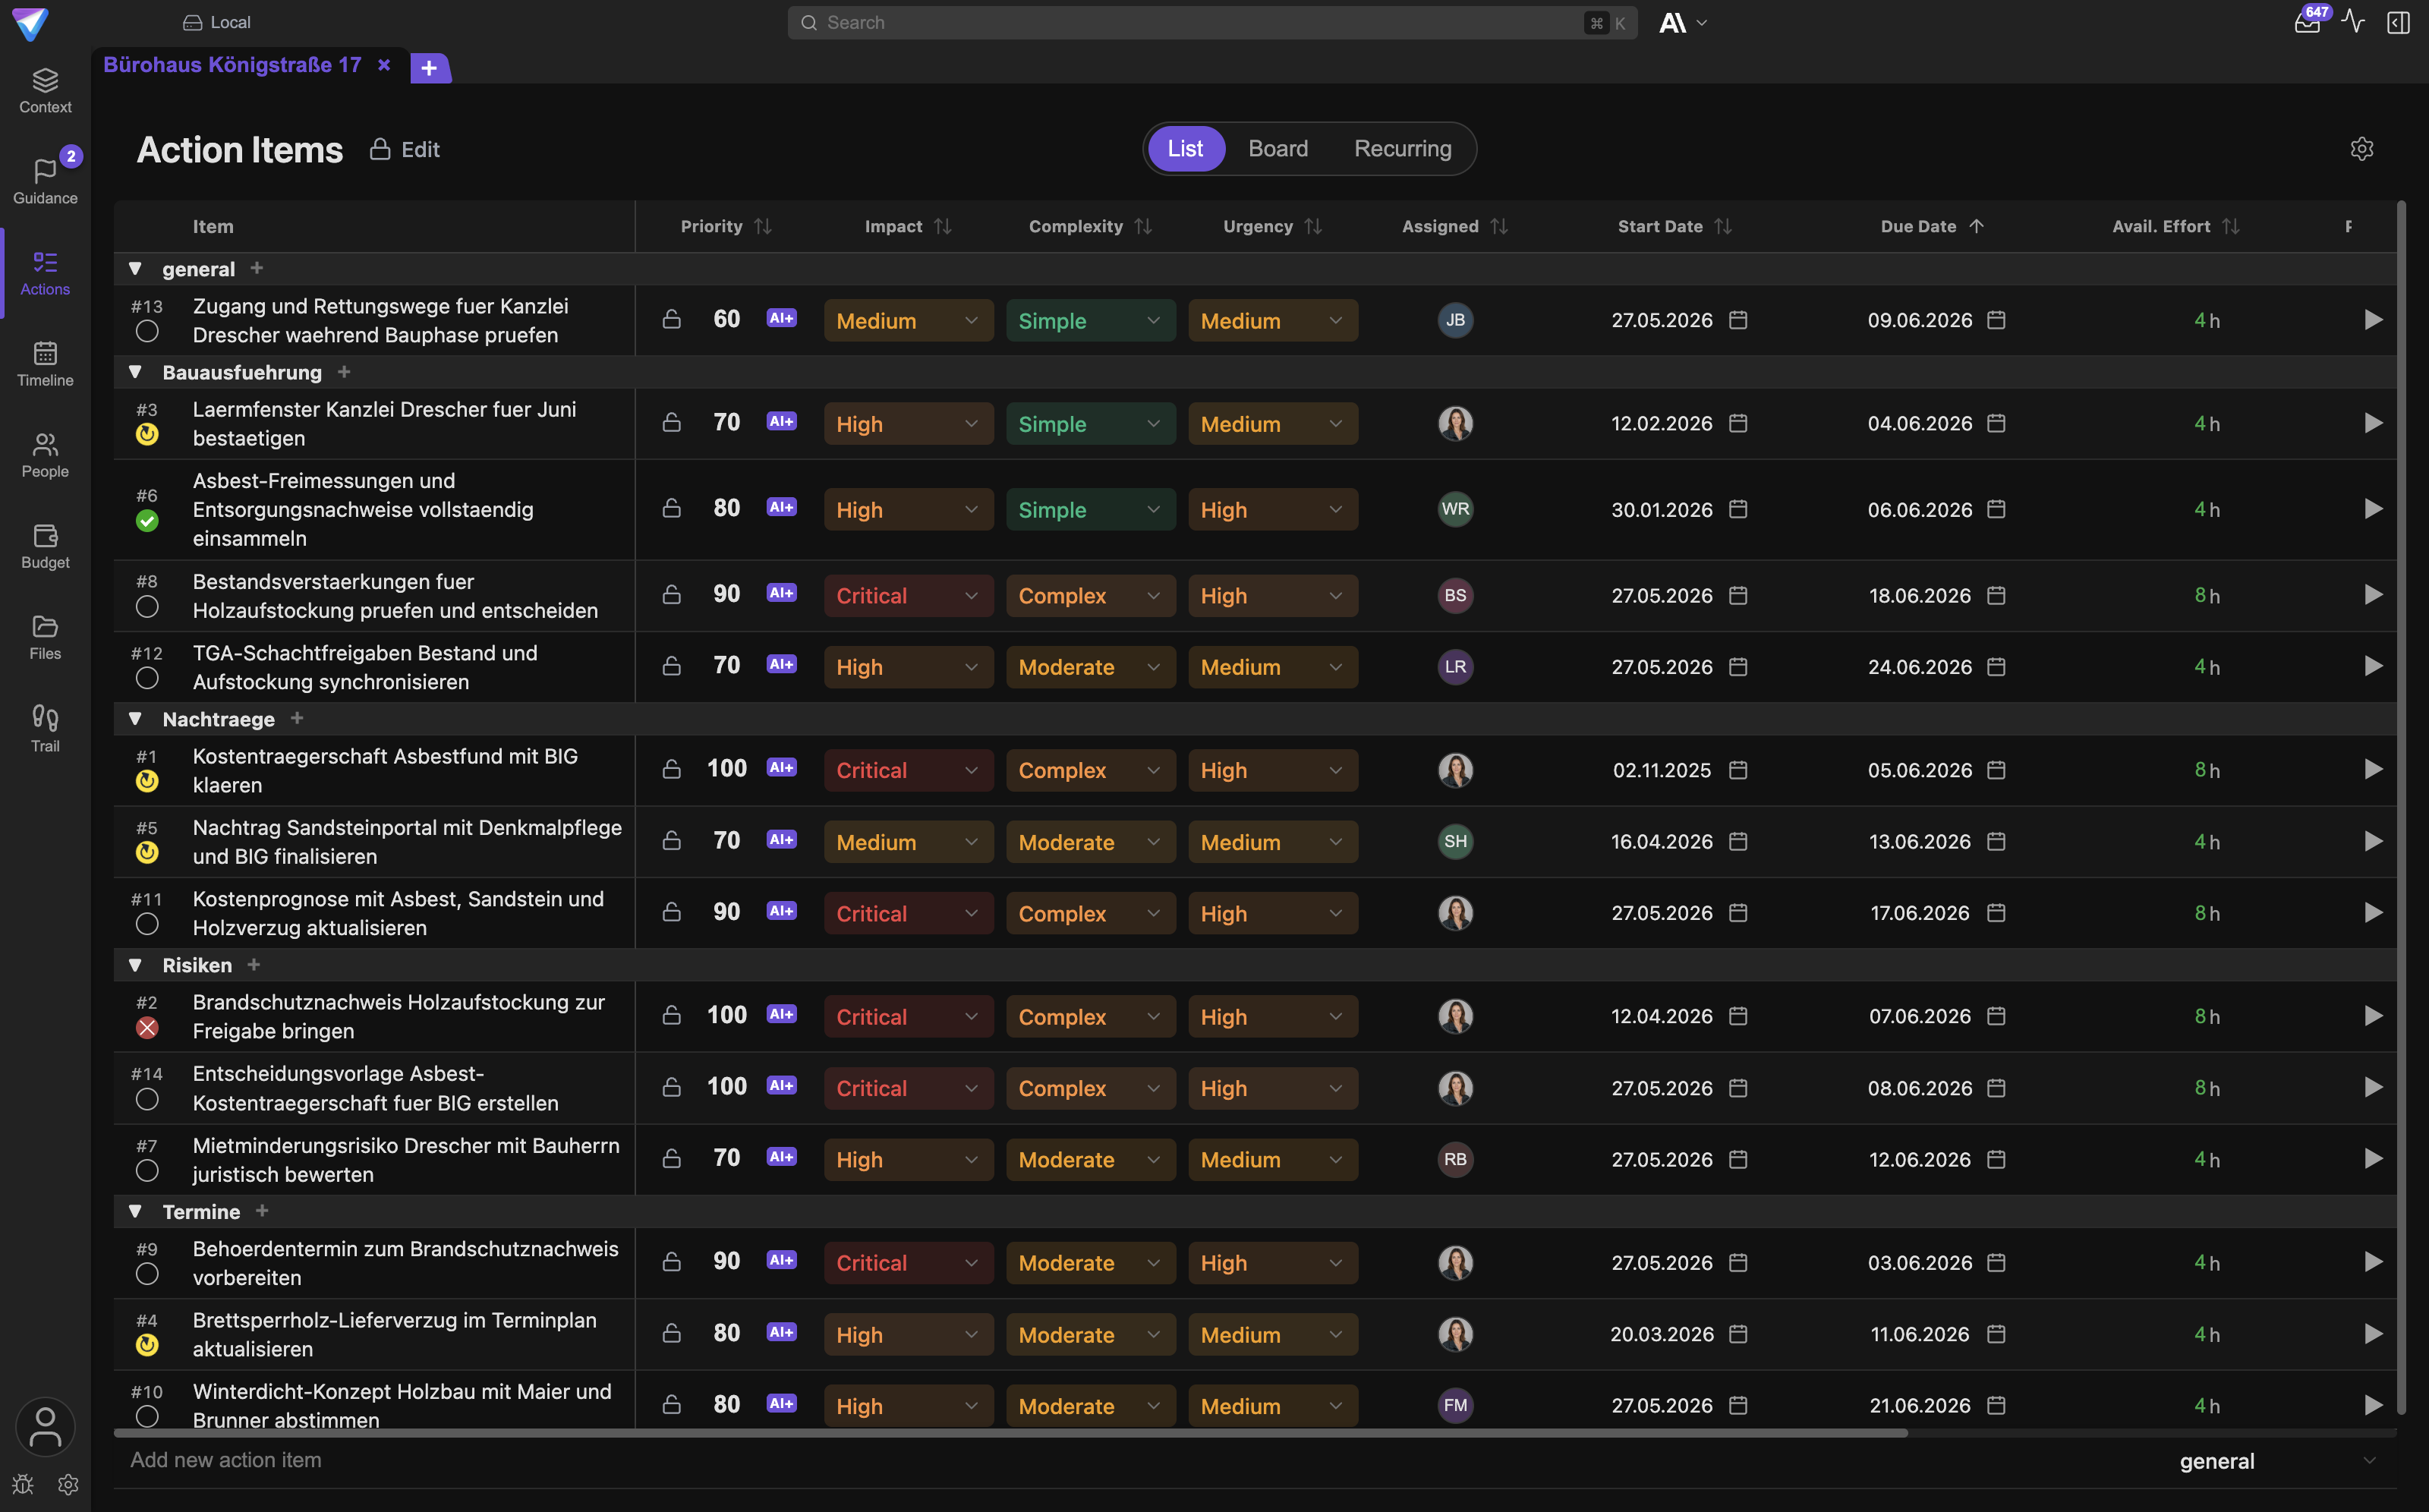
In practice this means:
- Always assign new work to a work package. Items hanging on an outline level appear in no rollup.
- When the deliverable itself changes, change the scope of the package, not just the Action Items.
- Ticking off an Action Item does not mean the deliverable is accepted. Acceptance happens on the work package.
Progress and rollup
"Rollup" means TensorPM adds the values of the lower levels upward. You maintain only the work packages, and the outline levels follow from them.
The three progress methods
Every work package uses exactly one of the three methods:
| Method | How the percentage is produced |
|---|---|
Calculated |
share of completed Action Items among all items in the package |
Manual estimate |
you enter the percentage yourself. The calculated value stays visible next to it so you can compare both |
0/50/100 |
the value follows the status: 0 percent at Planned and Released, 50 percent at In progress, 100 percent at Done and Accepted |
Calculated is right when the Action Items really represent the deliverable. Manual estimate fits
deliverables whose progress a person judges better than a task count, design work for instance.
0/50/100 is the coarse but argument-free option for many small packages.
If you choose Manual estimate without entering a value, the app falls back to the calculated one.
How progress is rolled upward
A structure node takes a weighted average of its direct children. TensorPM picks the weight per sibling group, in this order:
- Planned budget, when every child in the group has a planned budget above zero
- Planned effort in hours, when every child has planned effort
- Number of Action Items, when every child has items
- Equal weights, when none of those is available across the whole group
The weight is deliberately chosen per group, not per node. That way euros, hours, and piece counts never share a denominator. Otherwise a EUR 500,000 package would outvote a 40-hour sibling many times over.
Two rules that often prompt questions:
- A work package with no measurable progress shows no value instead of falsely claiming 0 percent. If nothing in the whole branch is measurable, the structure node stays empty too.
- A work package with no resolvable progress still occupies its share of the parent's weight. It does not vanish from the calculation, it counts as not yet delivered.
Besides progress, TensorPM rolls up planned budget, actual cost, planned effort, actual effort, the
actual time span, and the status. When the actual end of a work package falls after its
Planned end, the app marks the branch as at risk on schedule.
Status and acceptance
The normal sequence is Planned -> Released -> In progress -> Done -> Accepted.
The derived status of a structure node follows these rules:
- Every work package below is
Accepted: the node showsAccepted. - All of them are
DoneorAccepted: the node showsDone. - At least one is
In progress,Done, orAccepted: the node showsIn progress. - Otherwise the node shows
Not started.
Acceptance is deliberately a separate act. You confirm it in a dialog and enter the acceptance date there. Afterwards the work package carries a note that warranty periods run from that date. An acceptance can be revoked.
Important: Confirm acceptance only after a real review. The date is not a formality, it anchors deadlines.
Work packages in the Timeline
The Timeline shows the same hierarchy: structure nodes, work packages below them, Action Items
below those. The order is the structure's order and cannot be re-sorted there. The identifier column
shows the WBS codes. In this mode you do not create new Action Items in the Timeline, you create
them in the Action Items view or in the work package.
Using the project agent
The project agent reads the structure, assigns Action Items, updates work-package fields, and edits sections of the scope. It respects the same boundaries as the interface:
- structure nodes receive no Action Items
- work packages receive no child nodes
- accepted work packages are not silently retyped or reopened
- every change stays reviewable and traceable in
Trail
Useful requests are, for example: "show all work packages without measurable completion criteria" or "propose a phase-based outline without changing accepted packages".
Recommended operating routine
- Review structure and ownership at the start of each planning cycle.
- Update scope and completion criteria before you add new Action Items.
- Assign every executable piece of work to a work package.
- Compare calculated progress with the responsible person's own assessment.
- Resolve cost, effort, and schedule deviations at the lowest useful level.
- Record durable scope and acceptance decisions in
Trail. - Accept a work package only after its criteria have been reviewed.
Frequently asked questions
Do I have to switch every project to the structure? No. The setting applies per project. A refurbishment project can use a structure while a small side project stays on the flat list.
Will I lose Action Items when I switch? No. Items stay where they are. Items attached directly to a structure node keep working, they just do not count toward the structure's progress and effort.
Can I go back later? Yes. Switching off keeps all fields. When you switch back on, your structure is unchanged.
Why does a node show no percentage?
Because nothing measurable sits below it. A work package in Calculated mode without Action Items
produces no value, and TensorPM deliberately refuses to claim 0 percent.
Why can I not turn a category into a work package?
Because it has sub-categories. A work package is always the lowest element. Move or delete the
children, or leave the node as a Structure node.
How many levels make sense? Three or four are enough for most projects. Every extra level adds maintenance without improving steering.
Where do I enter actual cost?
Not on the work package itself. Actual cost comes from expenses and material in the Budget area
and is rolled up from there.
When something does not work
The tab in the left bar is missing.
The structure is not active for this project. The tab only appears with an active structure. Open
Settings -> General -> Work Breakdown Structure and switch it on.
The view says this project does not use a work breakdown structure.
That is the empty state. Use the Open settings button inside it.
The view is empty and reports that there are no work packages yet.
The structure is active but the tree is empty. Choose Start editing and create the first node.
I cannot create a new Action Item, the field demands a work package.
That is intended. Pick the right package in the Select work package field. If none exists yet,
create one first in the Work Packages area.
A code appears twice.
The app flags this with Code conflict. Edit one of the two codes by hand, or use Renumber codes
if you accept the automatic scheme.
After renumbering, my external references no longer match. Renumbering cannot be undone. Re-enter the affected codes by hand. In future, read the warning in the confirmation dialog before you agree.
I cannot drag a node into another one.
The target is probably a work package. A work package cannot have children. Change the target's role
to Structure node first.
A progress value looks too high or too low.
Check the package's progress method. Manual estimate shows a value somebody set by hand, and
0/50/100 only follows the status. The calculated comparison value sits next to it.
A structure node shows a status I never set. Structure nodes have no status of their own. The value shown is derived from the work packages below them.
Next steps
- Maintain executable work: Actions & recurring work
- Understand the schedule and the views: Navigation & Views
- Prioritize the next intervention: Suggestions & Order
- Record scope and acceptance decisions: Files, signals & Trail
- Look up terms: Glossary